
Appearance
Build a multi-channel support desk
One assistant, every inbox. WhatsApp, Instagram, Telegram, and your website widget all answered by the same helper — with a human ready to jump in whenever it matters.
- What you'll have — A single AI support assistant that answers customers on WhatsApp, Instagram, Telegram, and your website widget, grounded in your own FAQ so the answers are actually right. When a conversation needs a person, your team takes over in one click (or automatically), and the assistant steps back in when they're done.
- Who it's for — Any business fielding the same questions across several channels — shops, service businesses, SaaS, agencies — that wants one tidy inbox and one voice instead of four.
- Time & plan — About 30-45 minutes (Telegram and the website widget are near-instant; WhatsApp and Instagram take longer because you set those up on Meta's side). Works on any Sales plan (Standard or above) — a real support desk should be on a paid plan, not the 3-day trial (more on that below). No multipro, no add-on: the whole trick is running one assistant, so higher-tier "multiple assistants" limits never apply.
Ingredients
The first two rows are the whole desk. Add channels below the line as you go.
| Switch on | Where | Why |
|---|---|---|
| One assistant | Your assistant | The single helper that runs on every channel — the key to this whole design |
| A FAQ knowledge base — connected to your assistant | Knowledge base → Create new → FAQ, then connect it to your Support assistant | Grounds every answer in your real answers, on every channel at once. Only a knowledge base that's connected to the assistant is searched at answer time |
| Handoff Control | Assistant configuration → Handoff Control | Lets a human take over — pick implicit or stop-word, plus Auto Return |
| — | — | — |
| Telegram | Channels → Telegram | Fastest channel to connect (a bot token from BotFather) |
| Website Widget | Channels → Website Widget | A copy-paste snippet for your site |
| Channels → WhatsApp | Reach customers on WhatsApp (Meta/WhatsApp setup) | |
| Channels → Instagram | Answer DMs (Meta authorization) | |
| Operators | Team → Operators | Add the humans who'll handle handoffs |
Steps
1. Pick a plan and open your one assistant
Sign in at app.mychatbot.app. If you're new, pick any Sales plan (Standard or above). Then open — or create — the single assistant that will answer everywhere. Give it a clear name like "Support."
This is the whole design
You connect one assistant to all your channels. That's not a shortcut — it's the point. On Standard and Pro, only one assistant stays active at a time, so if you tried to run a separate bot per channel, a background job would quietly switch the extras off. Running one assistant across every channel sidesteps that limit completely, and gives your customers a single, consistent voice.
In the app
Your assistants → app.mychatbot.app/agents
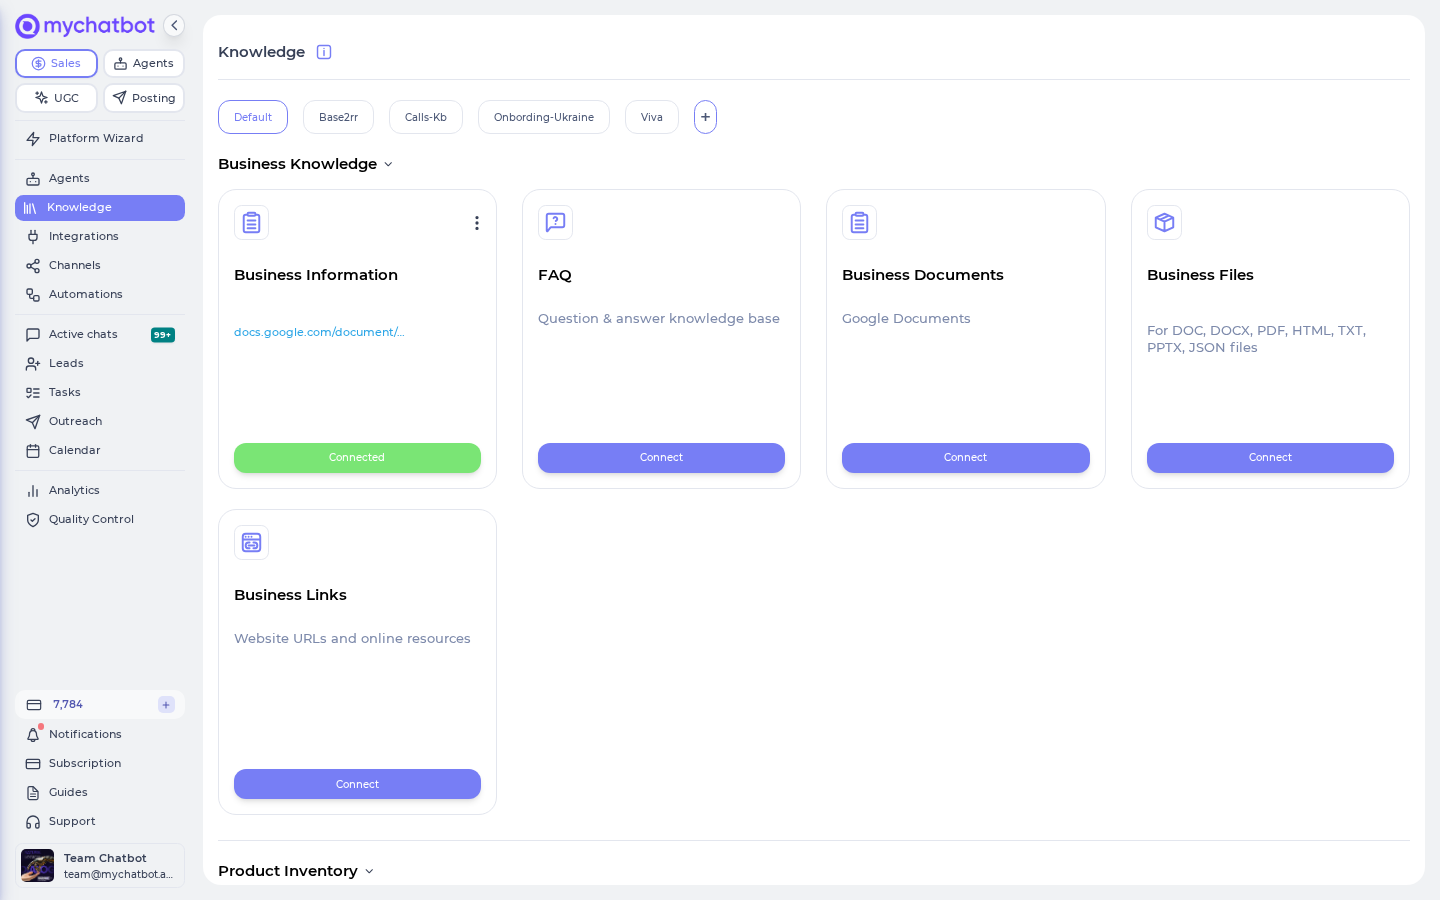
2. Ground it in a FAQ knowledge base
An assistant with no source material makes things up. A FAQ knowledge base fixes that — but only once it's connected to the assistant: a knowledge base that exists but isn't linked to your Support assistant grounds nothing. When it is connected, every answer is searched against your real questions and answers, live, on every channel.
Create the FAQ. Open Knowledge base and click Create new (or Connect knowledge base). Choose FAQ, and in the Create FAQ Knowledge Base modal, name it (e.g. "Support FAQ") and click Create. Then add your entries — one question and answer per row. Cover the questions you actually get: shipping, returns, hours, pricing, "where's my order," and so on.
Connect it to your Support assistant. This is the step people miss. Creating the FAQ isn't enough on its own — you have to connect it to the one assistant so its answers are searched at reply time. Use the Connect knowledge base action to attach this FAQ to your Support assistant (creating or attaching it under that assistant's knowledge base). A FAQ that isn't connected to the assistant is silently ignored on every channel — the whole "grounded everywhere" promise depends on this link.
In the app
Knowledge base → app.mychatbot.app/knowledge-base — create the FAQ here, then connect it to your Support assistant.
Start with 10 real questions
You don't need a hundred entries to launch. Pull your ten most-asked questions from your existing inbox and add those first — you'll cover most conversations immediately, and you can keep adding entries as new questions come up. If you also have a product catalog or a spreadsheet of details, you can attach those as extra knowledge later for even sharper answers.
3. Connect Telegram (the two-minute channel)
Start with the easy win. In Telegram, message @BotFather, create a new bot, and copy the access token it gives you. Then in MyChatBot go to Channels → Telegram, paste the token, and save.
In the app
Channels → Telegram → app.mychatbot.app/channels
That's a live channel in about two minutes. Message your new Telegram bot and you should already get an AI reply grounded in your FAQ.
4. Add the Website Widget
On Channels → Website Widget, you'll get an integration snippet — a small script tag. Copy it and paste it into your site's HTML (right before the closing </body> tag, or into your site builder's "custom code" box). Publish your site, and the chat bubble appears.
In the app
Channels → Website Widget → app.mychatbot.app/channels
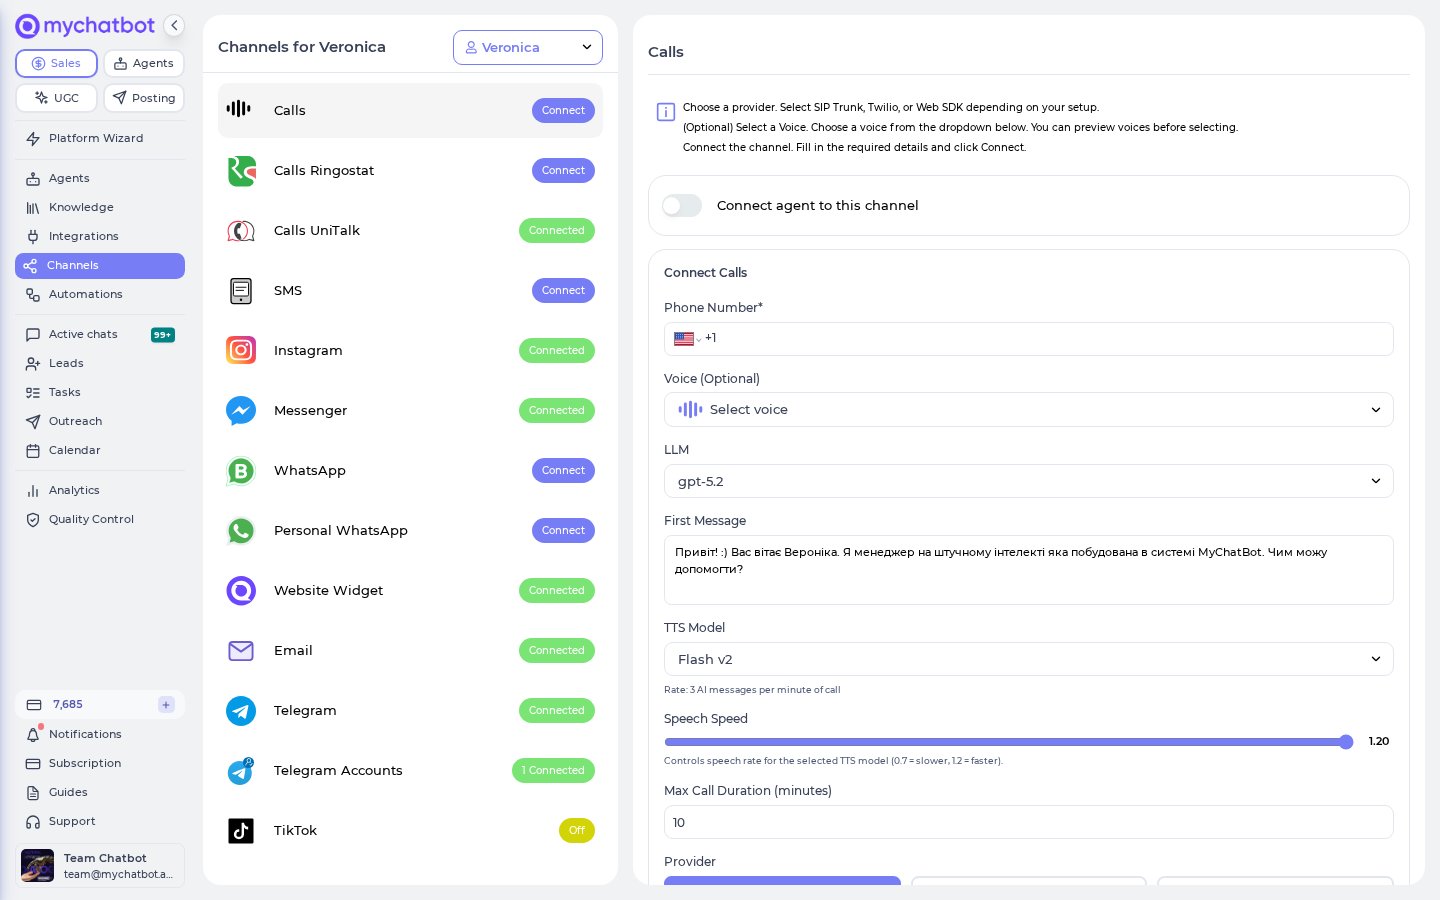
5. Connect WhatsApp and Instagram (the Meta-side channels)
These two reach the most people but take the most setup — because the account and permissions live on Meta's / WhatsApp's side, not ours. MyChatBot wires up everything on our end automatically; your job is to complete the provider steps.
- WhatsApp — On Channels → WhatsApp, follow the on-screen instructions. You can use the official WhatsApp Business number setup, or the Personal WhatsApp option, where you scan a QR code (open WhatsApp → Settings → Linked devices → Link a device, then scan). Wait until the status shows authorized, then click Connect agent to finish.
- Instagram — On Channels → Instagram, click Connect Instagram. You'll be sent to Meta to sign in, pick the Facebook page linked to your account, and allow access. You'll land back on the dashboard connected. (Your Instagram must be a business account linked to a Facebook page — a personal account can't be connected.)
The setup friction lives on Meta's side
WhatsApp and Instagram both need a bit of external onboarding — number provisioning or QR pairing for WhatsApp, page permissions for Instagram. This is normal, not a bug in MyChatBot: we connect the plumbing, but you have to be signed in and authorized on the provider first. For reliability, prefer the official WhatsApp Business and Instagram (Meta) connections over personal-account pairings, which can drop their session and need re-linking.
Each channel you connect attaches to that same one assistant — so it instantly speaks with the same voice and the same FAQ everywhere.
6. Set up Handoff Control
This is what makes it a support desk and not just a bot: a clean way for a human to take over. Open your assistant configuration and find the Handoff Control section.
In the app
Assistant configuration → Handoff Control → app.mychatbot.app/agents
Pick one takeover style — these two are mutually exclusive:
- Implicit operator handoff — "Any message from an operator immediately switches the chat to operator mode." The moment a human replies in a chat, the AI steps aside. Simplest for most teams — your operators just start typing.
- Stop word for manual handoff — set a keyword instead. "When an operator types your keyword, the chat switches to operator mode." Use this if your operators are sometimes in a chat without wanting to take it over.
Then set the safety-net options:
- Silent handoff — "Don't notify the client when switching between AI and operator." Turn this on if you'd rather the customer never sees a "handed to a human" seam.
- Auto Return — "If an operator disables the agent in a specific chat and doesn't re-enable it within 24 hours, the agent will be enabled automatically." This stops chats from getting stuck in operator mode forever. You can set a custom return interval in minutes (min 1, max 10080 — one week) if 24 hours isn't right for you.
Click Save.
Implicit and stop-word can't both be on
The interface enforces this for you: set a keyword and implicit mode greys out ("Disabled while a keyword is set"); turn implicit on and the keyword field greys out ("Turn off implicit mode below to use keywords"). Just pick the one that fits how your team works.
7. Add your operators
The humans who handle handoffs need accounts. Go to Team → Operators, click Add operator, and create a profile for each teammate. Under Access scope you can choose which agents each operator can see (leave it empty to grant access to all).
In the app
Team → Operators → app.mychatbot.app/profile
Now everyone on your team can watch the queue and jump in. In the chats view, the Need operator tab collects every conversation where the AI is off and a human is handling it, and the Attention tab queues chats flagged for review.
Try it
- From your own phone, message your Telegram bot with a question your FAQ covers ("What are your hours?"). You should get an AI answer grounded in your FAQ, in seconds.
- Open Active chats in MyChatBot, find that conversation, and — if you chose implicit handoff — just type a reply. Watch the chat flip to Operator mode ("Switched to Operator mode"), and the AI go quiet.
- Send another message from your phone. Your typed reply arrives, not an AI one — you've taken over.
- Walk away. After your Auto Return interval, the chat hands itself back to the AI automatically. (Or flip the per-chat AI toggle back on yourself.)
- Repeat from your website widget, WhatsApp, or Instagram. Same assistant, same FAQ, same handoff — every channel behaves identically, because it's all one assistant.
If a question comes in on one channel and a person can take it over on another, your desk is live.
One balance feeds every channel — watch it
Every reply your assistant sends — on WhatsApp, Instagram, Telegram, and the website widget — draws from the same shared sales-message balance on your plan. A busy multi-channel desk burns through it faster than a single channel would. And here's the important part: if that balance hits zero, a background job switches all your assistants off across every channel at once, and they do not turn back on by themselves — you have to top up or wait for your plan to renew. So if your whole desk suddenly goes silent, check your balance first. This is also why a real support desk belongs on a paid plan: the 3-day trial only includes about 30 sales messages, which a live desk exhausts almost immediately.
Level it up
- Add more knowledge. Beyond the FAQ, attach business documents, a product catalog, a feed, or a spreadsheet as extra grounding for the same assistant — all of it becomes searchable at answer time, on every channel.
- Let the AI ask for a human. Tell the assistant in its instructions when to escalate — for example, "If a customer is upset or asks to speak to a person, hand the chat to an operator." It can flag the conversation for your team on its own.
- Tune the queue with SLAs. The operator queue tracks how long a customer has waited for a human's first reply after handoff, and flags overdue ones — so nobody sits ignored.
- Scope your team. Give each operator access to only the agents (and their linked pipelines) they should see, from the operator's Access scope. Handy once you're running more than one desk.
- Grow later, deliberately. If you eventually want genuinely separate assistants — say, a different brand or language per channel — that's when multipro's "multiple active assistants" comes in. For a single unified support desk, you never need it.
See also
- Channels — every channel and how to connect it.
- Assistant configuration — Handoff Control and everything else that shapes replies.
- Knowledge for agents — FAQ, documents, and how grounding works.
- Chats & operator inbox — the shared inbox, the Need operator queue, and per-chat AI/Operator toggle.
- Chats & client analytics — the operator queue, handoff, and takeover.
- Analytics & quality control — where message usage and costs show up.