
Appearance
SalesDrive CRM Integration
Let your MyChatBot agent create and manage deals directly in your SalesDrive account. The agent runs the CRM actions on its own during a conversation — no human step in between — so leads and orders land in SalesDrive as they happen.
At a glance
| You need | Where | Result |
|---|---|---|
| API key | SalesDrive → Загальні налаштування → Інші сервіси → API → API-Ключі | Credential your agent authenticates with |
| Domain | Your SalesDrive URL (e.g. your-company.salesdrive.me) | Points MyChatBot at your account |
| Agent | MyChatBot → Integrations → SalesDrive CRM | Agent that runs the CRM actions |
| Fields | Entities & Data Fields Configuration | Which deal fields the agent can fill |
Connect in 3 steps:
- In SalesDrive, create an API key and copy it.
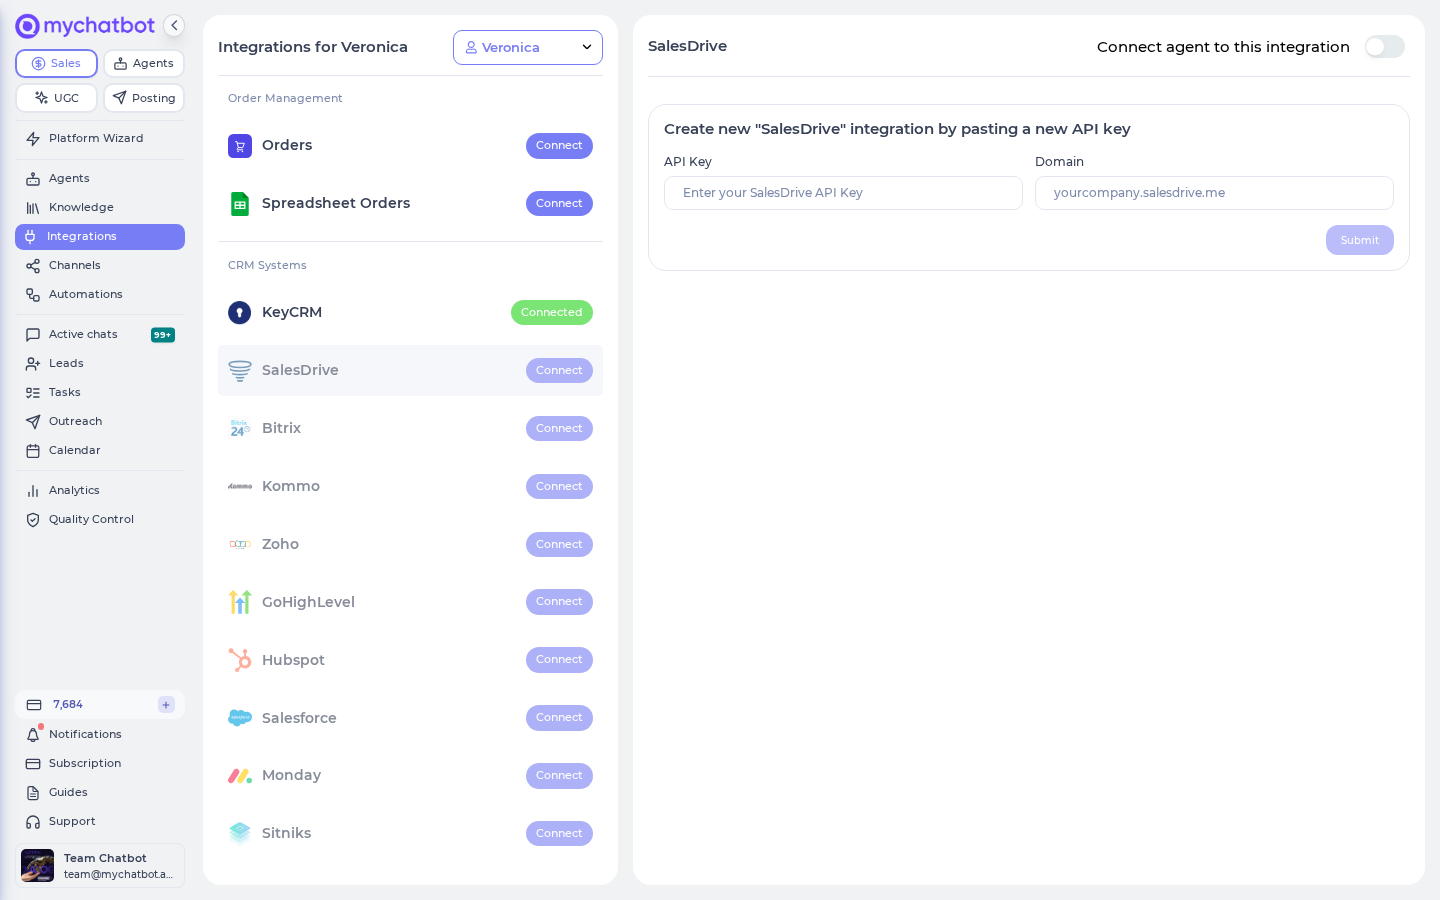
- In MyChatBot, open Integrations → SalesDrive CRM, pick your agent, and paste your Domain + API Key.
- Configure entities and fields, then click Apply fields.
Statuses must match exactly
The Status value your agent sets must match a status defined in your SalesDrive account, character for character. Whenever your pipeline stages change, click Sync statuses to pull the latest set — otherwise status updates silently fail to move the deal.
Create the API key in SalesDrive
- Log in to your SalesDrive account as an administrator.
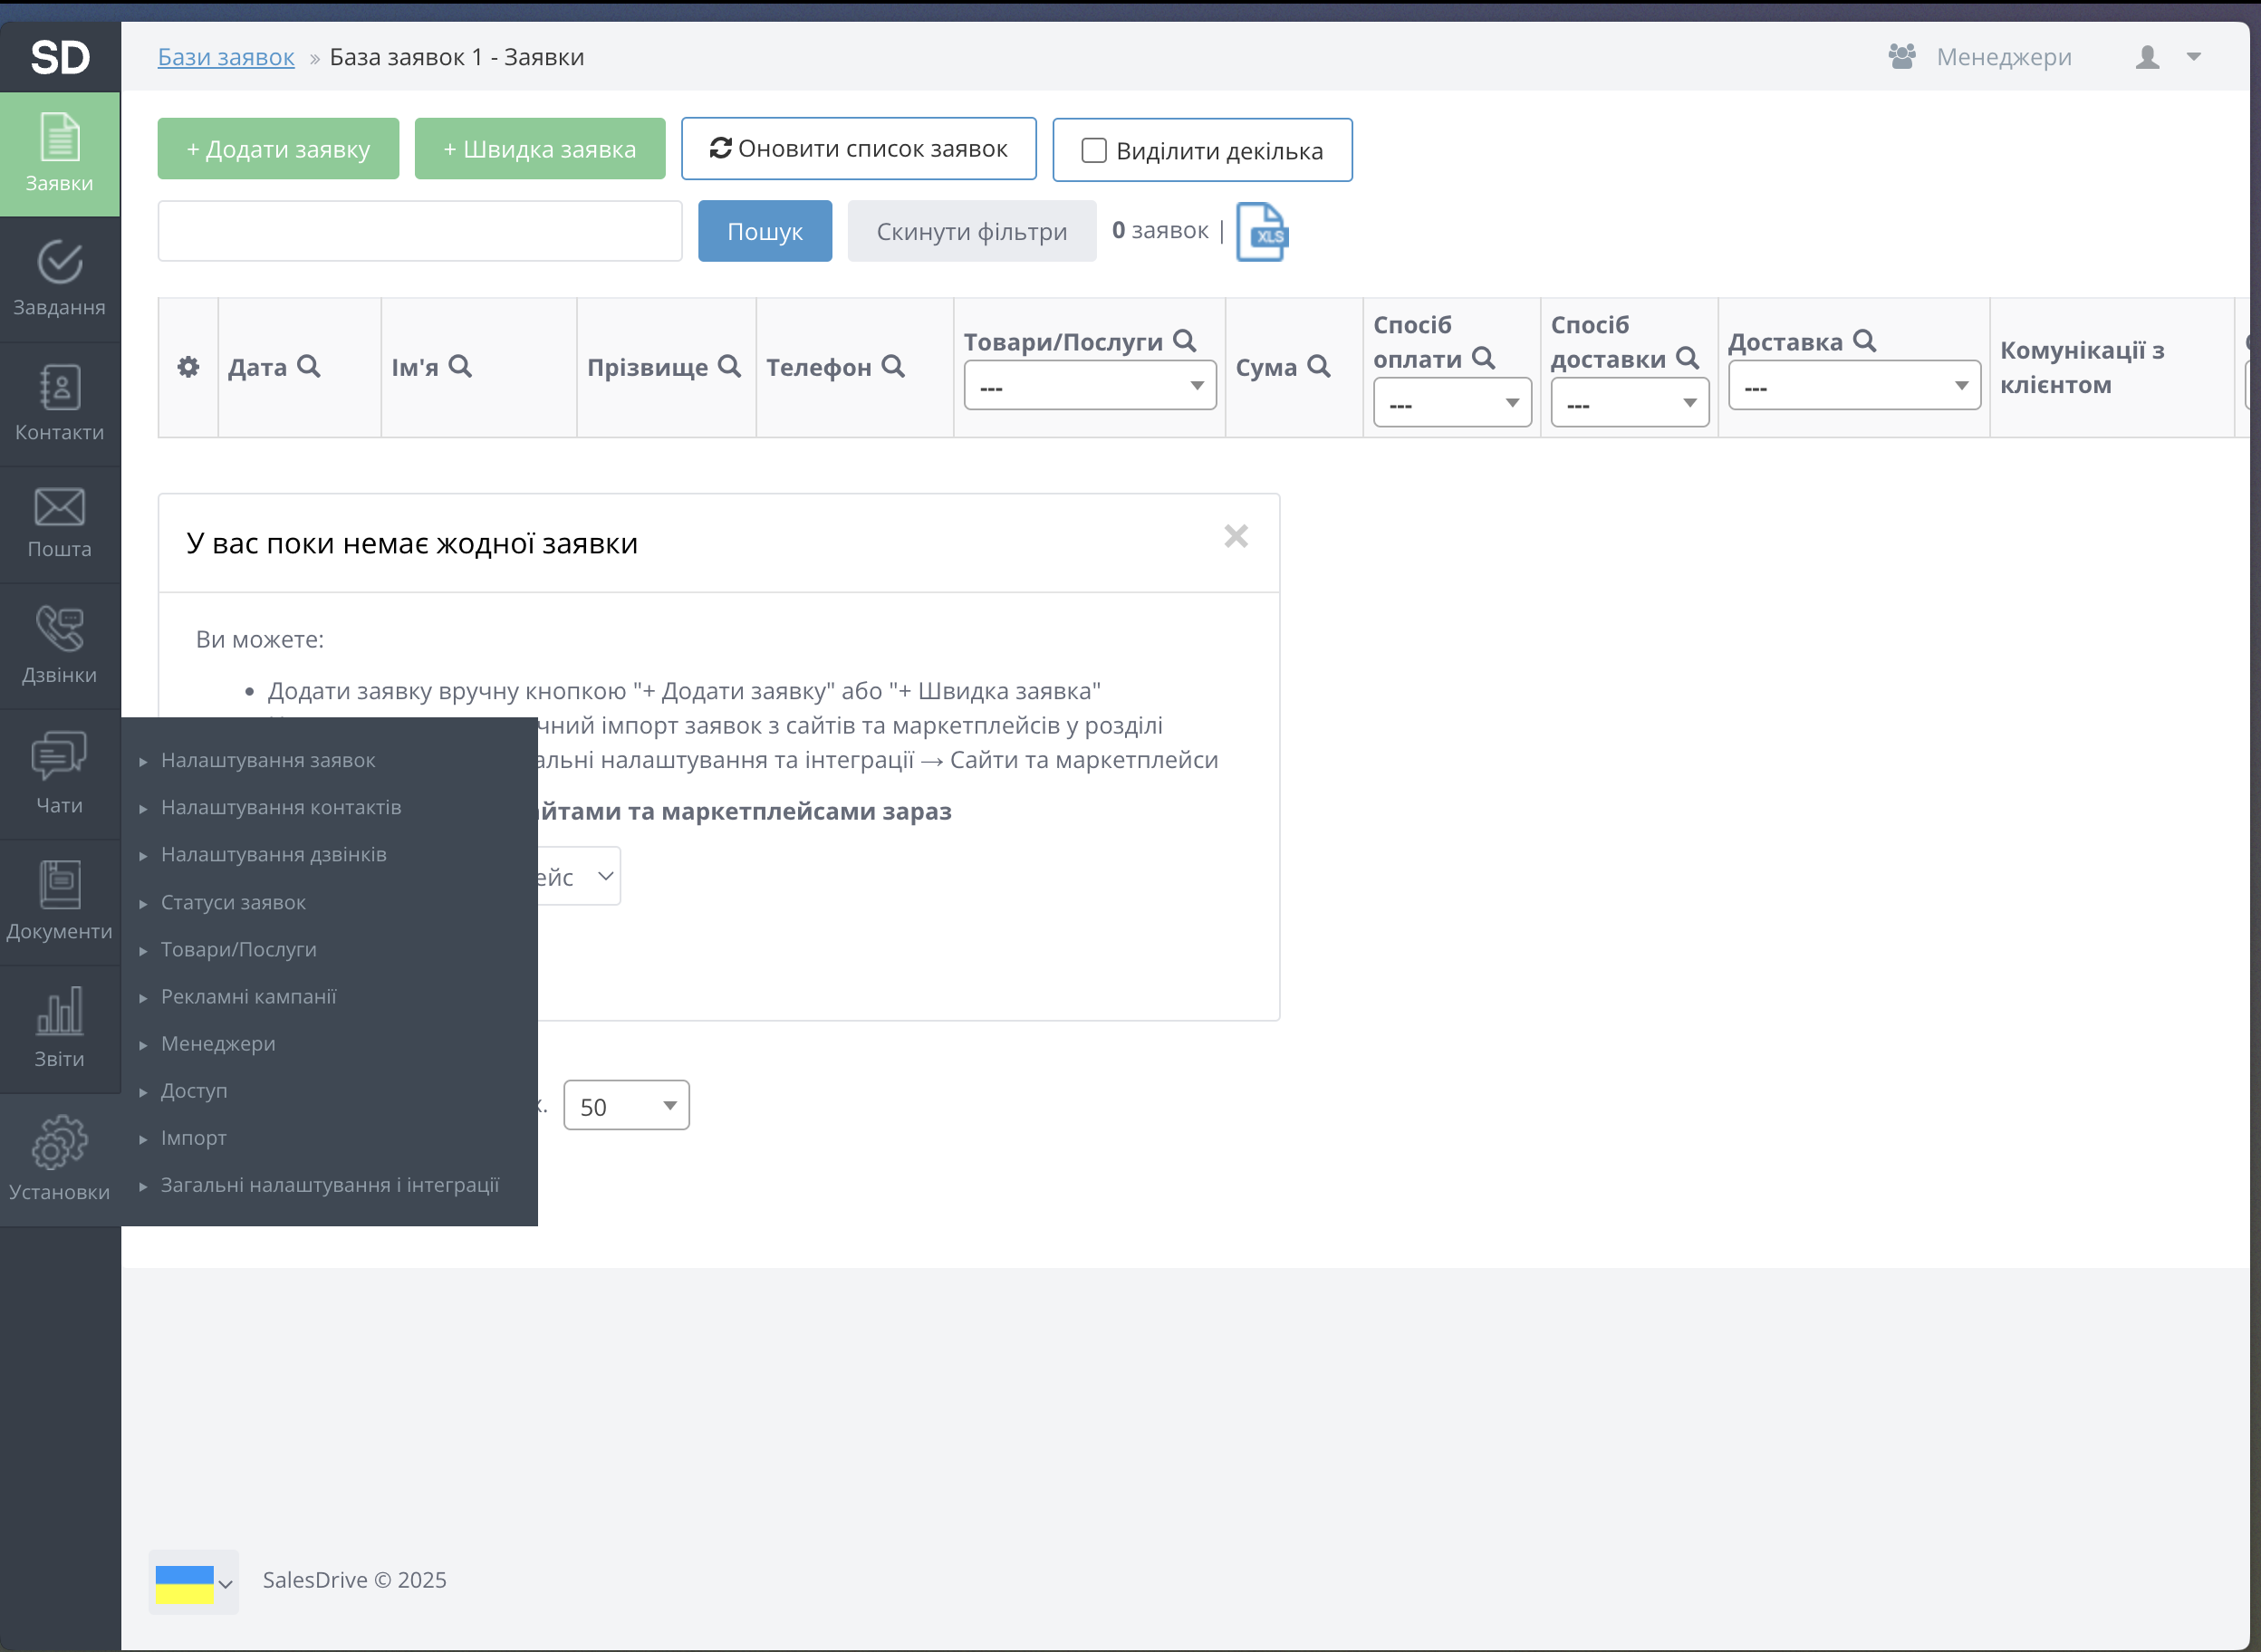
- Navigate to Загальні налаштування і інтеграції.
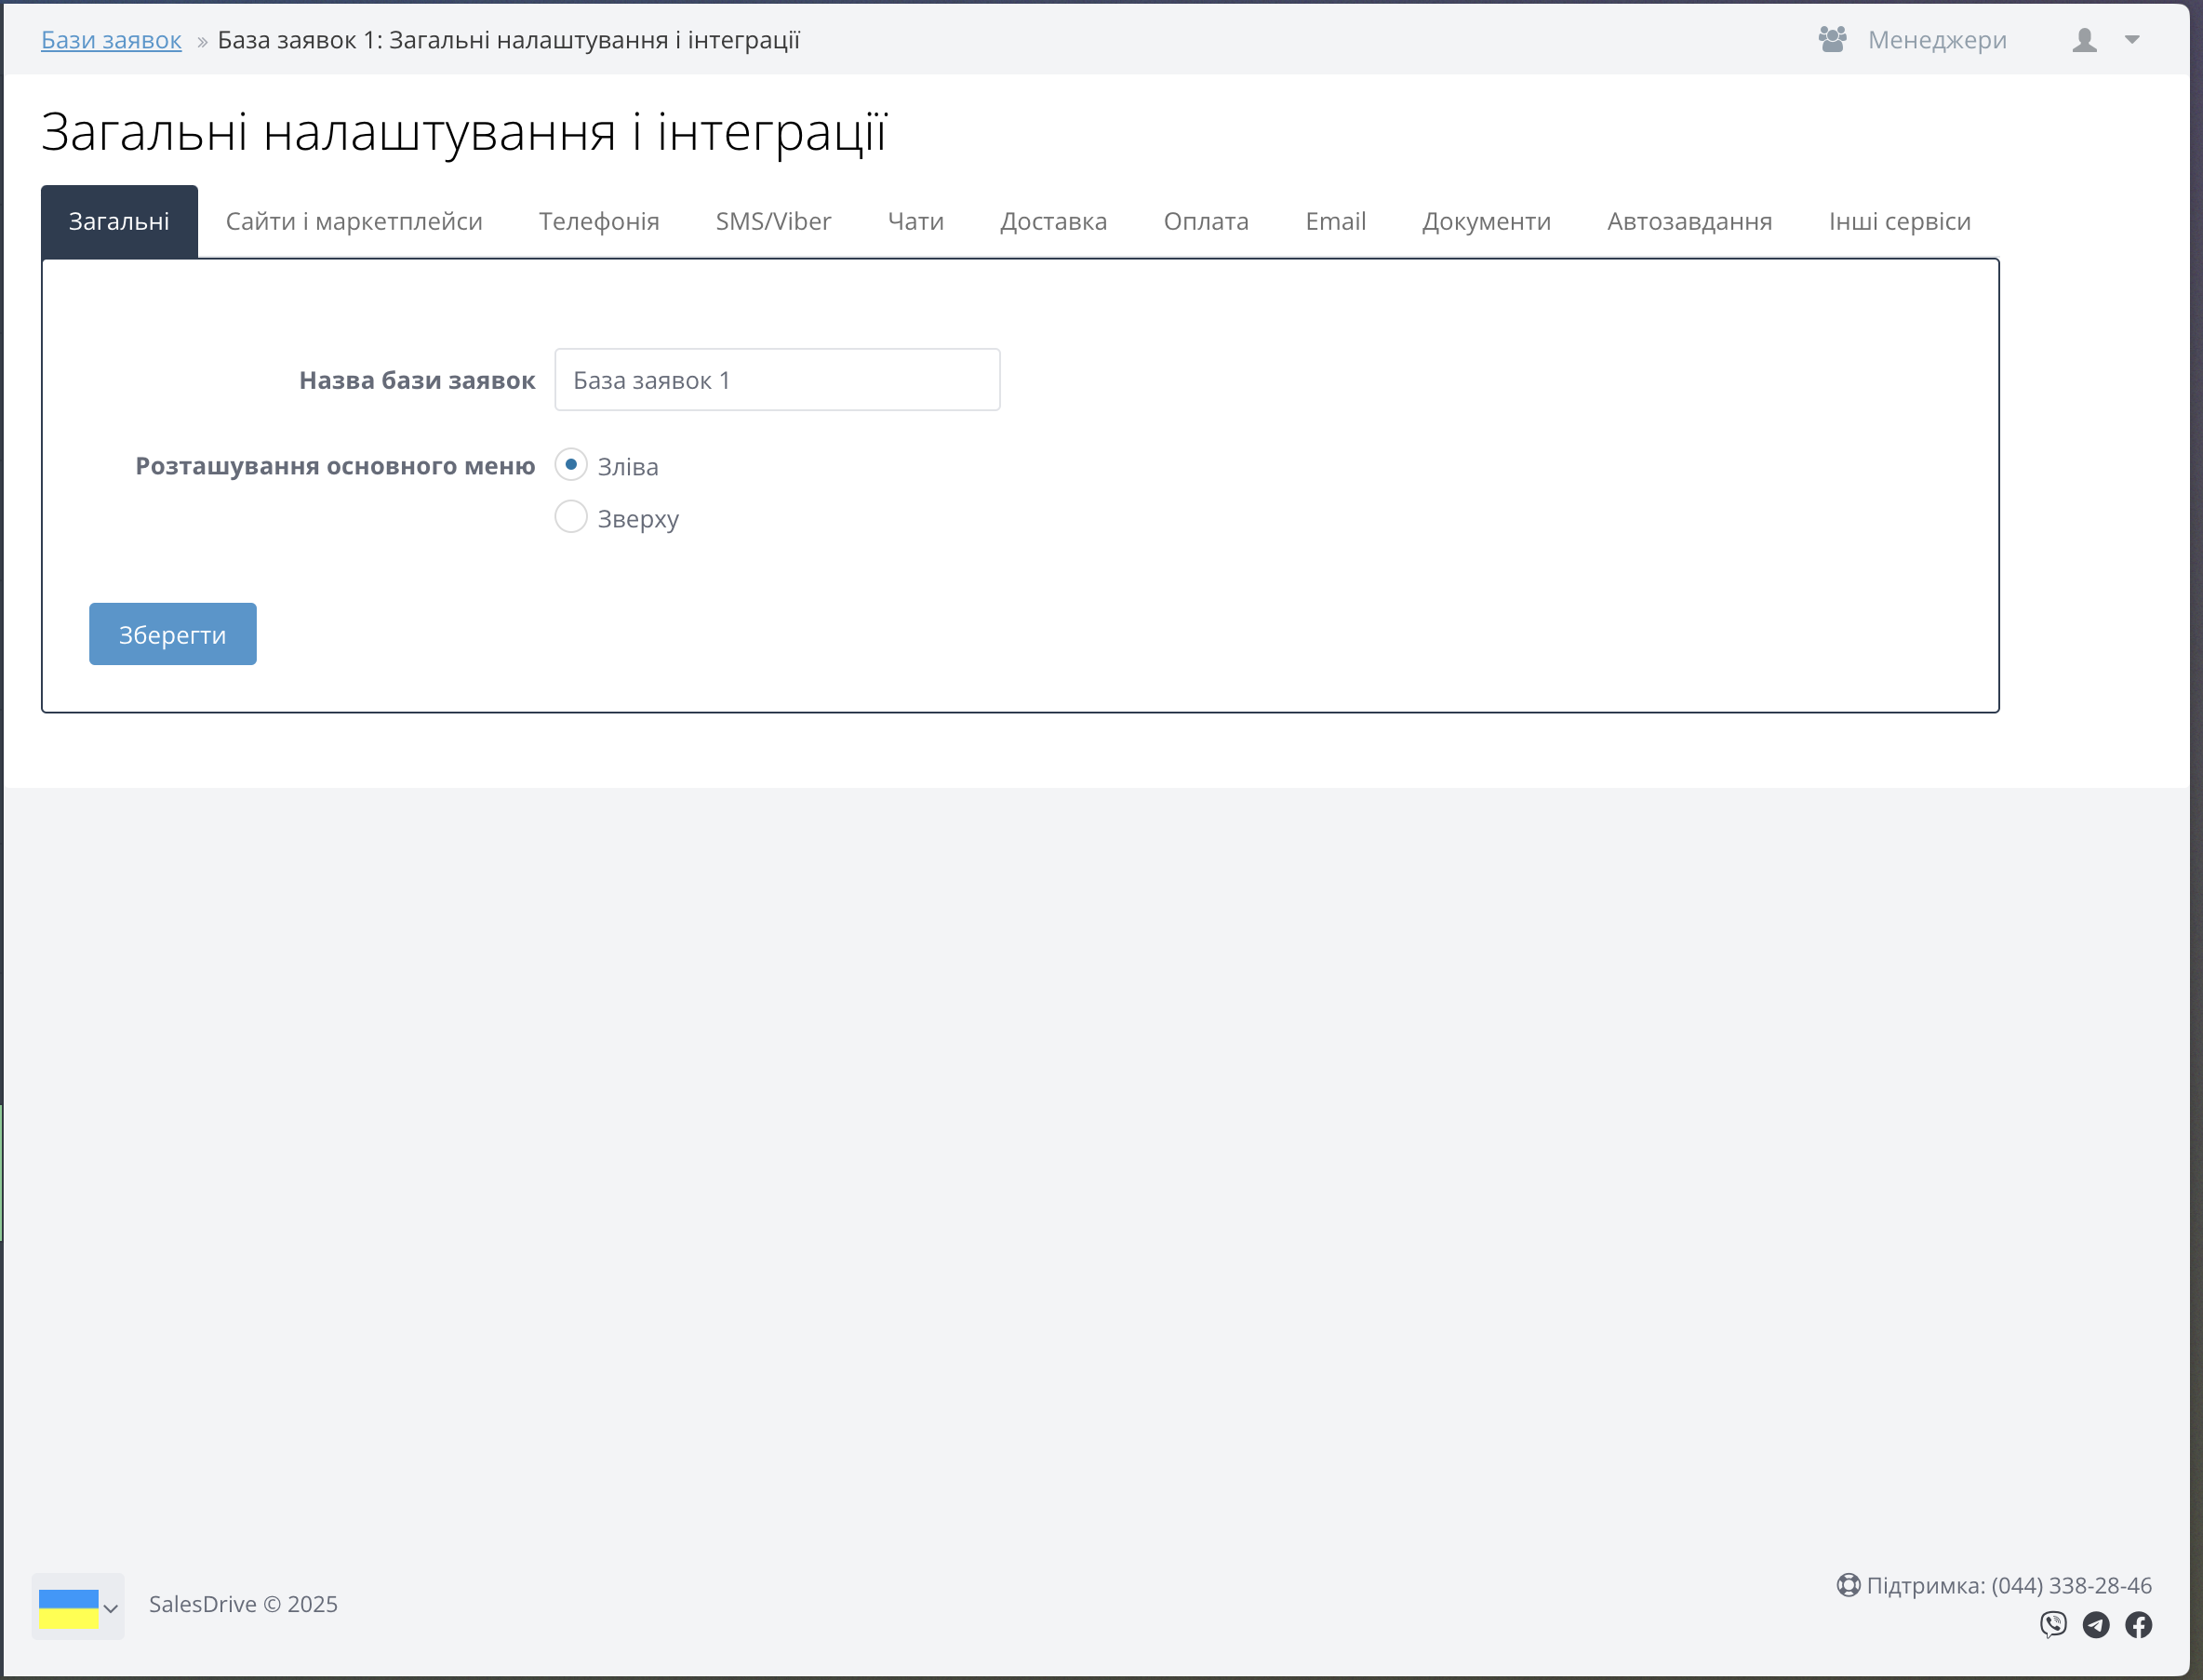
- Open Інші сервіси.
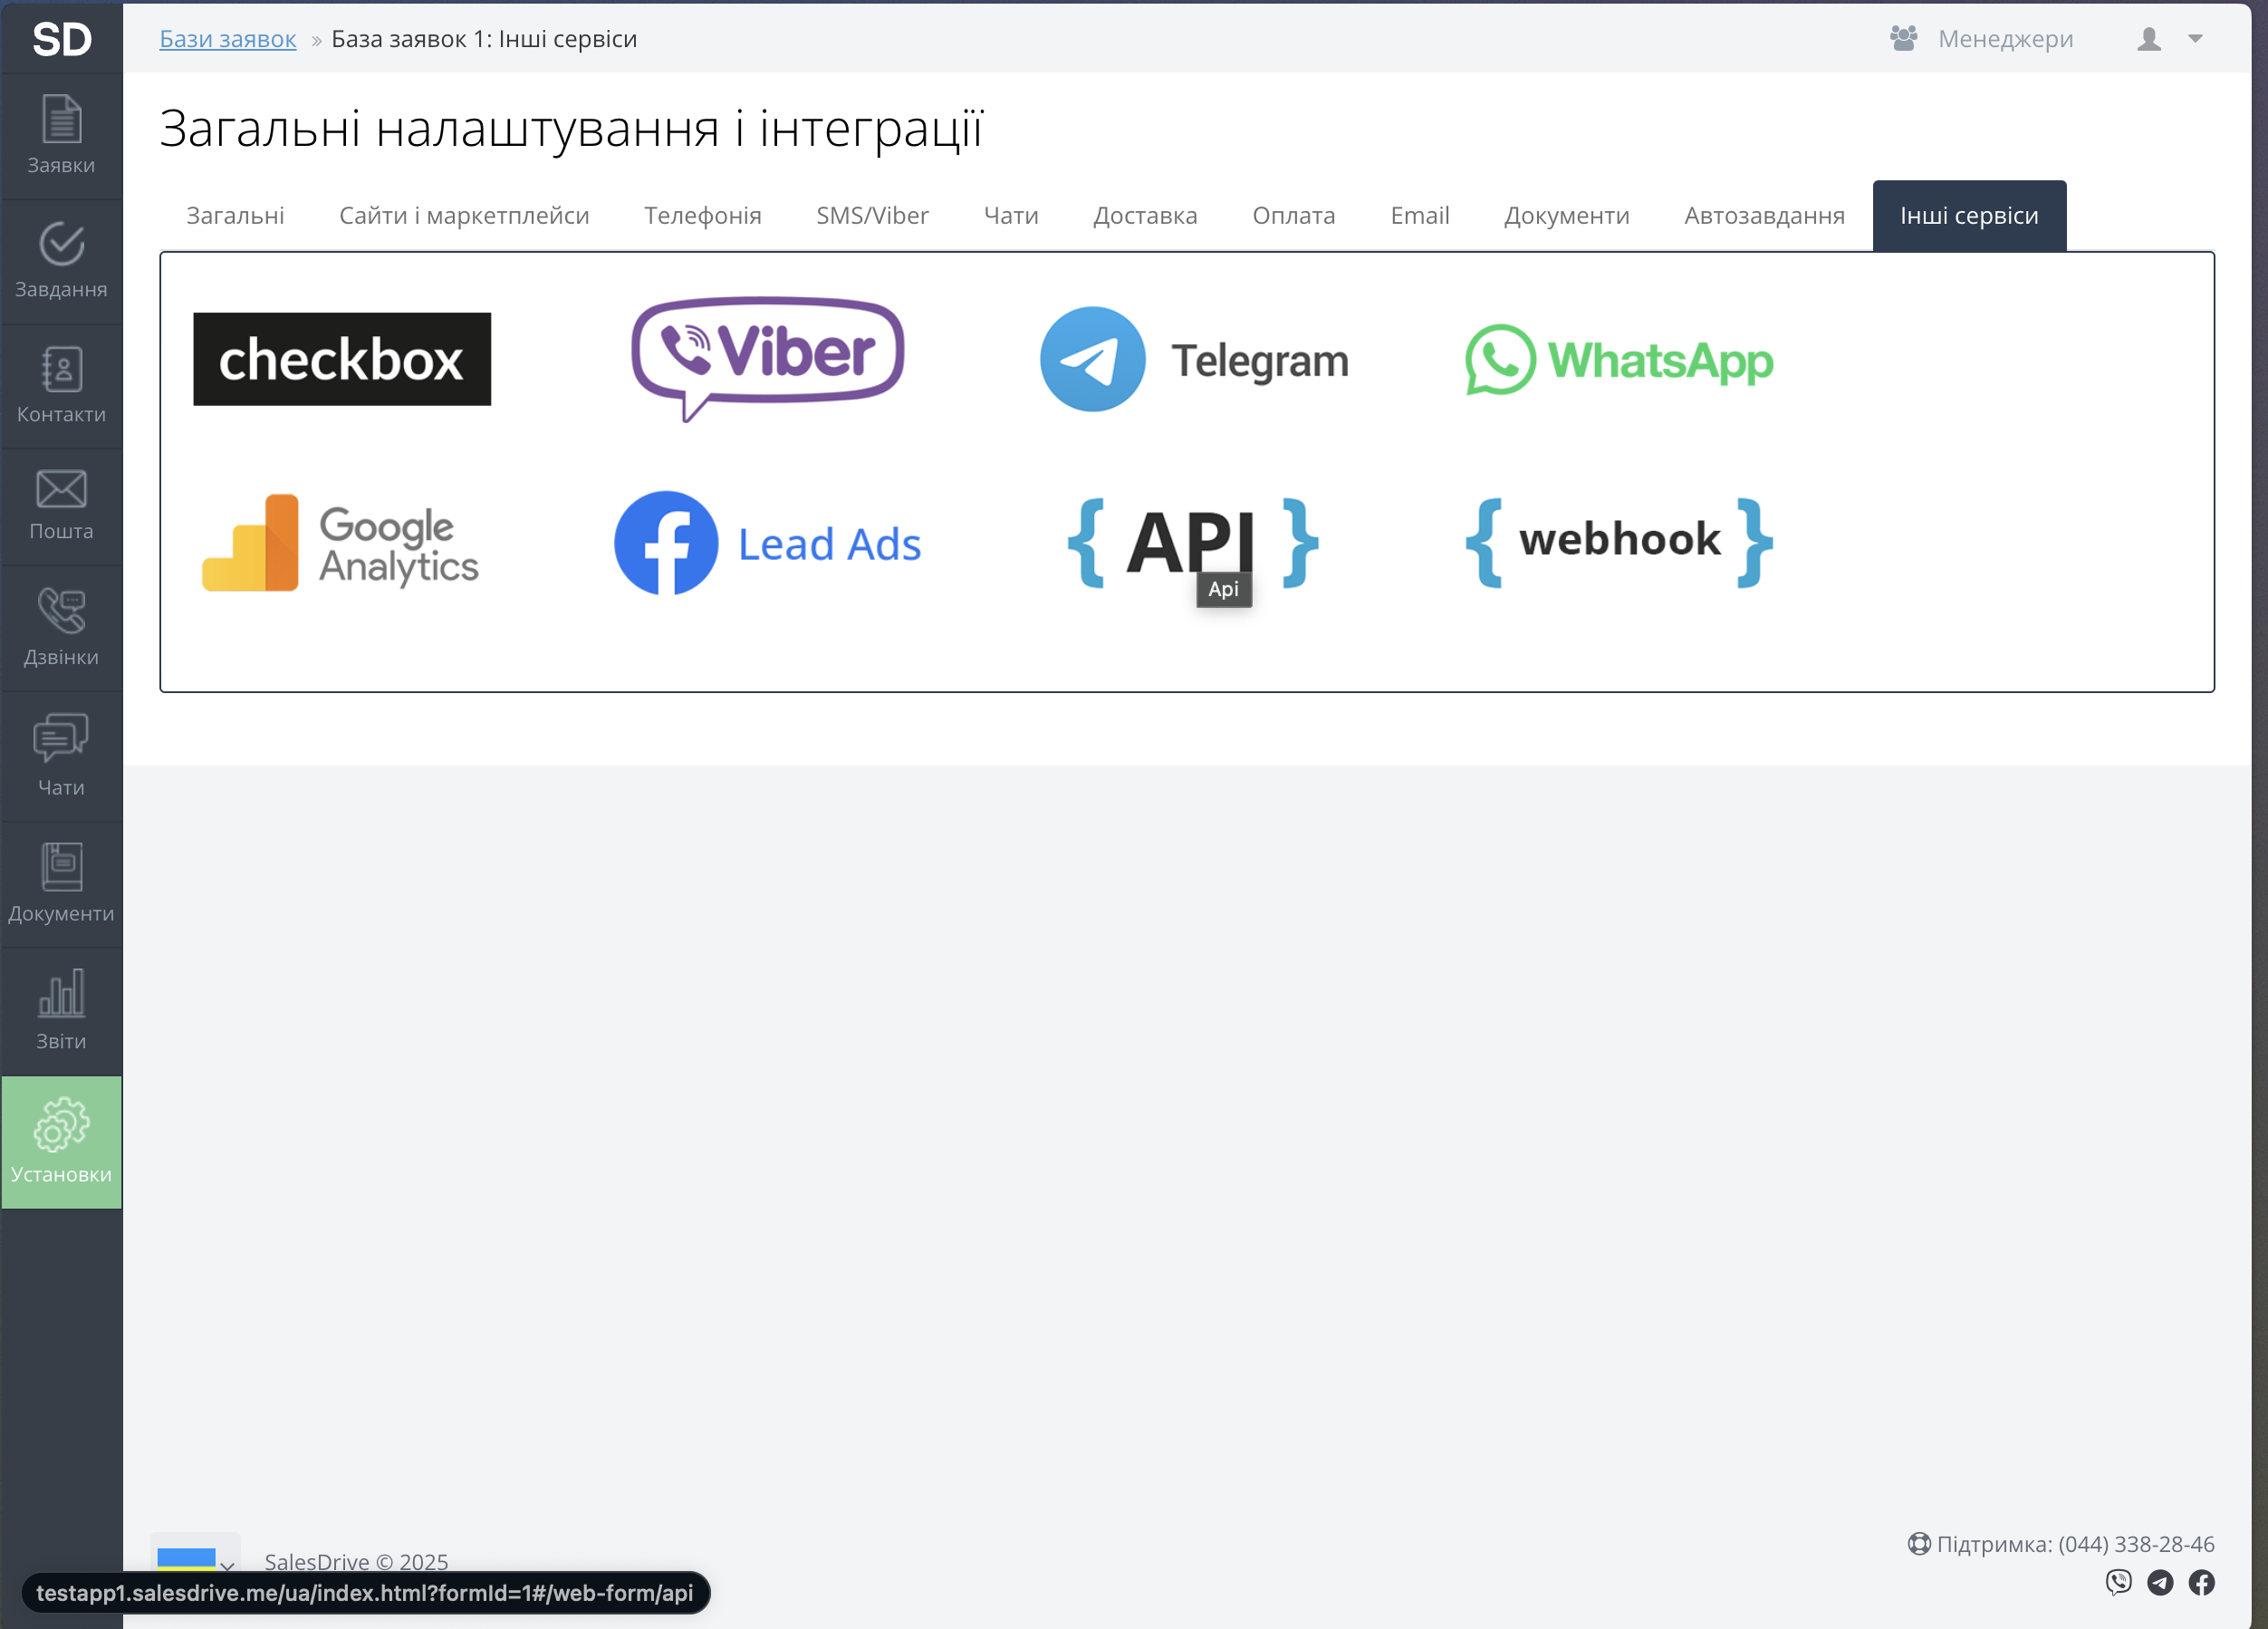
- Click the API button.
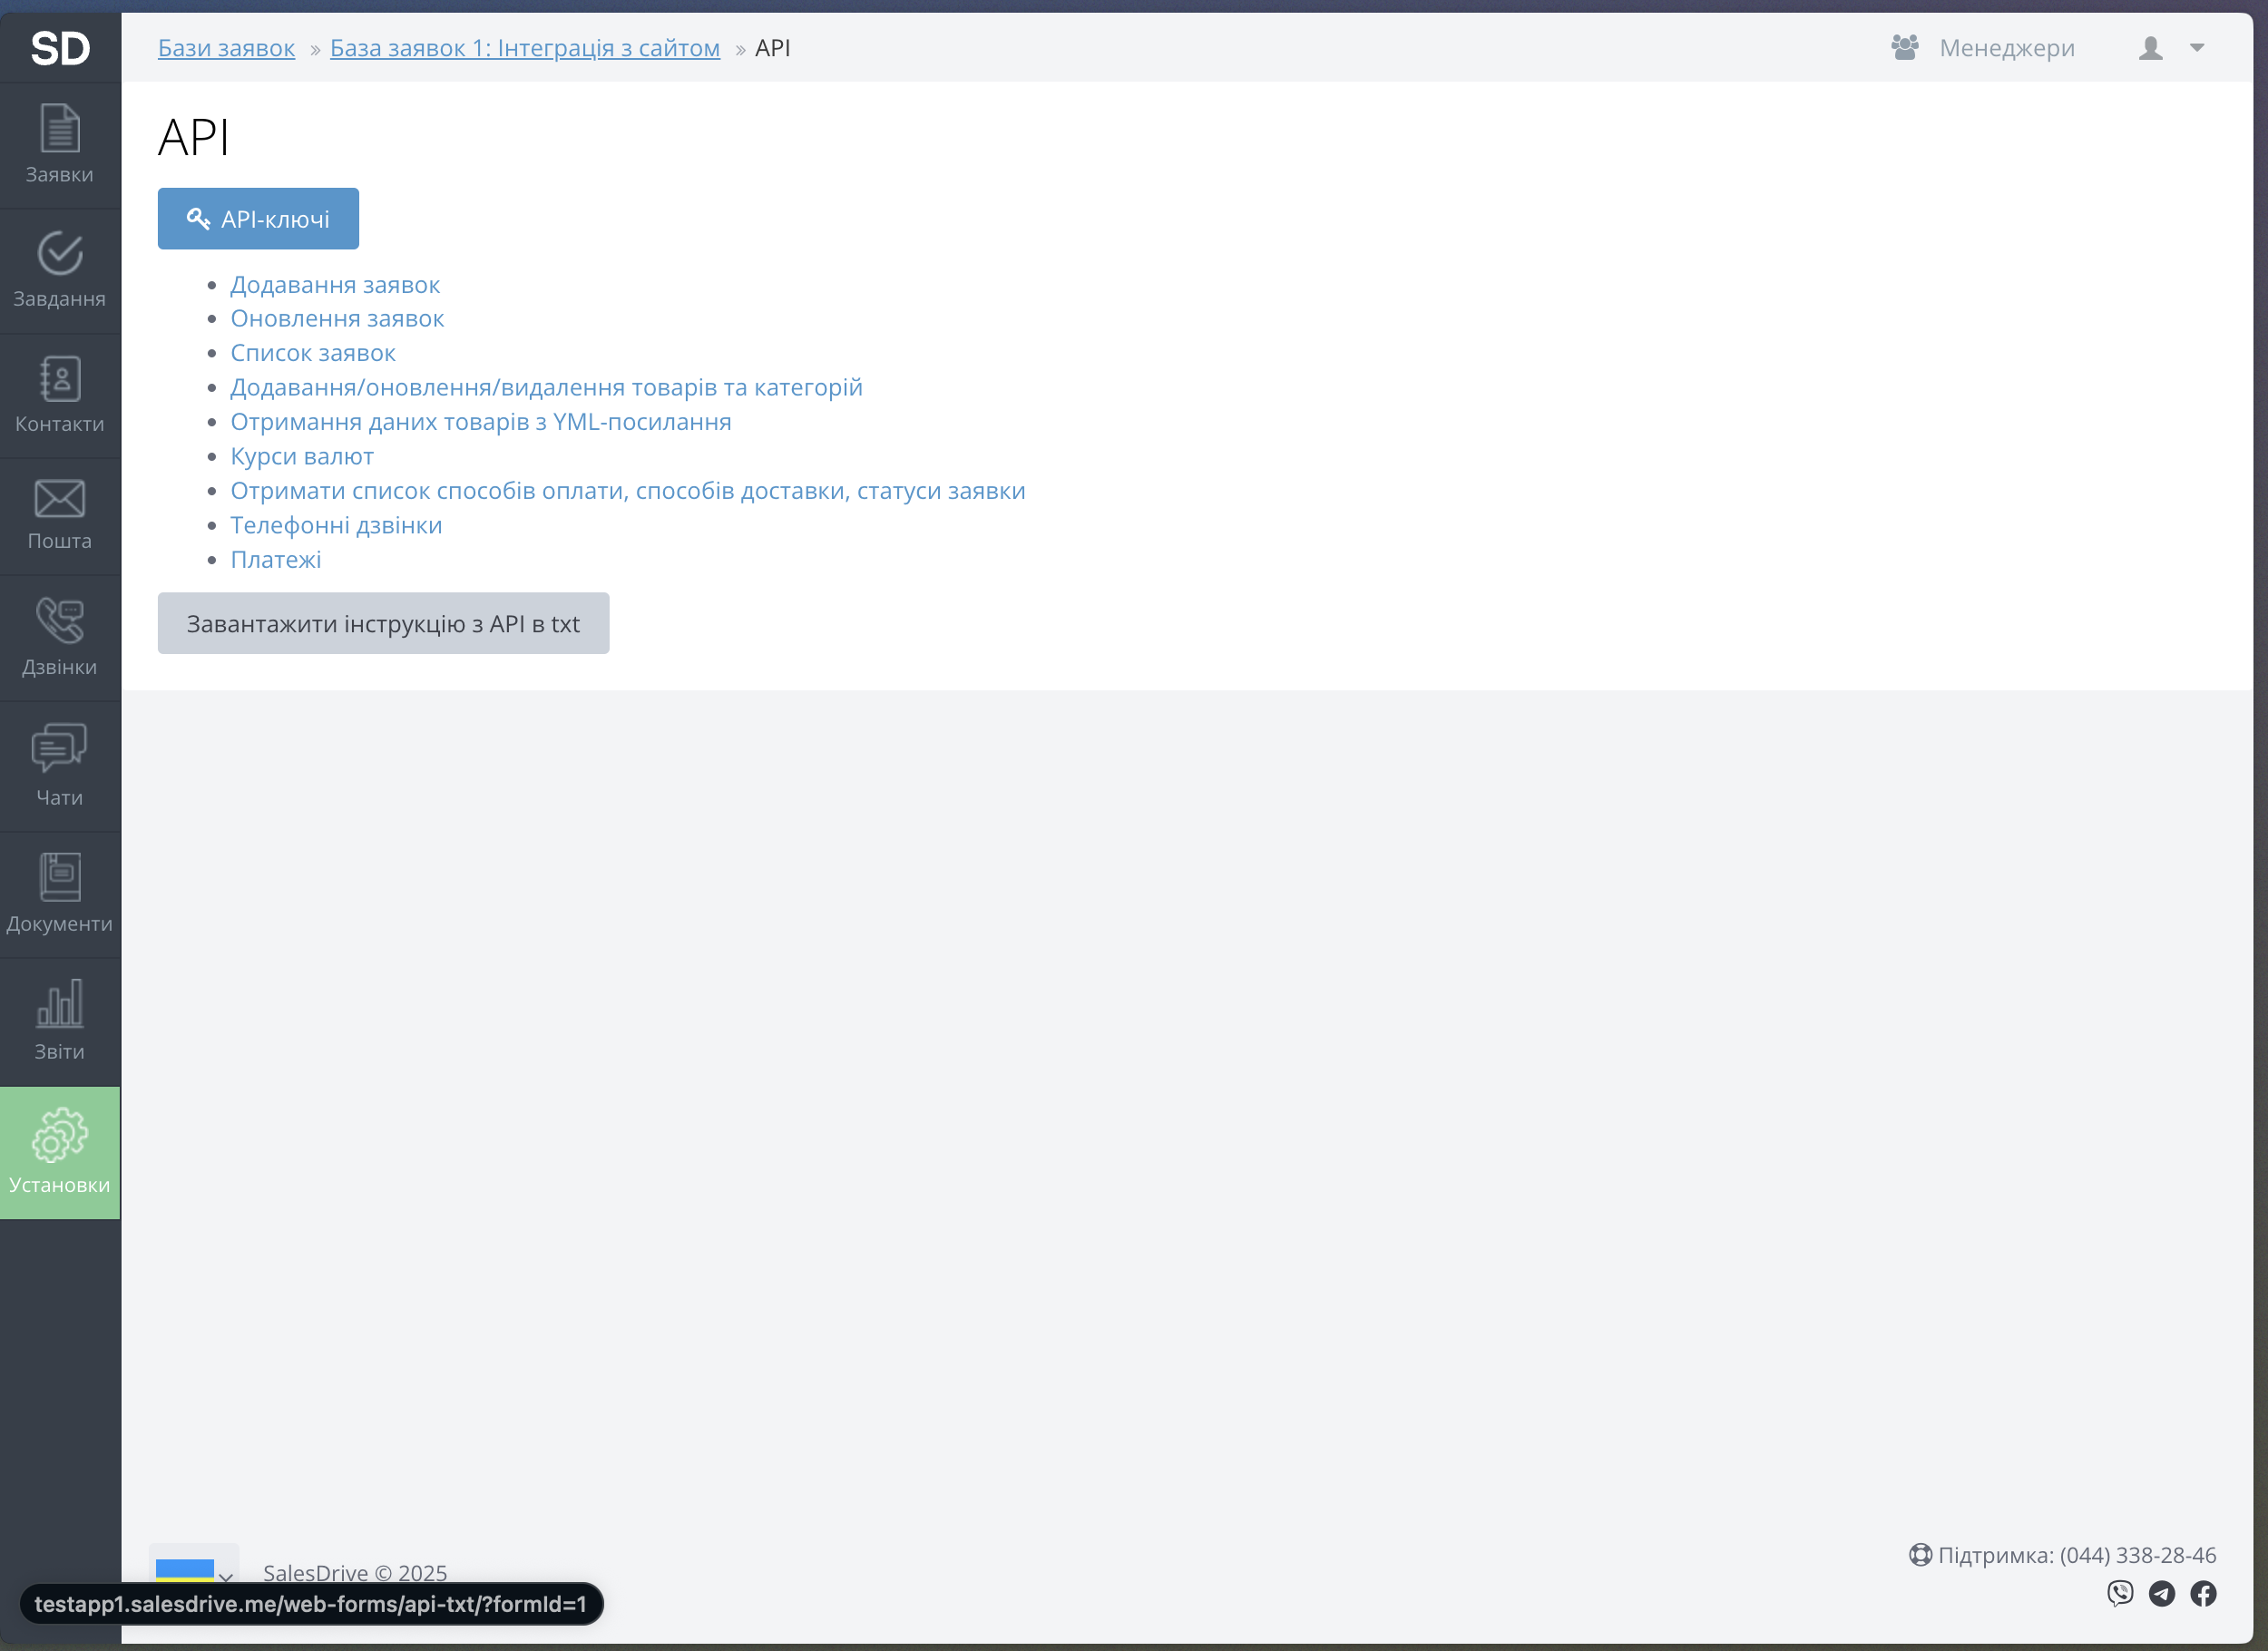
- Click the API-Ключі button.
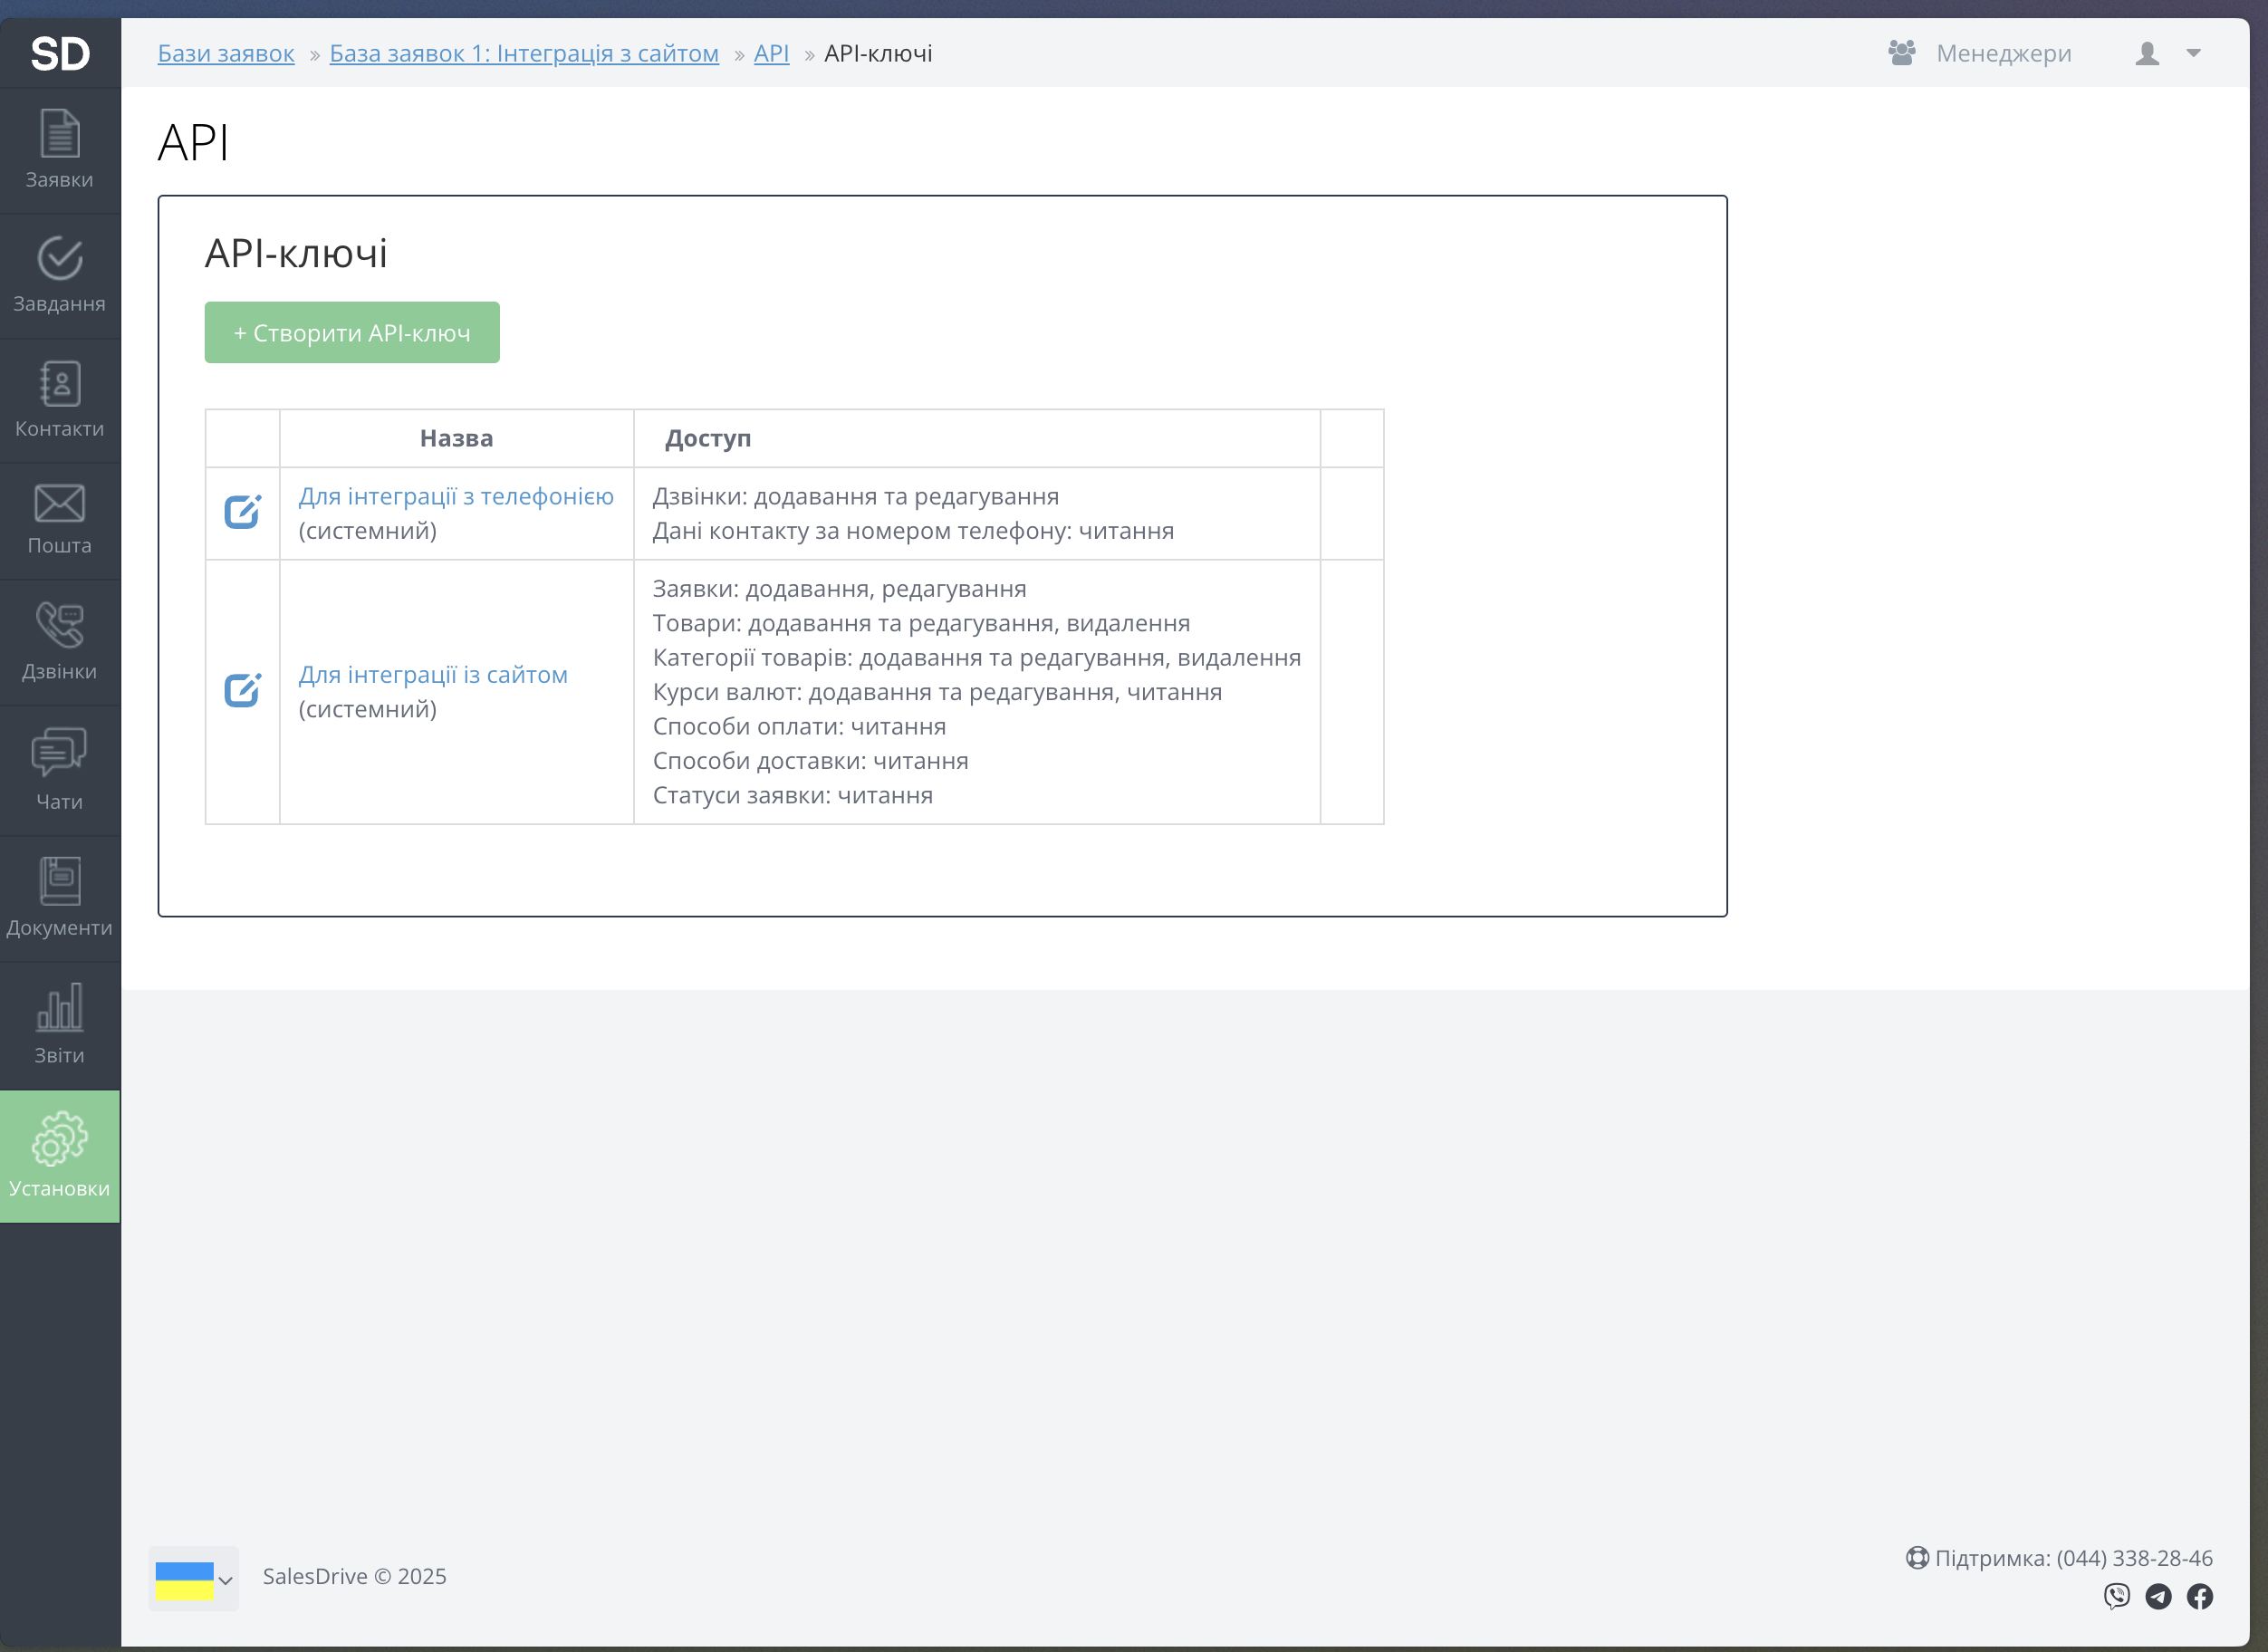
- Click the Створити API-Ключі button.
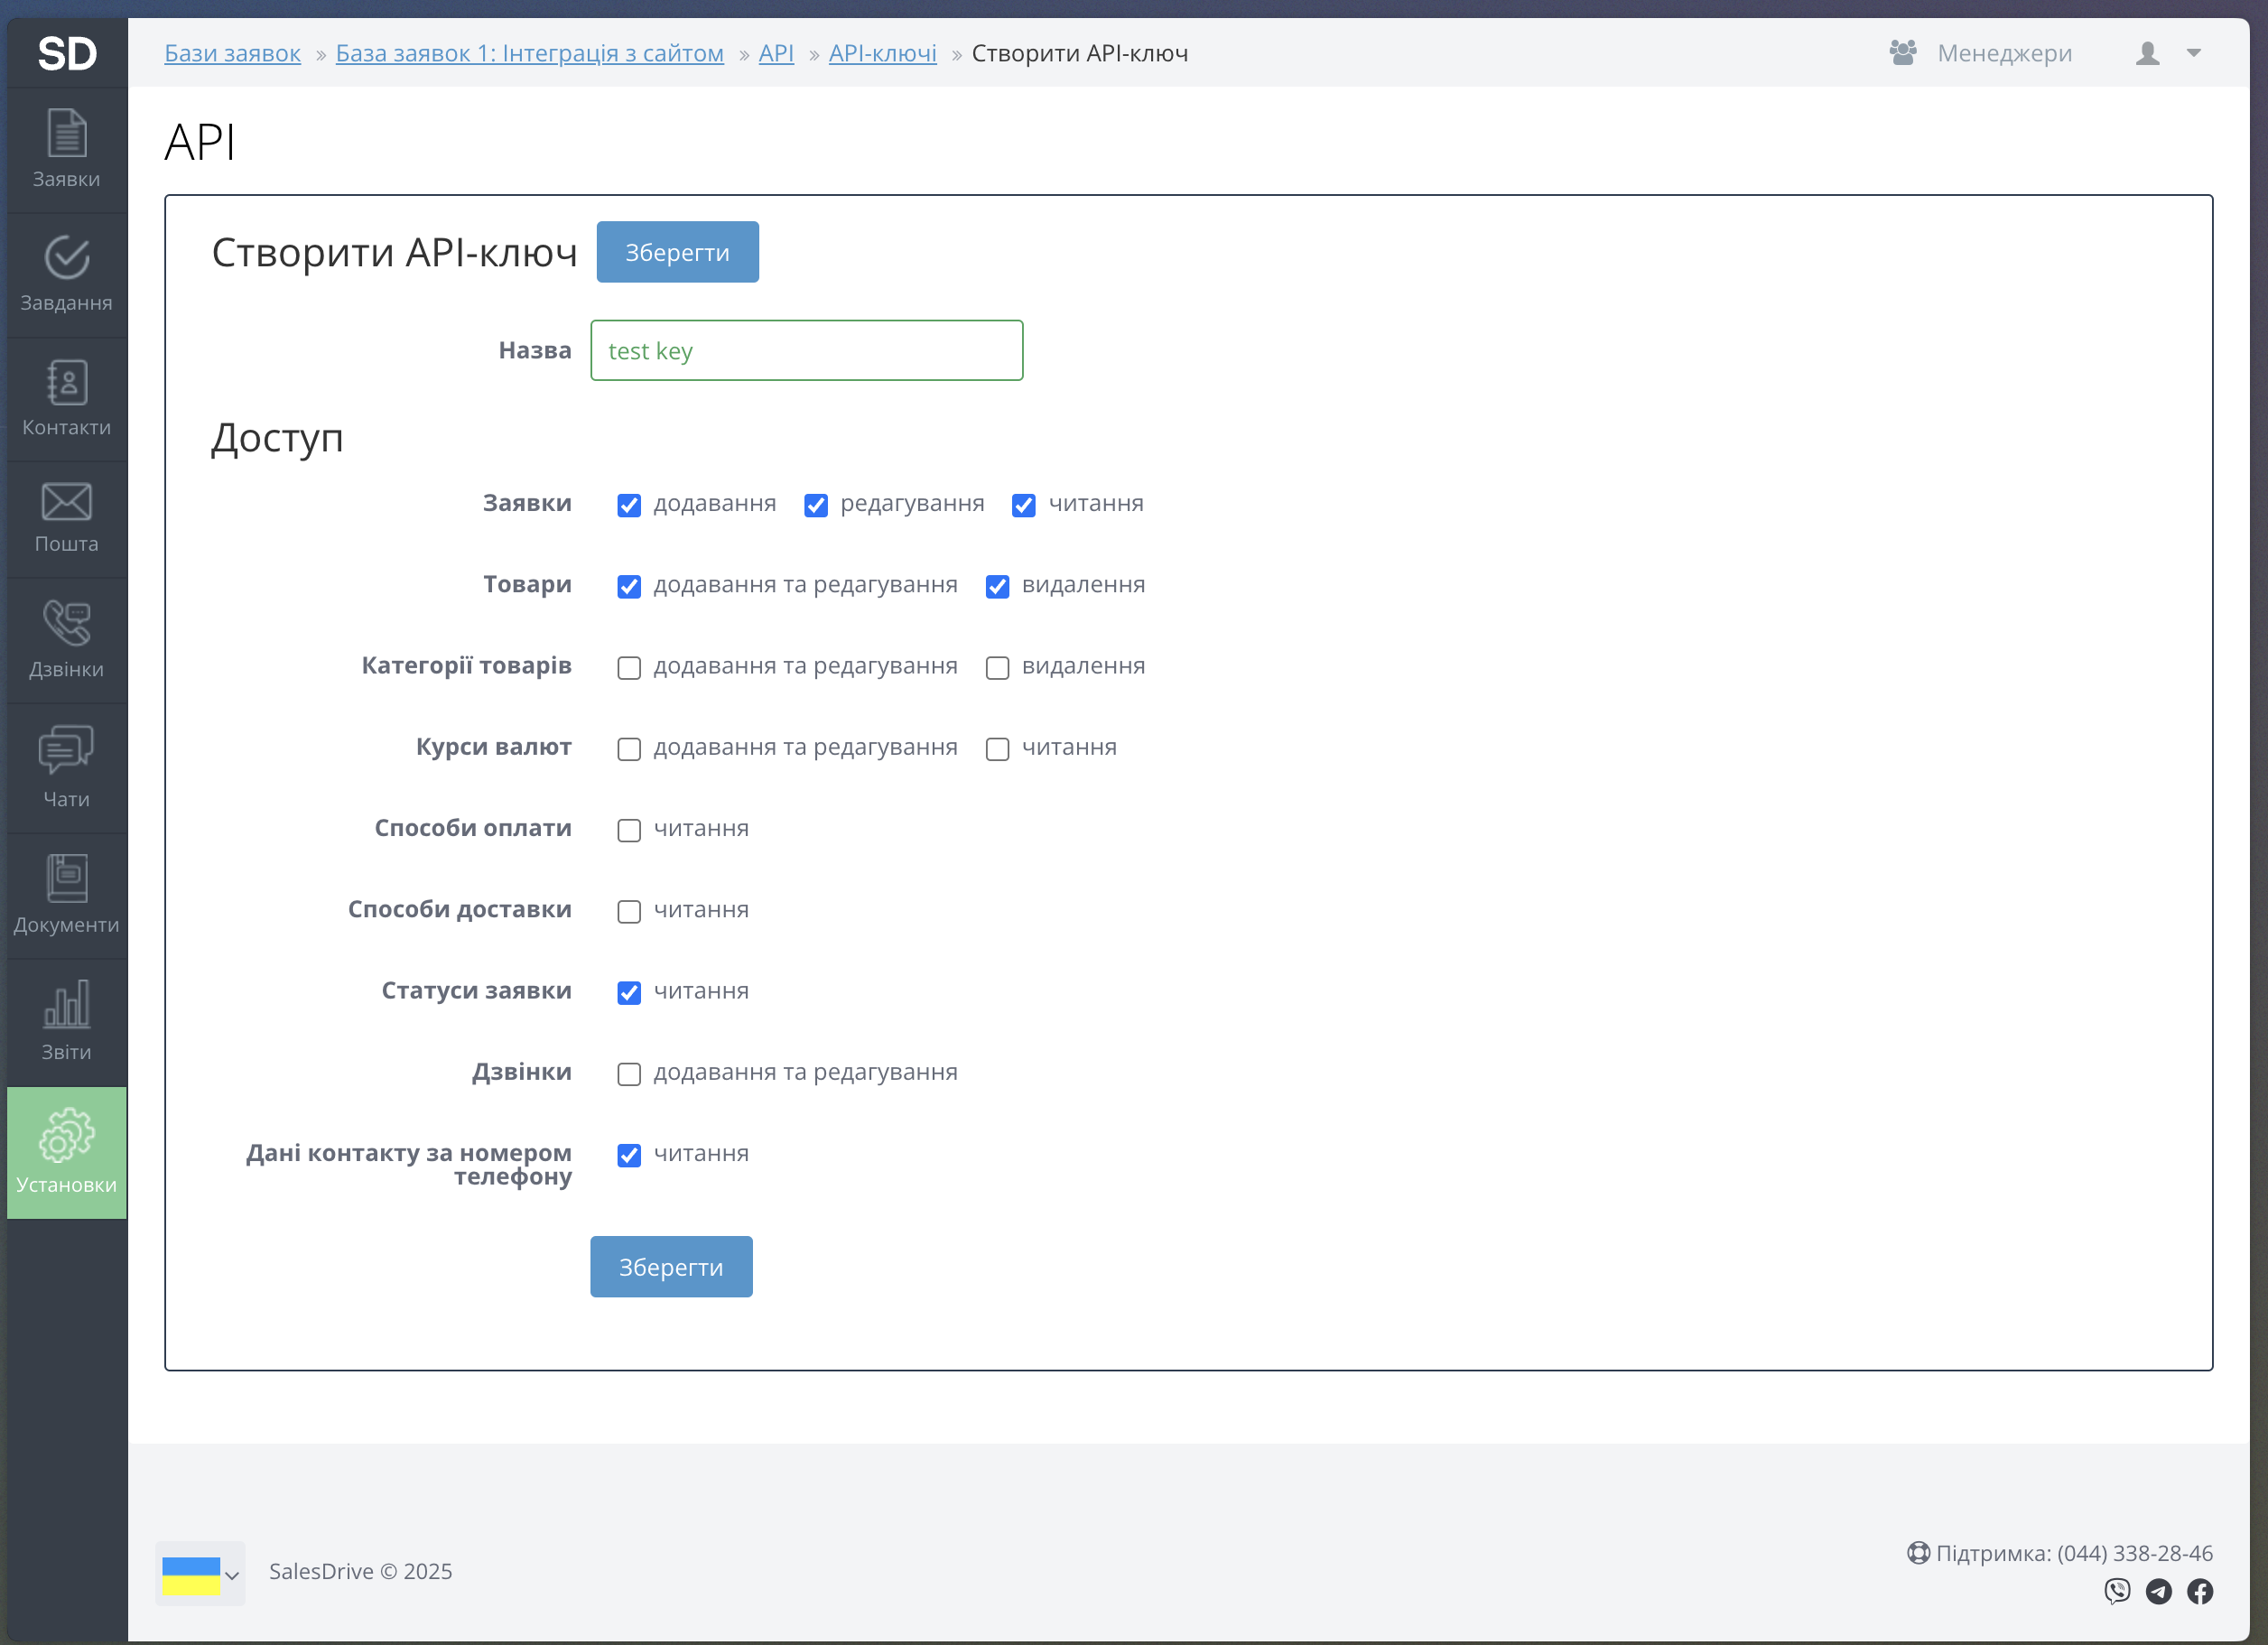
- Complete the form: enter a key name, check all checkboxes shown, then click Зберегти.
- Copy the API-ключ.
Connect SalesDrive in MyChatBot
In the app
Open Integrations, then pick SalesDrive CRM — app.mychatbot.app/integration?integration=SalesDrive.
- Go to the Integrations tab in your MyChatBot dashboard.
- Select the agent you want to connect to SalesDrive.
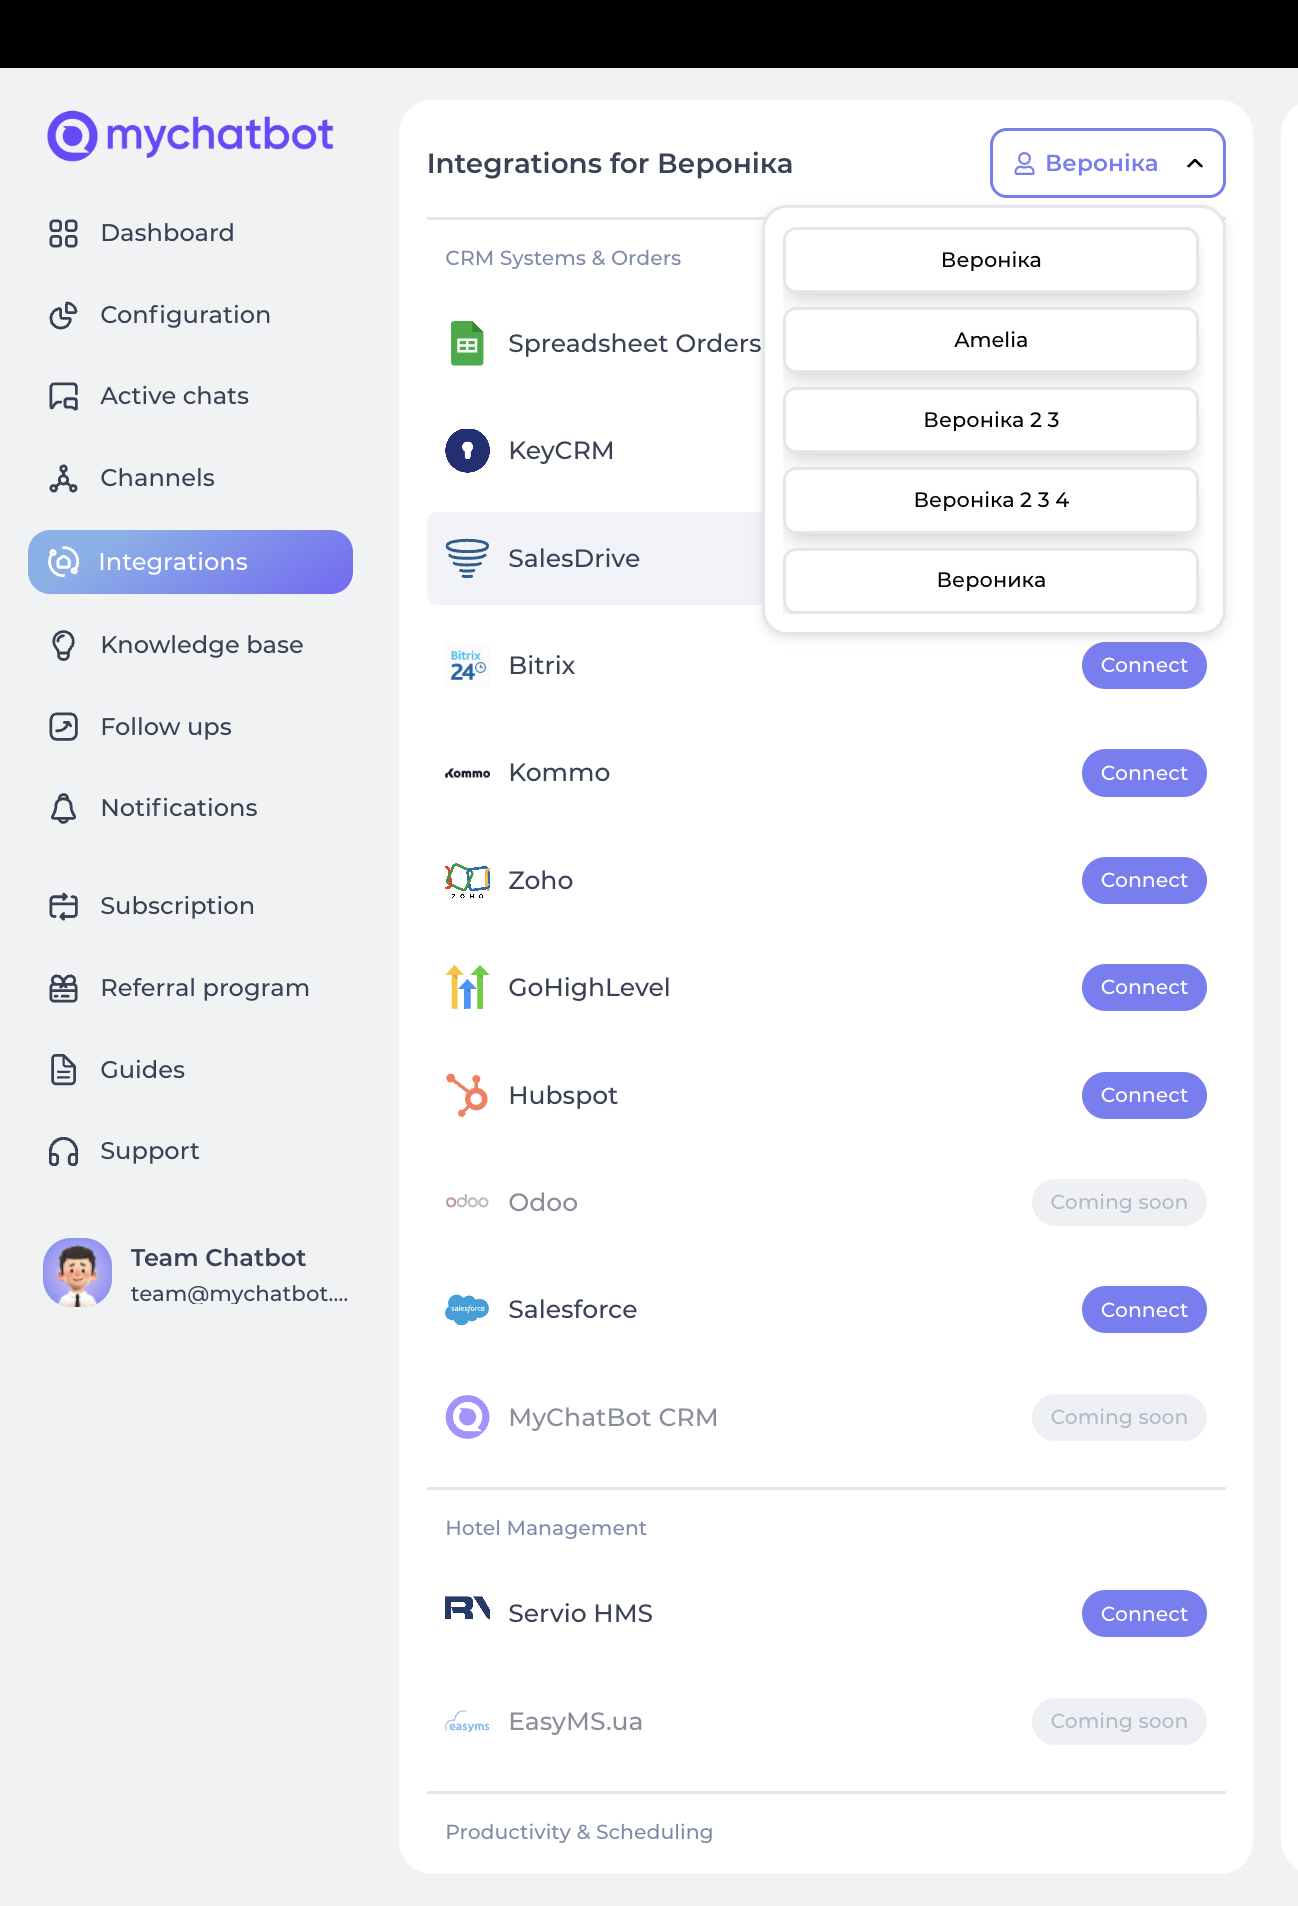
- Scroll to SalesDrive CRM in the integrations list.
- Click Connect.
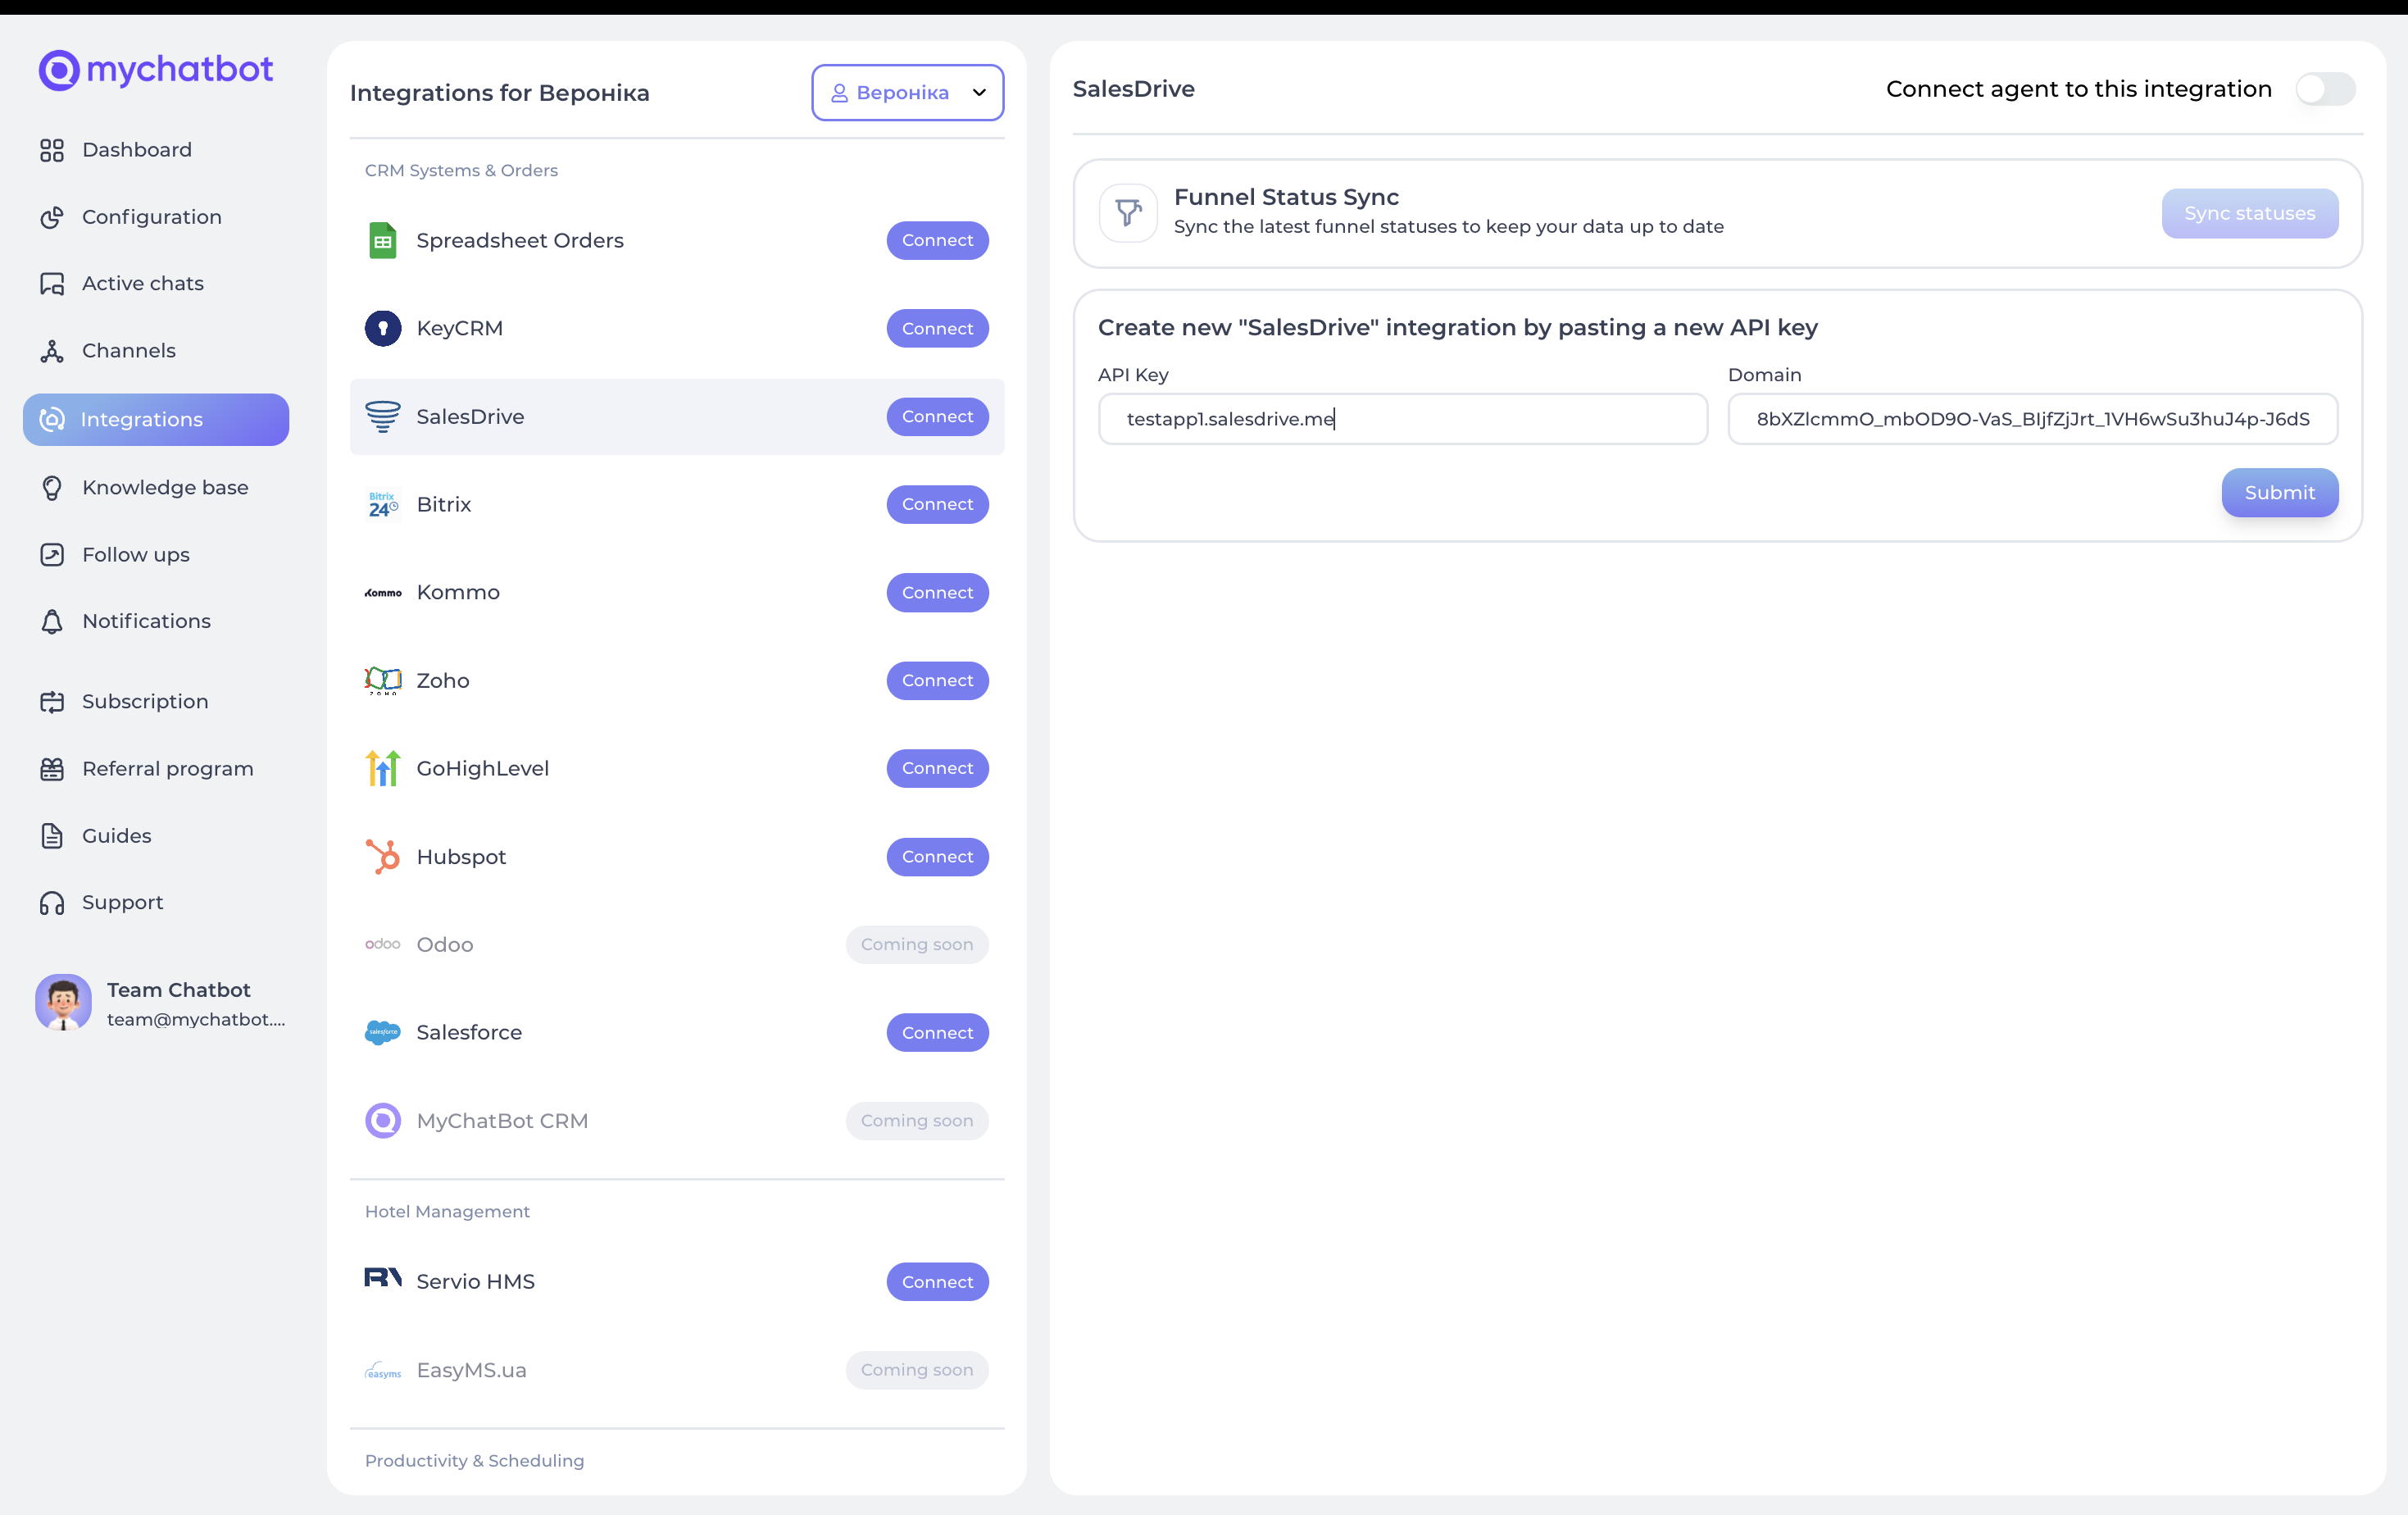
- Fill in the connect form:
- Domain: Your SalesDrive domain (e.g.
your-company.salesdrive.me) - API Key: The API key from your SalesDrive account
- Domain: Your SalesDrive domain (e.g.
- Click Submit to save the integration.
Entities & data fields configuration
Once your account is connected, choose which entities and fields the agent is allowed to fill. In the app this is the Entities & Data Fields Configuration section — "Select the entities and their fields you want the assistant to fill."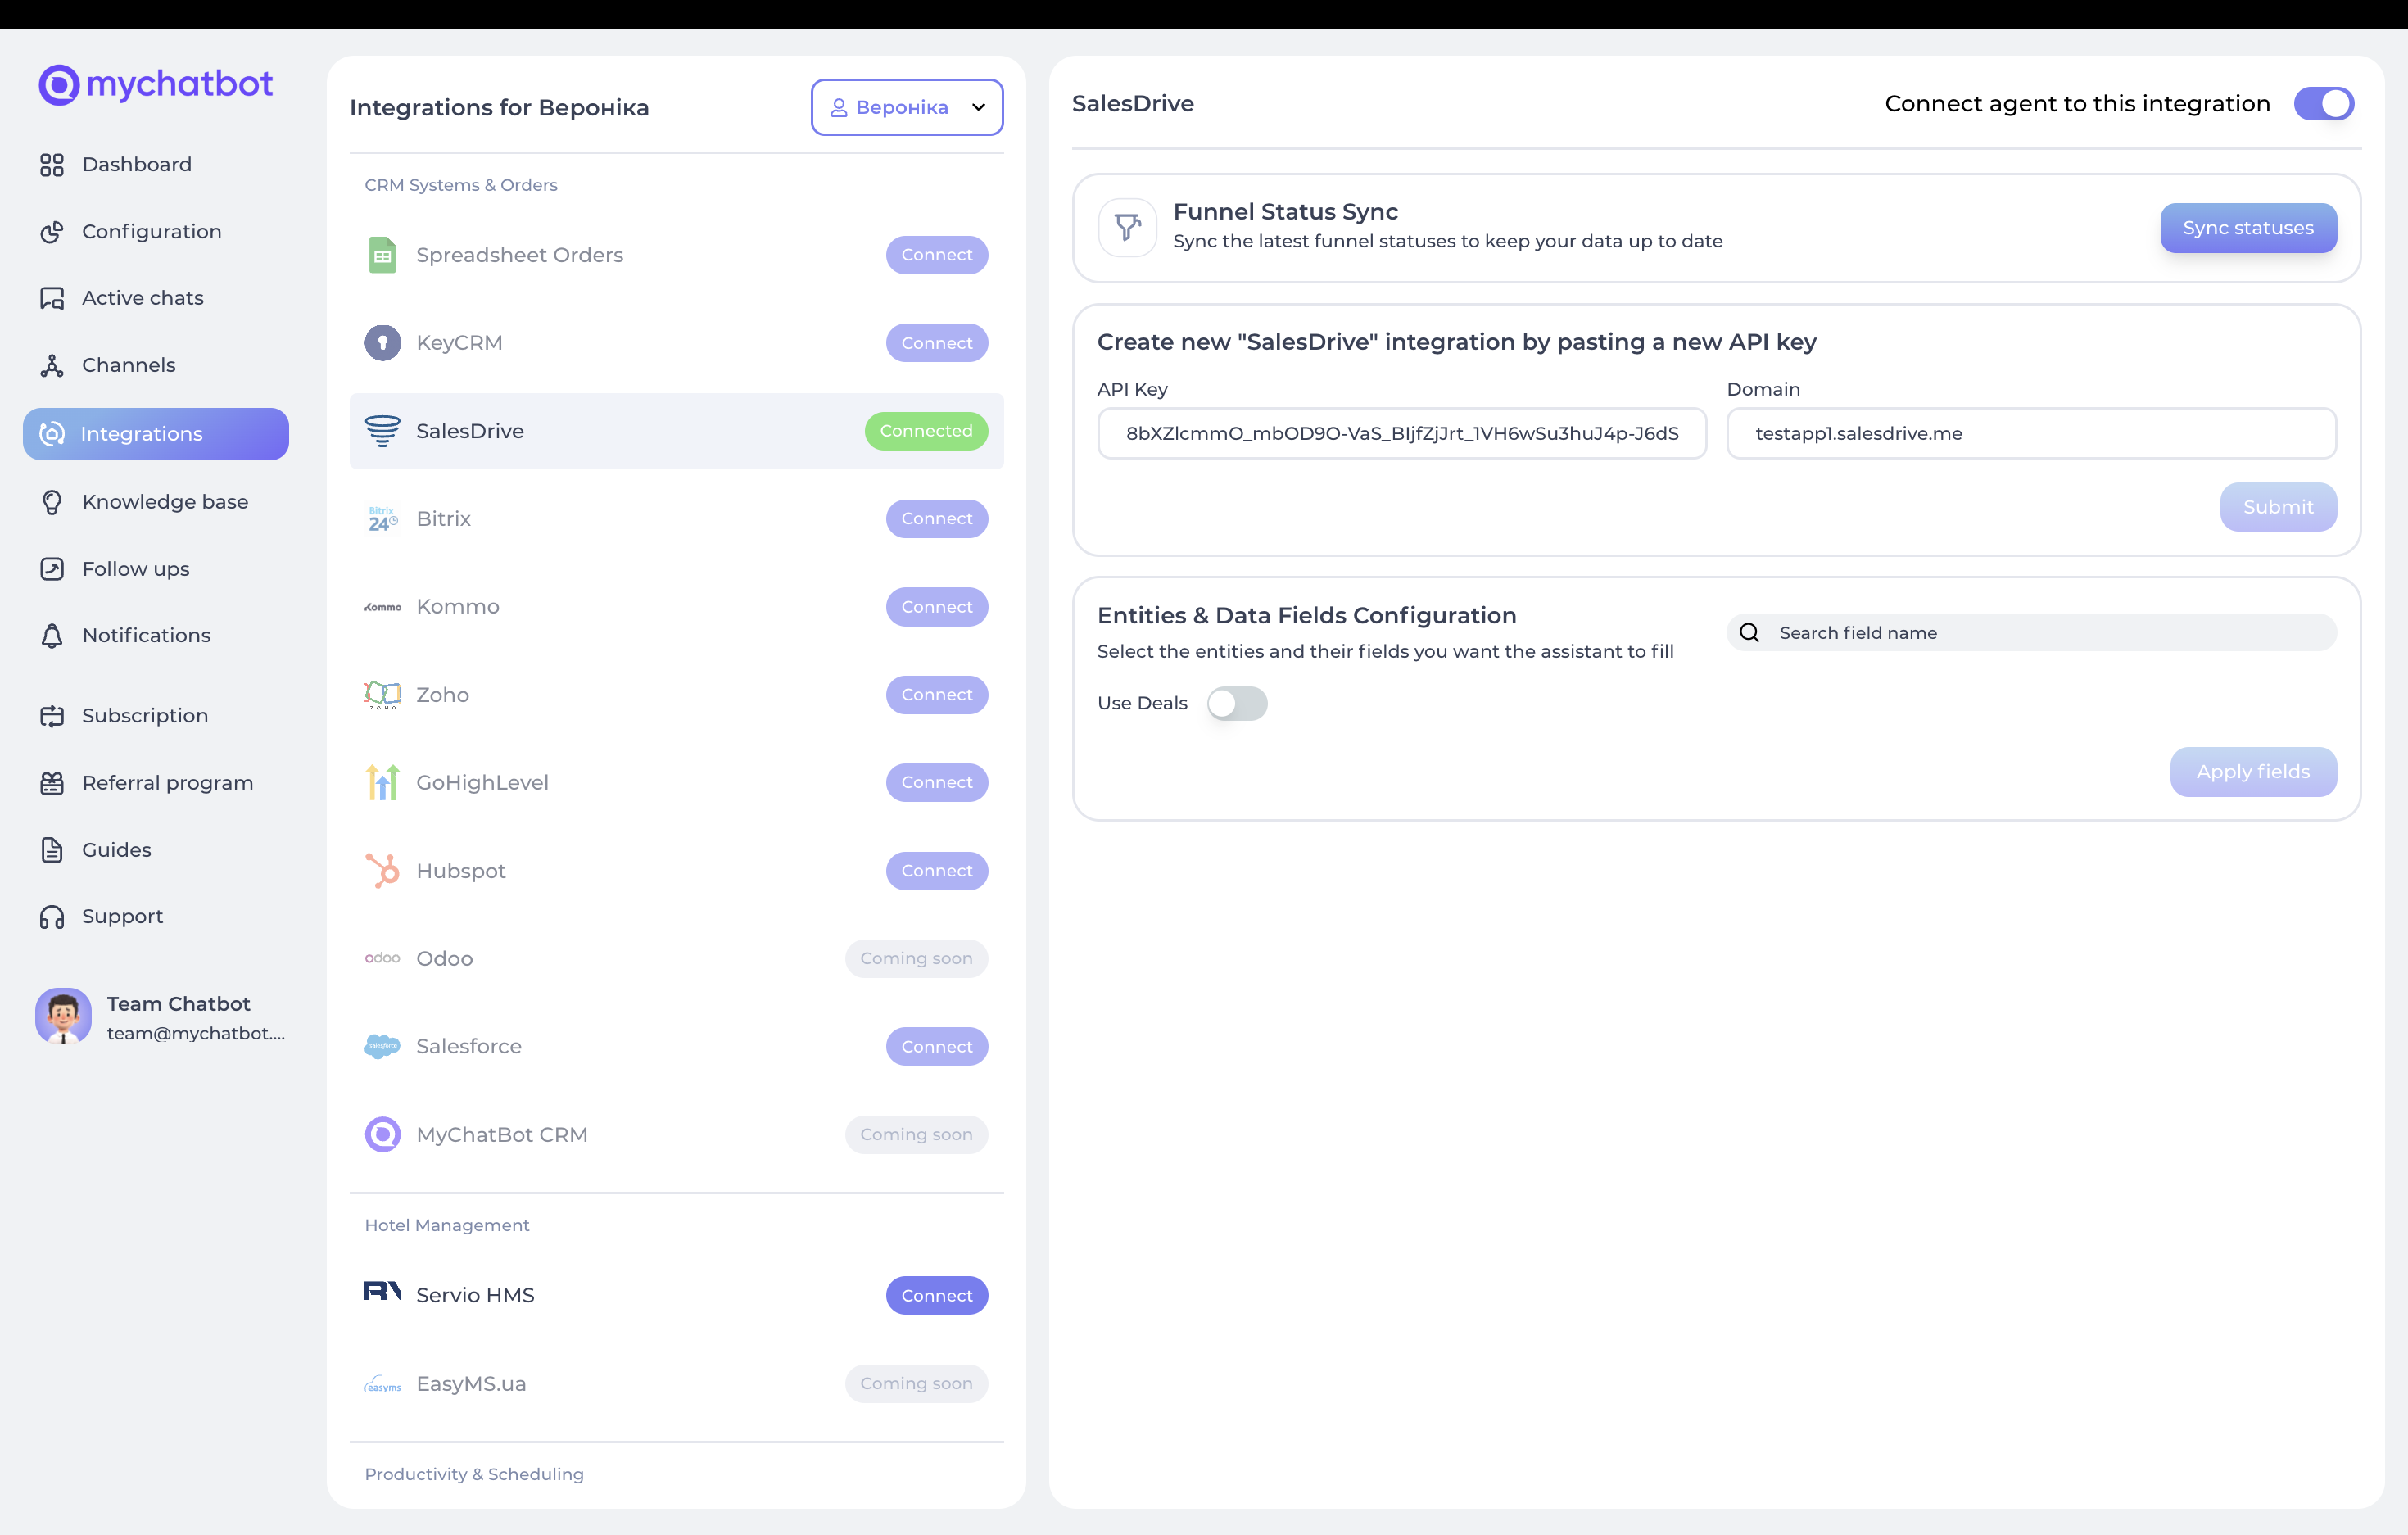
- Turn on Use Deals to let the agent create and manage deals.
- Pick the fields the agent may set for each entity:
- Standard fields — the default fields SalesDrive ships with.
- Custom fields — the extra fields you defined in your own CRM setup (shown as Most used custom fields and Other custom fields).
- Click Apply fields to save.
- Use Sync statuses at the top whenever your funnel changes. Statuses sync to the pipeline assigned to that agent.
Entity type
The SalesDrive integration works with Deals — sales transactions in progress, with their associated contact and products.
Field types
Each entity has two kinds of fields:
- Standard fields — the defaults provided by SalesDrive.
- Custom fields — fields you defined yourself, specific to your CRM setup.
Special fields
A few fields behave in a special way:
| Field | Behaviour |
|---|---|
| Status | The deal's current stage in the pipeline. Must match a status defined in SalesDrive exactly. Refresh the list with Sync statuses. |
| Source | Set automatically to AI- + your assistant's name, so you can tell which deals came from your AI agent. |
| Chat Link | Added automatically as a comment on each deal — a link back to the conversation that created it. |
| Products | A list of line items. Each product needs a name, price per item, and quantity. Description, discount, and SKU are optional. |
Working with pipelines
Deals in SalesDrive move through the stages of a pipeline:
- New deals are created in the default pipeline assigned to your agent.
- Stages move a deal through your sales process.
- Your agent advances a deal by updating its status as the conversation progresses.
What your agent can do
Once SalesDrive CRM is connected, your agent gains two capabilities.
TIP
Every field you enable in Entities & Data Fields Configuration becomes a field your agent can fill on a deal.
| Capability | What happens |
|---|---|
| Create a deal | Creates a new deal, automatically creating and linking the contact, adding any products, stamping the Source and Chat Link. |
| Update a deal | Updates an existing deal — moves it to a new Status/stage, updates contact details, and writes new values into any enabled field. |
Fields on a new deal
- Full name (required)
- Phone
- Payment method
- Shipping method
- Shipping address
- Company
- Products — each with a name, price per item, and quantity; optionally description, discount, and SKU
- Any custom fields you enabled
When a deal is created, MyChatBot also creates the contact, links the deal to it, adds the products, attaches the chat link back to the conversation, and sets the source to identify your AI agent.
Fields when updating a deal
- Full name
- Phone
- Status — moves the deal to that stage in the pipeline
- Any custom fields you enabled
Guiding the agent from its instructions
You steer these actions from your agent's instructions (the Role, Skills & Communication section for that agent). Describe, in plain language, when to create a deal and how to move it through your funnel — the agent maps that to the SalesDrive actions on its own.
In the app
Open your agent, edit its instructions, and paste guidance like the examples below. Changes apply after you save.
Creating deals
When a customer expresses interest in our services, create a new deal in SalesDrive with:
- Their full name
- Their phone number
- Payment and shipping method if provided
- Shipping address if applicable
- Their email address
- Status set to "New"
- Any product details: name, price and quantity
Updating deal status
When a customer requests a call back:
1. Create a new deal if they're new
2. Update the deal's status to "Callback Requested"
3. Add the preferred callback time to the comments

When a customer confirms an appointment:
1. Update the deal's status to "Appointment Scheduled"
2. Add the appointment details to the comments field
For deal progression:
When a customer completes a payment:
1. Move the deal to "Closed Won"
2. Record the payment method
3. Add payment details to the comments field

When a customer declines to proceed:
1. Move the deal to "Closed Lost"
2. Add the reason for declining in the comments field
Handling products
When a customer orders products:
1. Create a deal with their contact information
2. Add each product with:
   - Product name
   - Price per item
   - Quantity
   - Any applicable discount
   - SKU if available
3. Include shipping details
4. Set the payment method