
Appearance
HubSpot CRM Integration
The HubSpot CRM integration lets your MyChatBot agent create and manage leads, deals, and contacts directly in your HubSpot account. Your AI assistant handles CRM work during the conversation — no manual data entry — so sales and customer records stay up to date automatically.
At a glance
| You need | Where | Result |
|---|---|---|
| Admin access to HubSpot | Settings > Integrations > Private Apps | Create a private app |
| A private app API key (all scopes) | HubSpot private app | Token to authenticate MyChatBot |
| The agent connected | MyChatBot Integrations tab | Paste the API key, click Submit |
| Entities & fields enabled | Entities & Data Fields Configuration | Leads / Deals / Contacts available to the agent |
Connect in 3 steps:
- Create a HubSpot private app and copy its API key.
- In MyChatBot, select your agent, connect HubSpot under CRM Systems, and paste the key.
- Enable entities (Use Leads / Use Deals), select the fields the agent may fill, then click Apply fields.
Once connected, your agent can
- Create a lead when a customer shows interest.
- Update a lead (change its status/stage, edit details) as the conversation progresses.
- Create a deal, optionally with product line items.
- Create or update a contact.
Each of these maps to an entity you enable in the field configuration — you don't call anything by hand, the agent decides when to act based on its instructions.
Create an API key in HubSpot
- Log in to your HubSpot account as an administrator.
- Navigate to Settings > Integrations > Private Apps.

- Click Create a private app.
- Provide a name for your app (e.g. "MyChatBot Integration").

- Select all scopes to allow the necessary access, including:
- CRM
- CMS
- Communication preference
- Marketing
- Settings
- Other
- Click Create App to generate your API key.
- Copy your API key — you'll need it to set up the integration in MyChatBot.

Connect the integration in MyChatBot
In the app
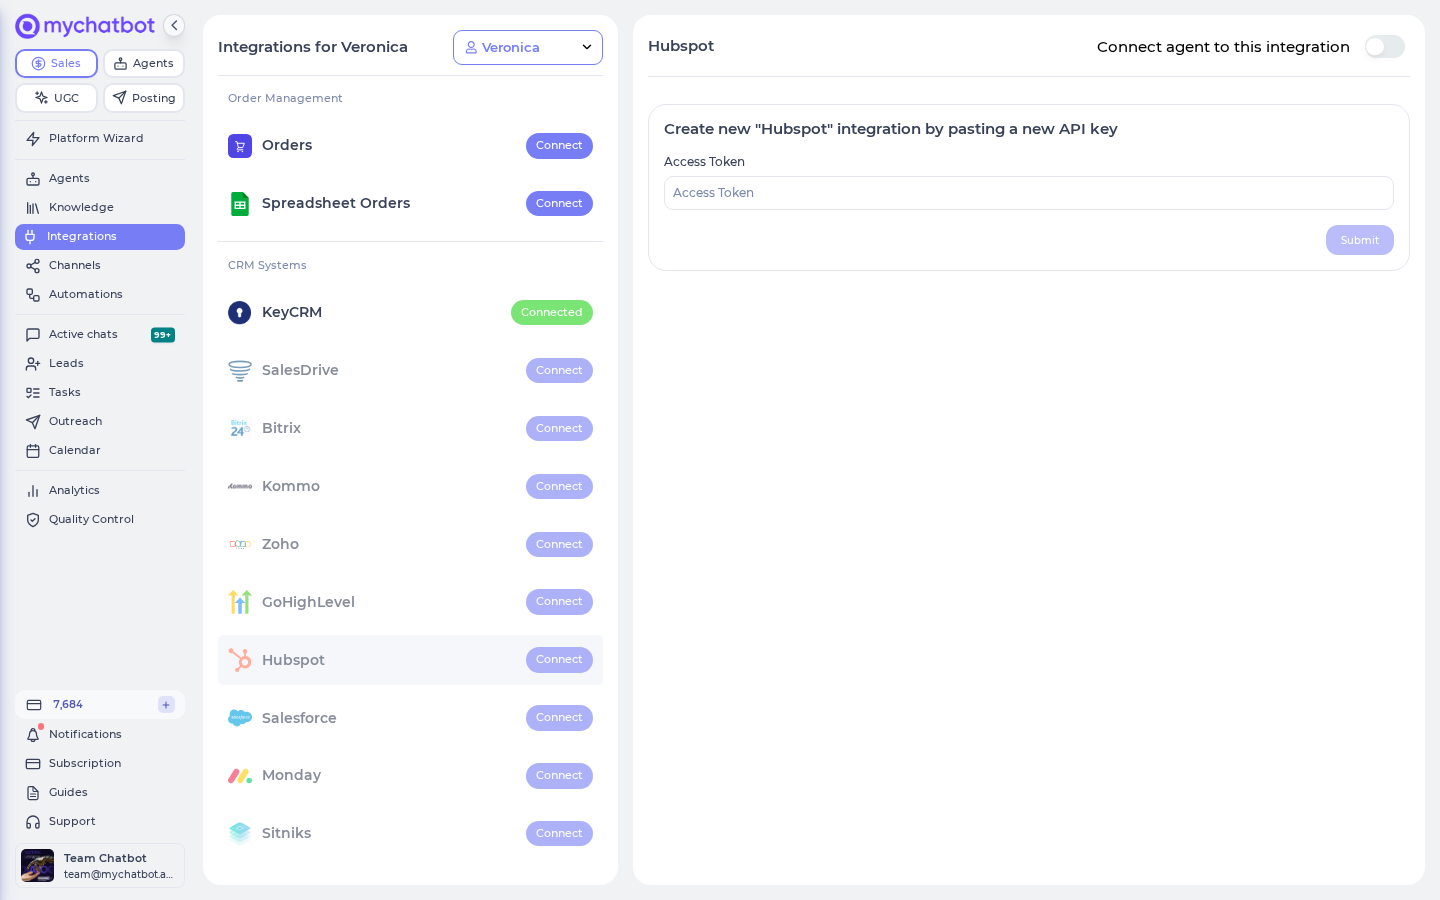
Open Integrations, pick your agent, find HubSpot under CRM Systems, and click Connect → app.mychatbot.app/integration?integration=Hubspot
- Open the Integrations tab in your MyChatBot dashboard.
- Select the agent you want to connect to HubSpot.

- Scroll to CRM Systems and find HubSpot in the list.
- Click Connect.
- Paste your HubSpot API Key (the key you created above).

- Click Submit to save the integration.
Entities & data fields configuration
After connecting your HubSpot account, choose which entities and fields your agent can access. This section is titled Entities & Data Fields Configuration — "Select the entities and their fields you want the assistant to fill." 
- Toggle Use Leads to let the agent manage leads, and Use Deals to let it manage deals.
- For each enabled entity, pick the fields the agent may write:
- Standard fields — HubSpot's default fields (shown under "Standard fields").
- Custom fields — fields specific to your CRM (shown under "Most used custom fields" / "Other custom fields").
- Use Select Pipeline to choose which HubSpot pipeline this agent writes to.
- Click Apply fields to save your selection.
- To pull in the latest pipeline stages, use Sync statuses in the Funnel Status Sync section at the top. Statuses sync to the agent's assigned pipeline.
Entity types
The HubSpot integration works with three entity types:
- Leads — potential sales opportunities.
- Deals — sales transactions in progress.
- Contacts — individual client records.
Field types
Each entity exposes two kinds of fields in the configuration:
- Standard fields — HubSpot's built-in fields.
- Custom fields — fields you've defined in your own CRM setup.
Only the fields you tick (and click Apply fields on) are ones the agent is allowed to fill.
Fields that behave specially
A few fields deserve extra attention:
| Field / concept | What to know |
|---|---|
| Status (lead stage) | The current stage in the lead pipeline (e.g. "New", "In Progress", "Qualified", "Disqualified"). It must match a status defined in your HubSpot pipeline exactly. Use Sync statuses to pull the current list. |
| Pipeline stage | You can also target a specific stage by its HubSpot pipeline-stage ID when a display name is ambiguous — useful when several stages share similar names. |
| Source | Auto-filled by MyChatBot to mark records that came from the AI. Leads are tagged with "AI-" plus your assistant's name; deals are tagged with the communication channel or "AI". Great for reporting on AI-sourced pipeline. |
| Chat link | Auto-added to every lead and deal. It links the CRM record back to the exact conversation that generated it, so your team can read the full context in one click. |
HubSpot statuses must match exactly
Status values must match the statuses in your HubSpot account exactly. A mismatched status string won't map to a pipeline stage, and the record can land in the wrong place. Run Sync statuses after you change your pipeline, and target a stage by its pipeline-stage ID when you need to be precise.
Working with products
Deals can include products as line items. When the agent creates a deal, it can attach one or more products, each with:
- name — product name.
- sku — product SKU (needed if a new product must be created).
- price — product price.
- quantity — number of units.
The agent matches an existing HubSpot product when it can (by product or line-item reference, or by name/SKU) and creates a new product only when no match exists. MyChatBot keeps the deal linked to the originating conversation so the order context is never lost.
What your agent can do in HubSpot
Once connected, the enabled entities give your agent these capabilities. You don't trigger them manually — the agent acts based on its instructions and the conversation.
| Capability | What the agent does | Enable via |
|---|---|---|
| Create a lead | Adds a new lead, finds-or-creates a matching contact by phone, links them, sets the status, tags the source as AI, and adds the chat link. | Use Leads |
| Update a lead | Edits an existing lead — name, phone, status/stage, or any configured field. | Use Leads |
| Create a deal | Adds a new deal (name and phone required), attaches product line items, finds-or-creates the contact, sets the deal stage, and adds the chat link. | Use Deals |
| Create / update a contact | Creates a contact (name and phone required) or updates an existing one; if a matching lead exists it's updated too, and the client's record in MyChatBot stays in sync. | Contacts (auto with Leads/Deals) |
Every field you tick in Entities & Data Fields Configuration becomes something the agent is allowed to fill for these actions — so the fields you enable directly control how much detail lands in HubSpot.
Require a phone number
Under the field configuration you can toggle Lead Phone Required / Deal Phone Required so the agent must capture a phone number before creating a record. Since contacts are matched by phone, this keeps duplicates down.
Guiding the agent from its instructions
The agent creates and updates CRM records based on your agent instructions — write these in plain language. You don't reference any function names; just describe when and with what the agent should act.
In the app
Edit these in your agent's Instructions — app.mychatbot.app.
Creating leads:
When a customer expresses interest in our services, create a lead in HubSpot:
- Use their name as the full name
- Include their phone number
- Set the status to "New"
- Fill in any other relevant fields
Creating deals:
When a customer confirms they want to buy, create a deal in HubSpot:
- Use their full name and phone number
- Add the products they're interested in (name, SKU, price, quantity)
- Set the deal stage to "Appointment Scheduled"
Updating lead status:
When a customer asks for a call back:
- Update the lead status to "In Progress"
- Note the preferred callback time

When a customer confirms interest:
- Update the lead status to "Qualified"
- Add any extra details
Adding contacts:
When talking with a new customer:
- Create a contact with their full name and phone number
- Let them know their details have been saved
- Continue the conversation
Remember: status names in your instructions must match your HubSpot pipeline stages exactly (run Sync statuses first), and only fields you enabled in the configuration will be written.