
Appearance
Bitrix24 CRM Integration
Overview
The Bitrix24 CRM integration allows your MyChatBot agent to create and manage leads, deals, and contacts directly in your Bitrix24 account. This enables your AI assistant to perform CRM operations without human intervention, streamlining your sales process and customer management.
App Creation on Bitrix24
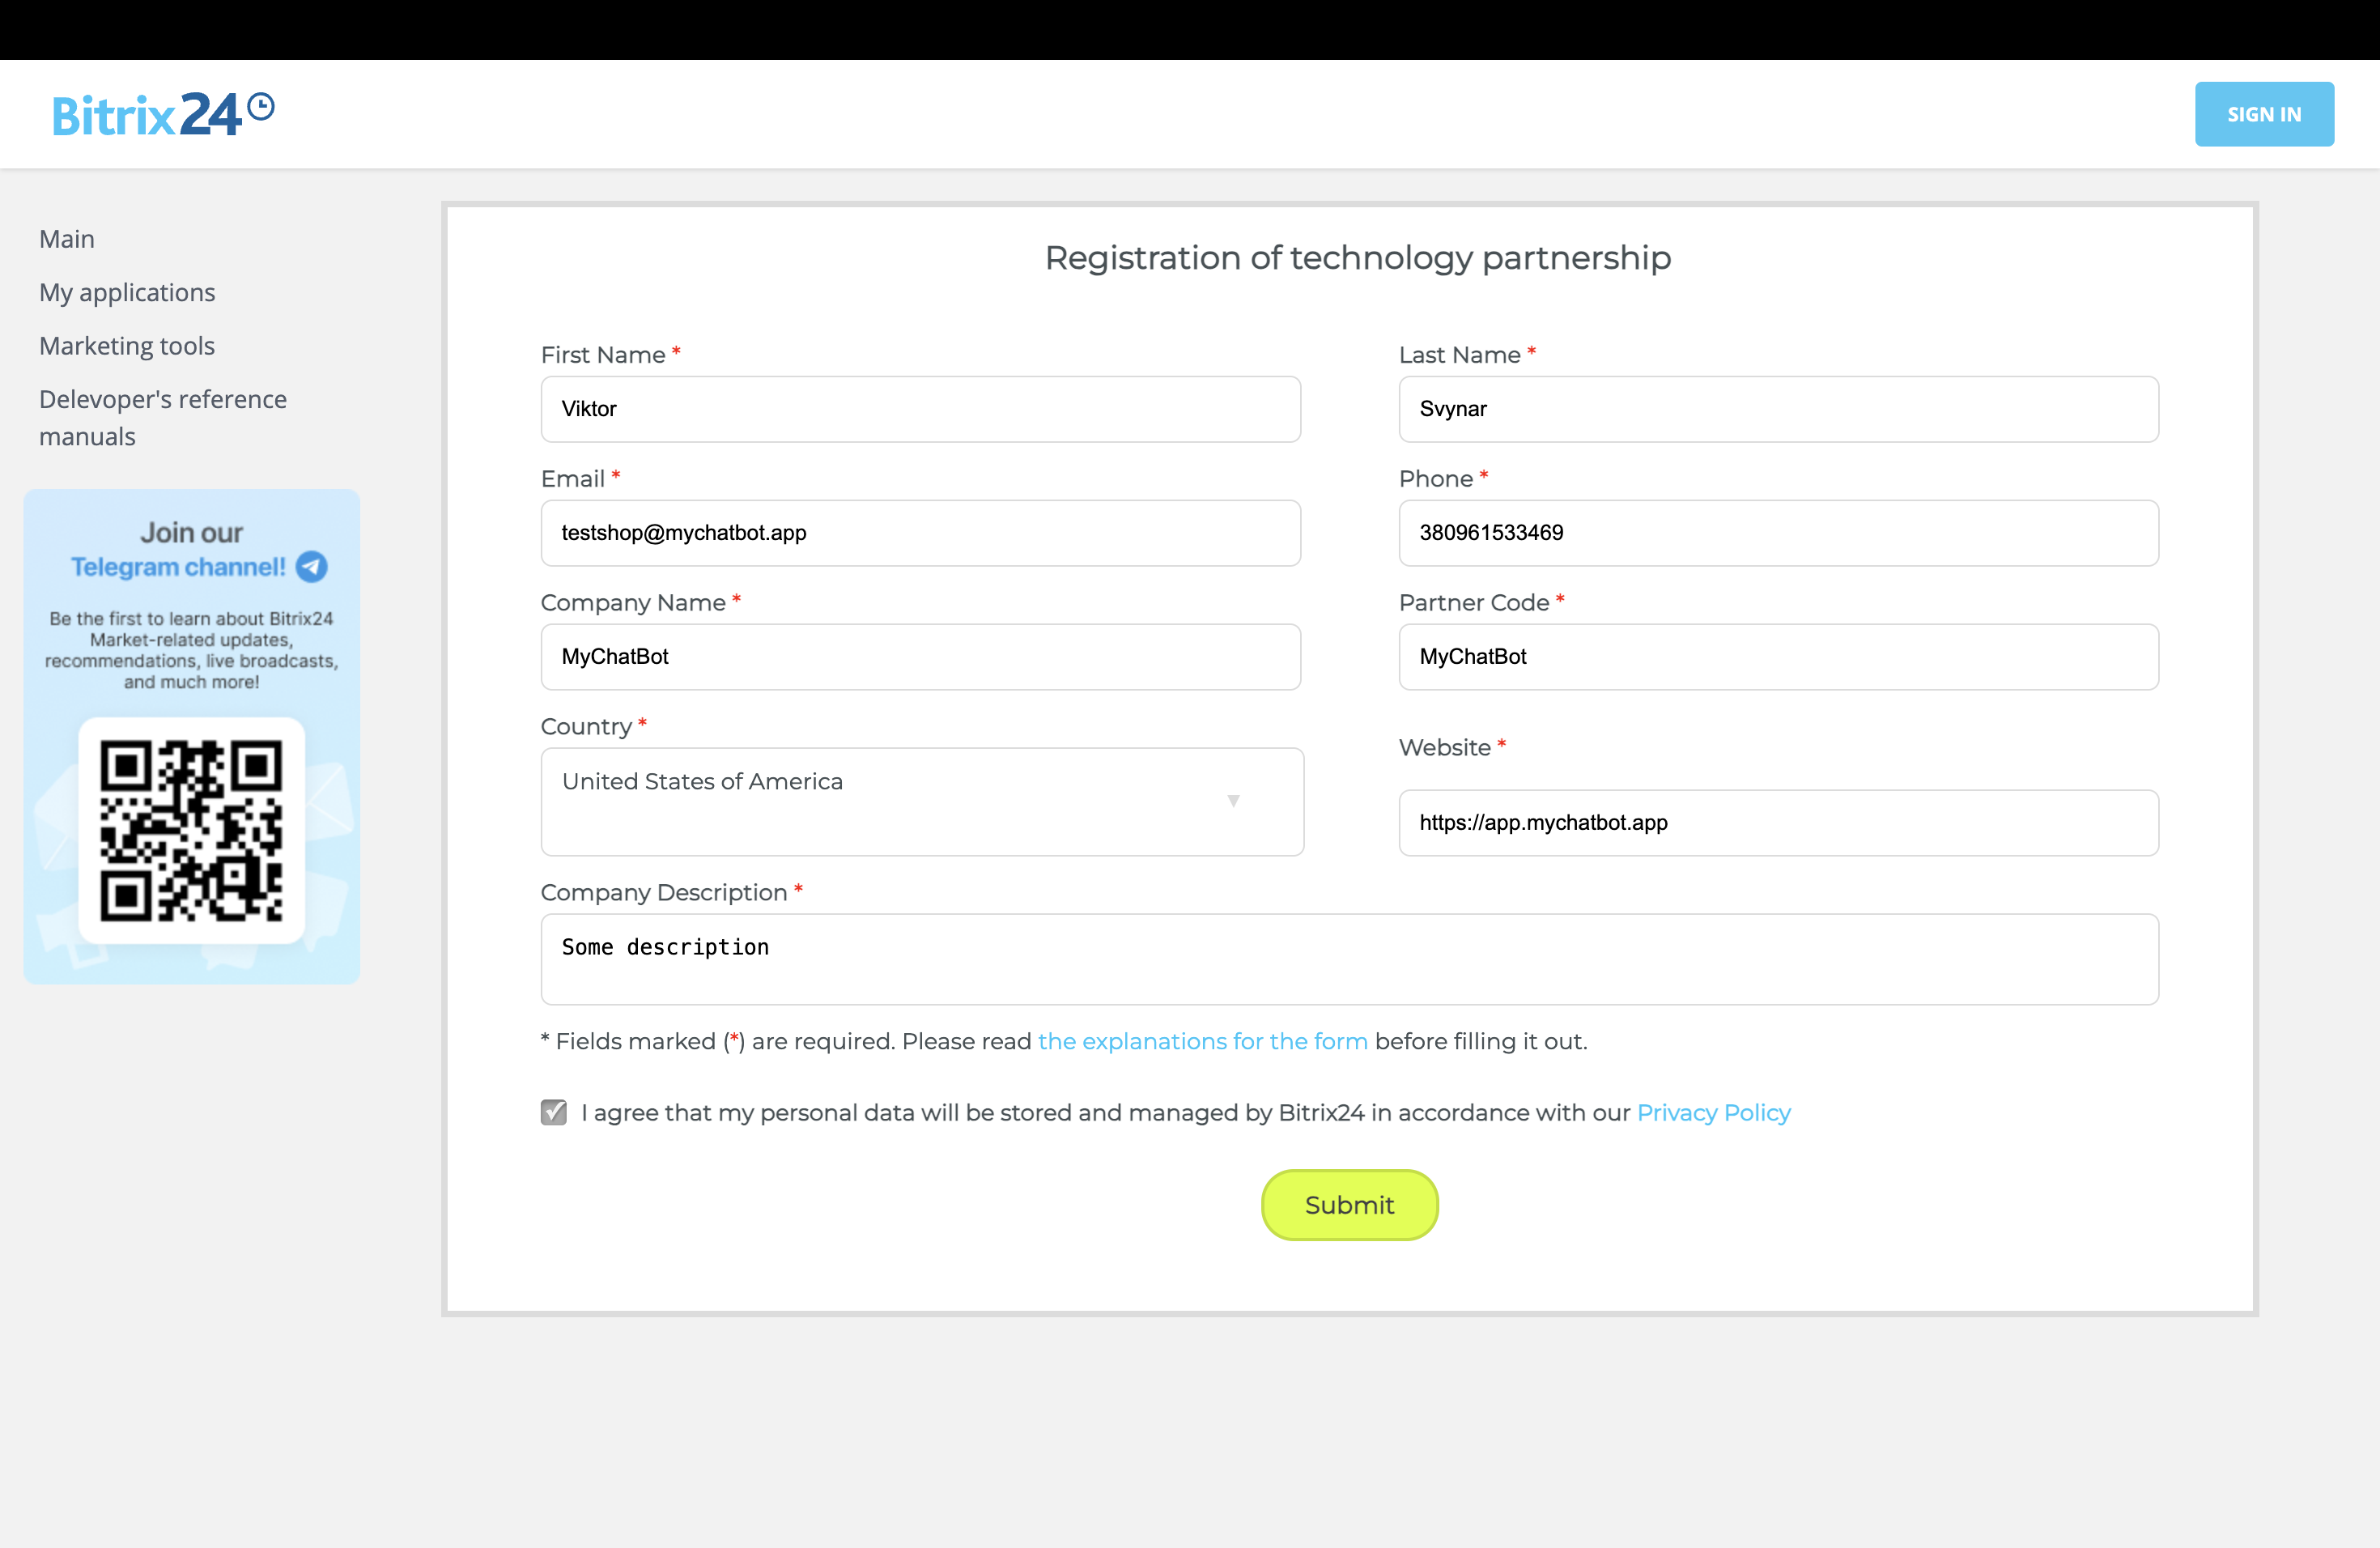
- Log in to your Bitrix24 account as an administrator. For this you need to fill this Registration of technology partnership form - https://vendors.bitrix24.com/technology-partnership/
- Navigate to https://vendors.bitrix24.com/app/ and select My Applications
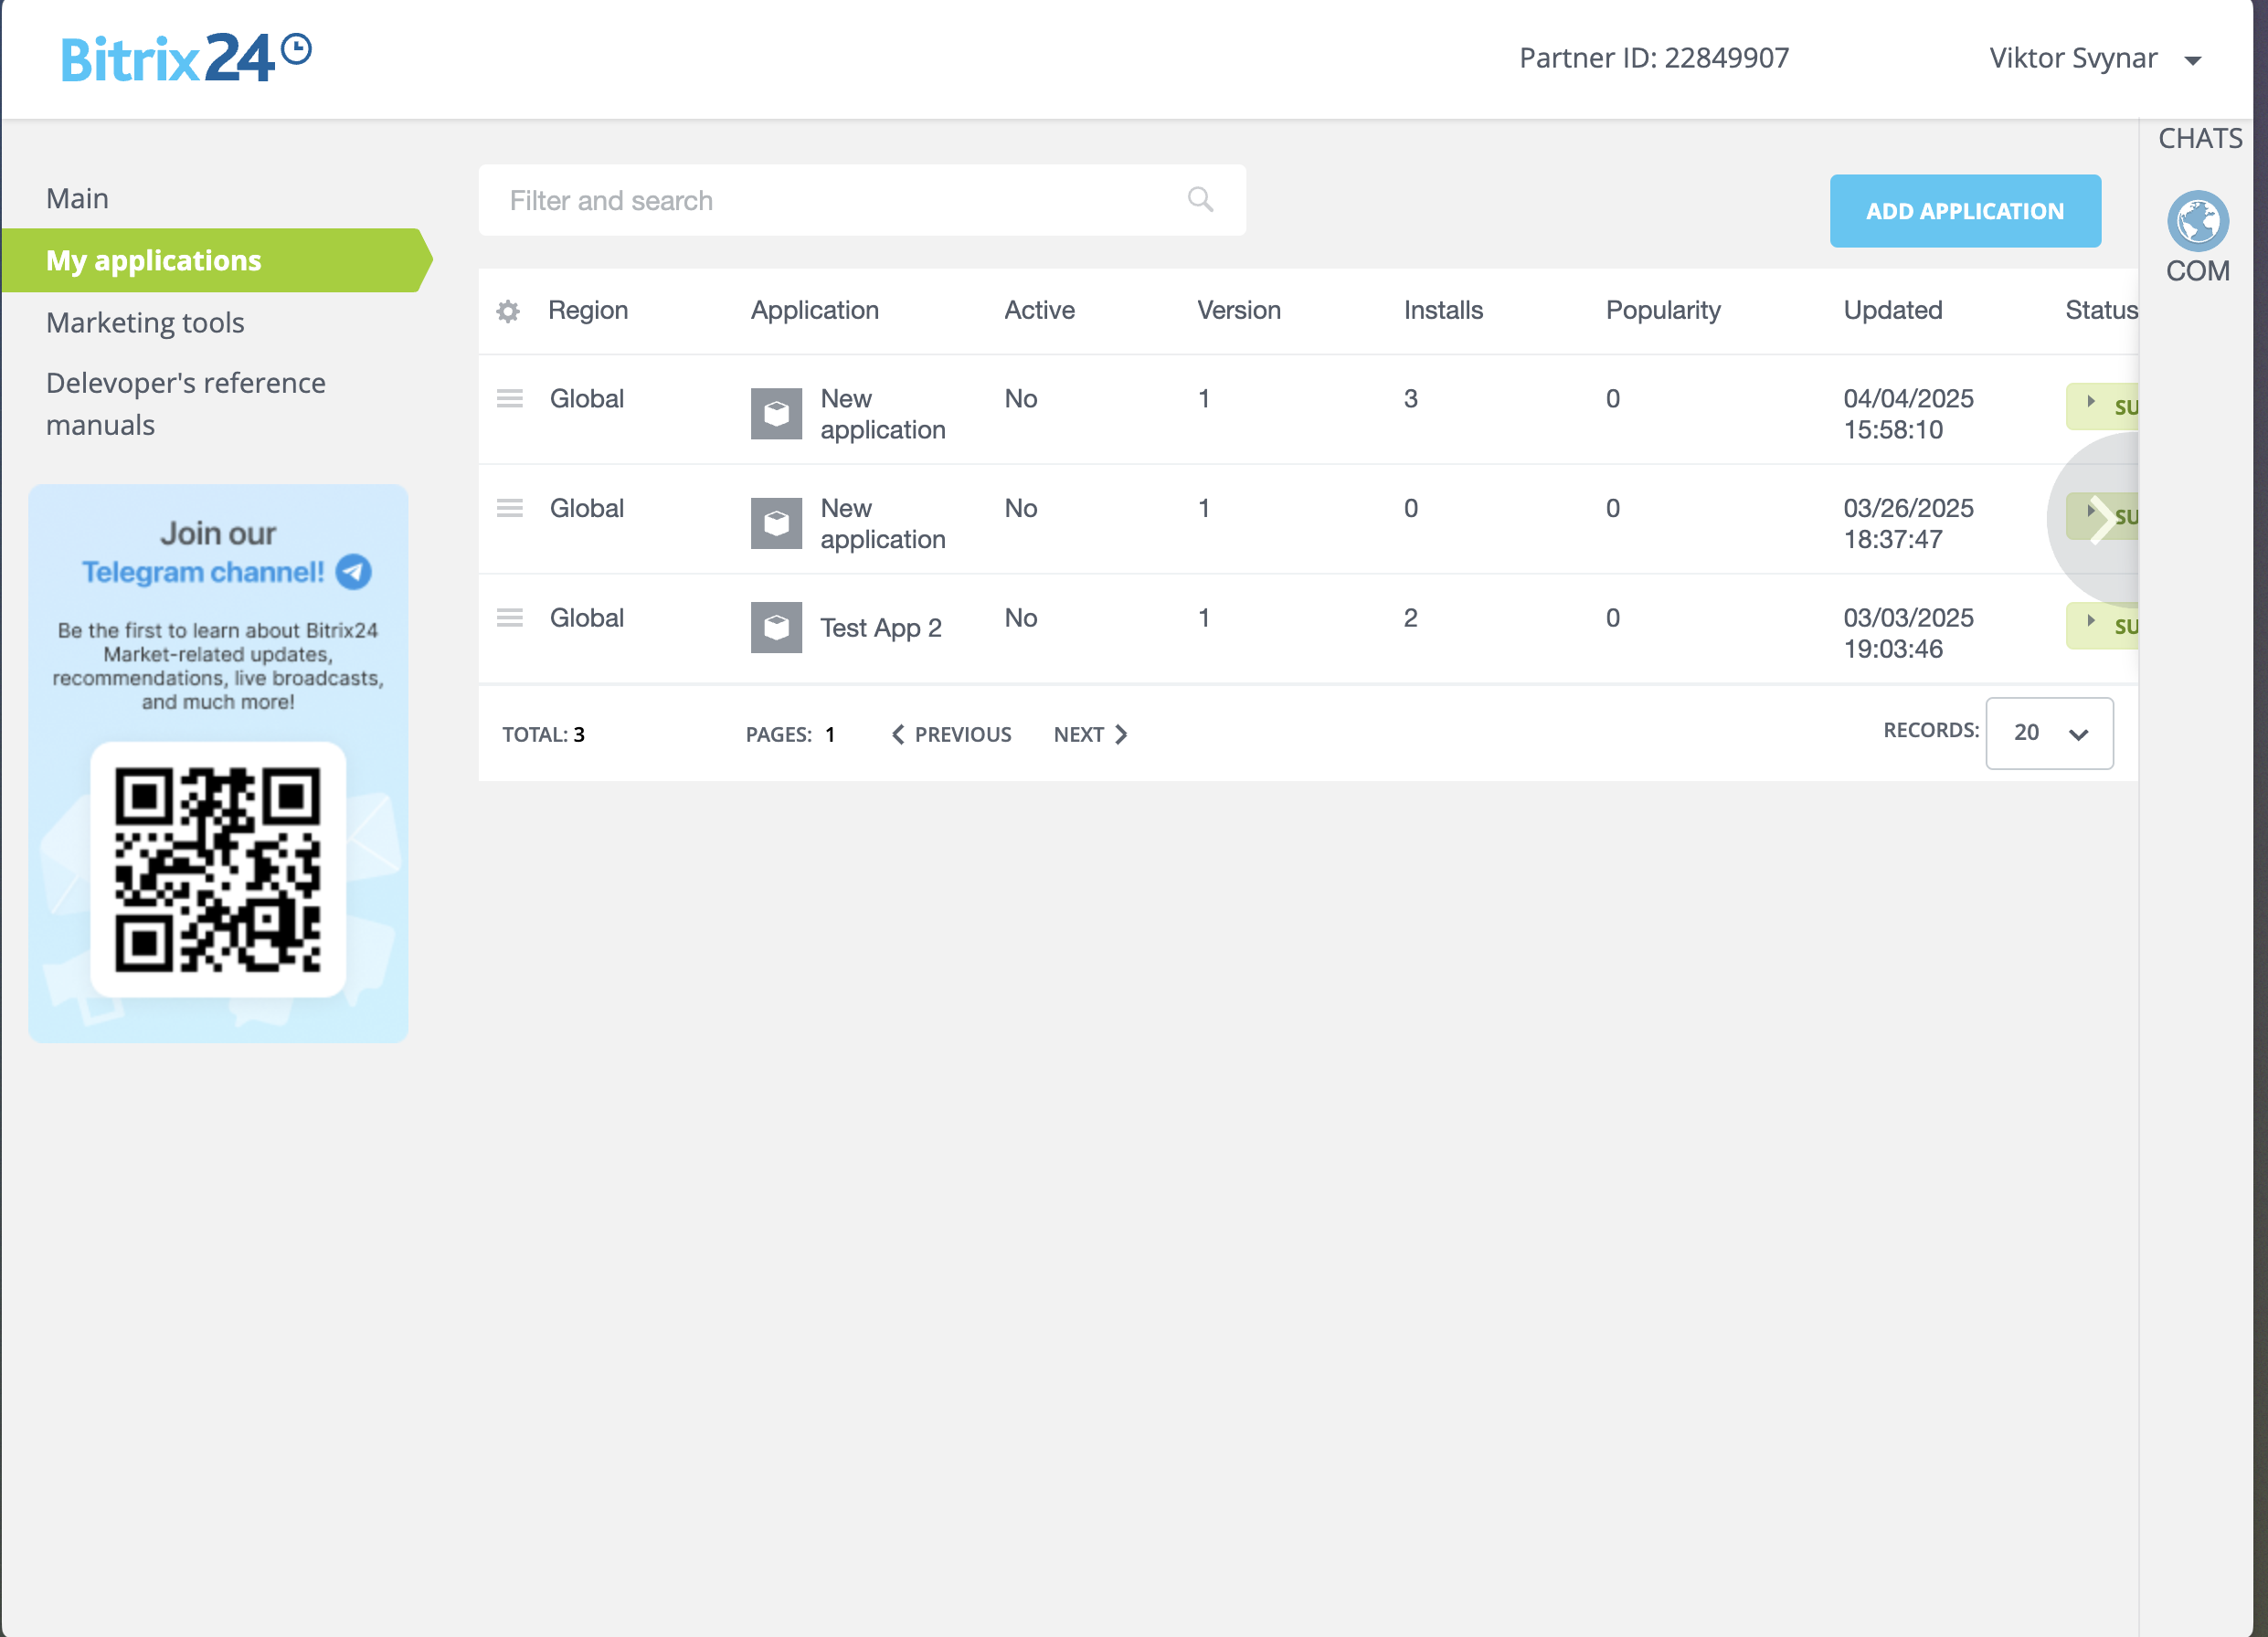
- Click Add Application
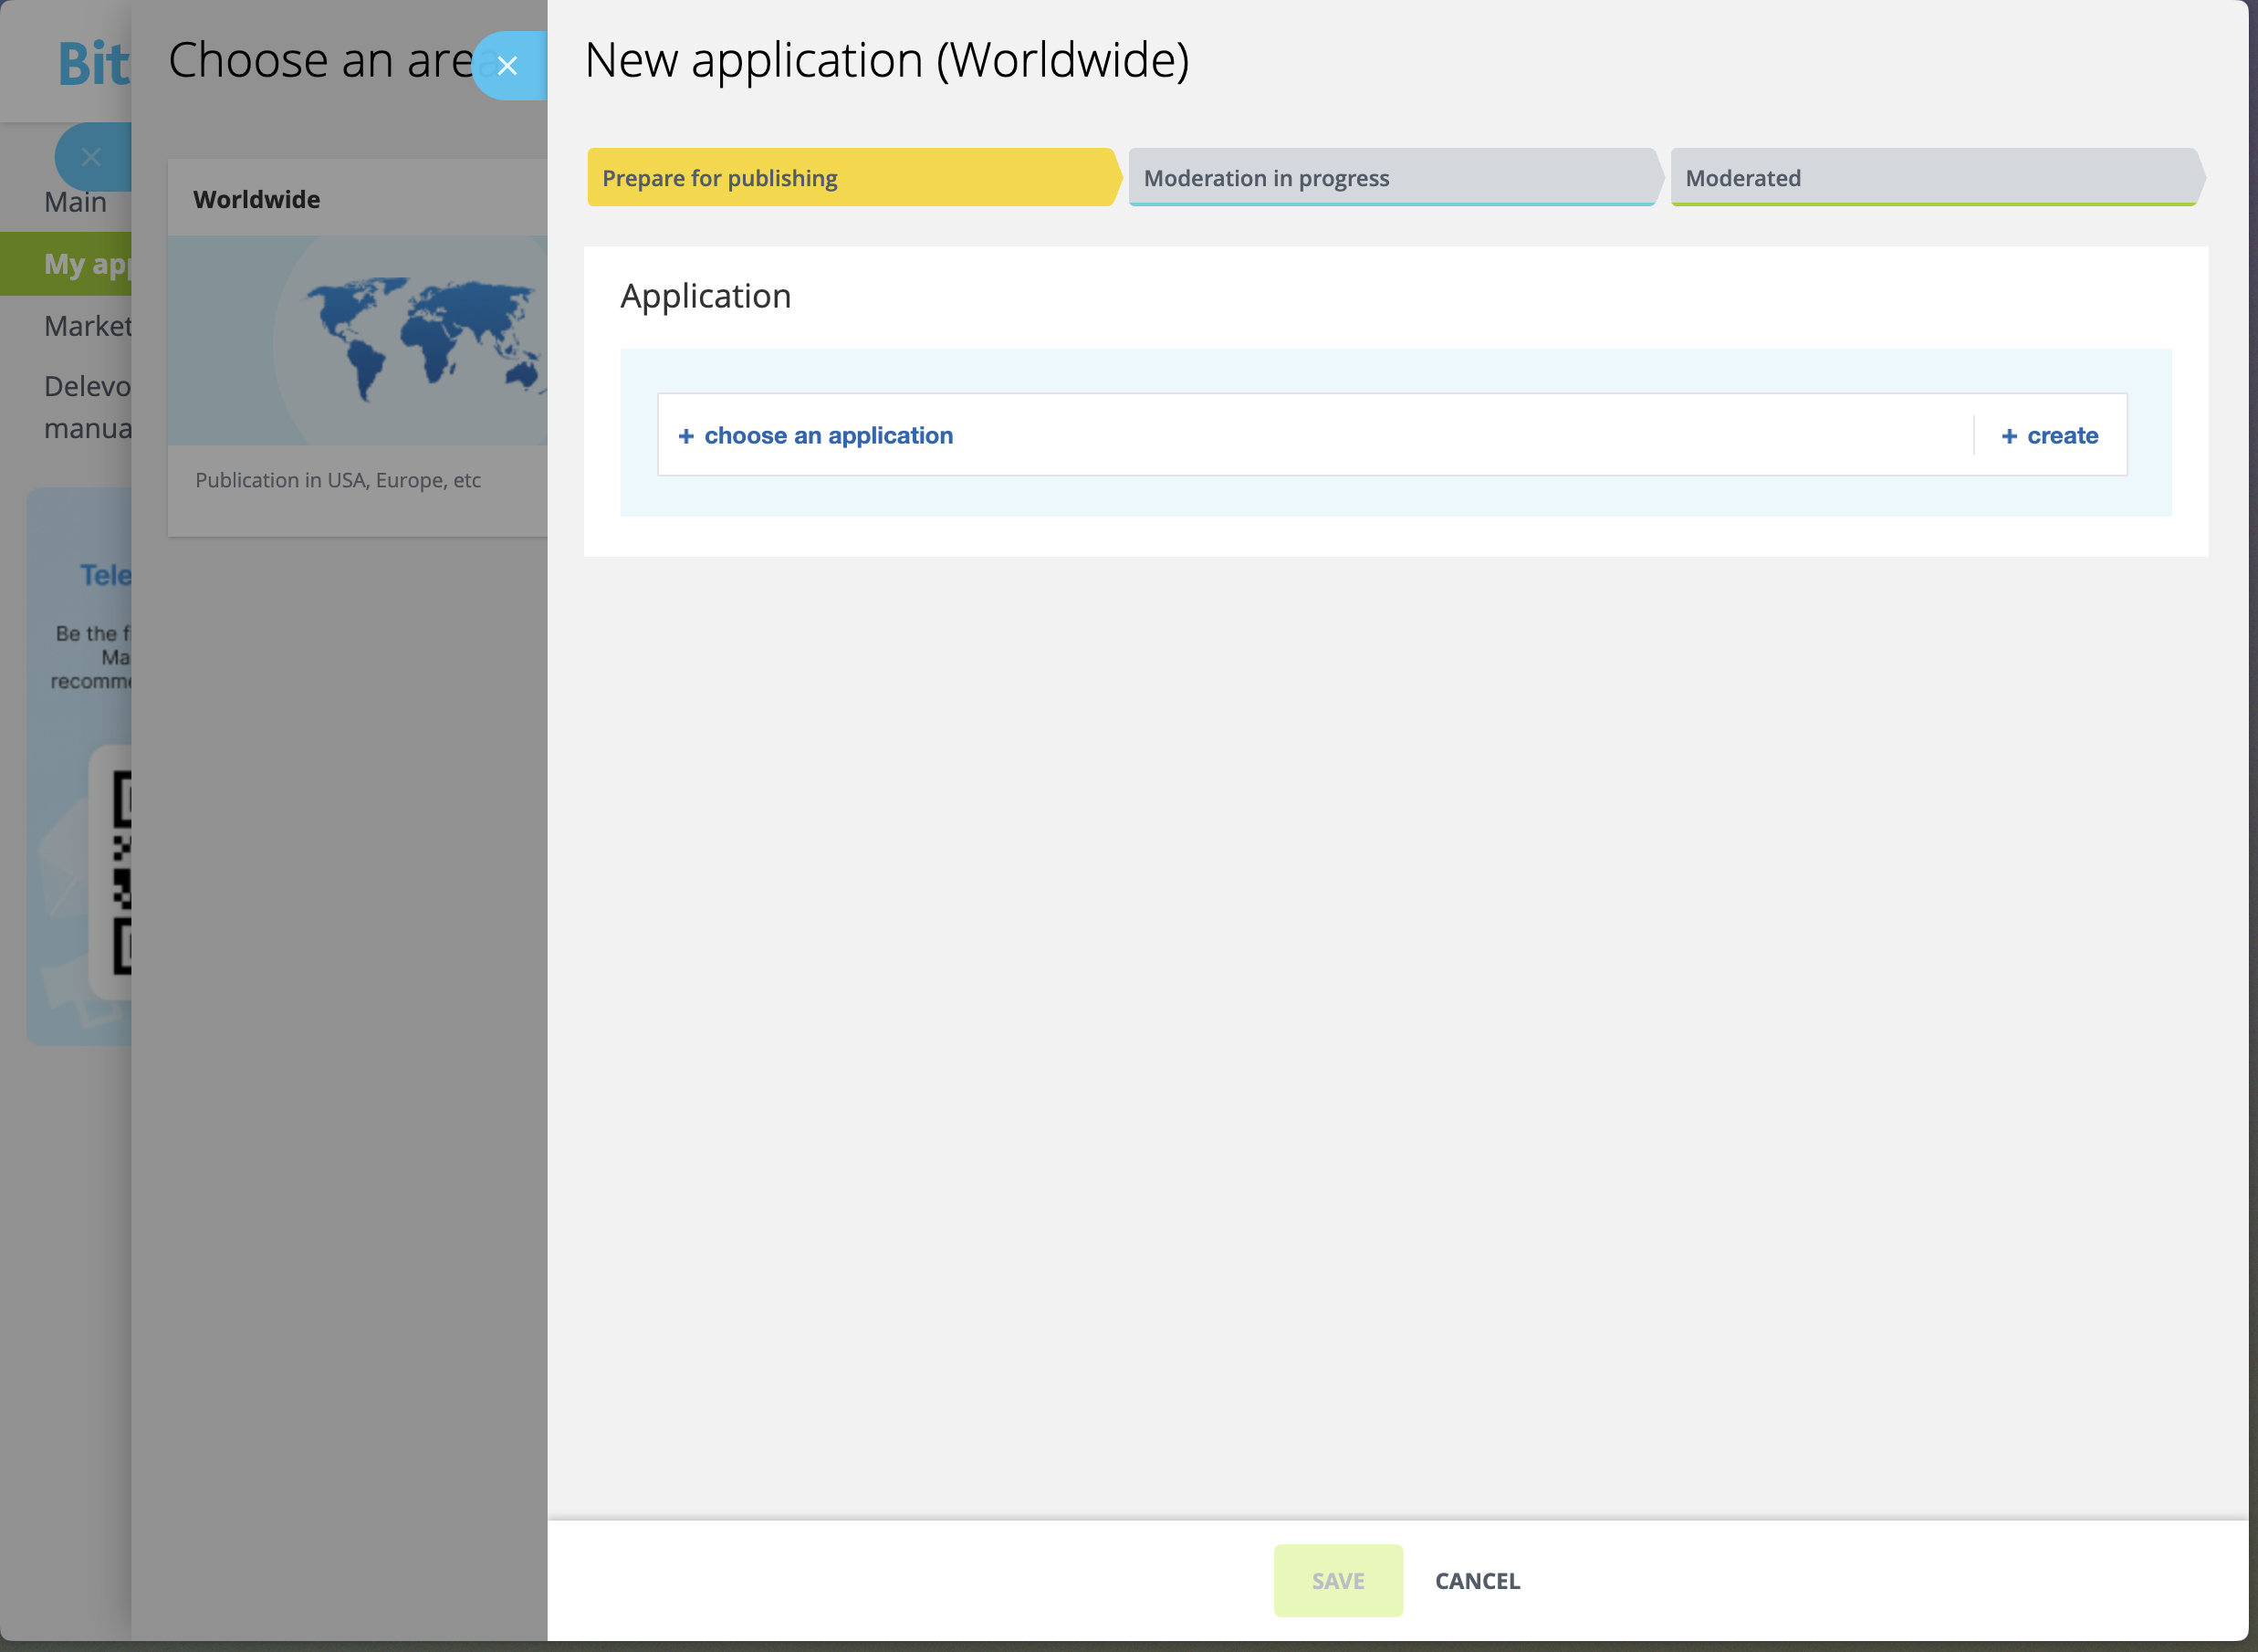
- In Choose an area click Worldwide
- In Application block click + create and in Application version 1 block
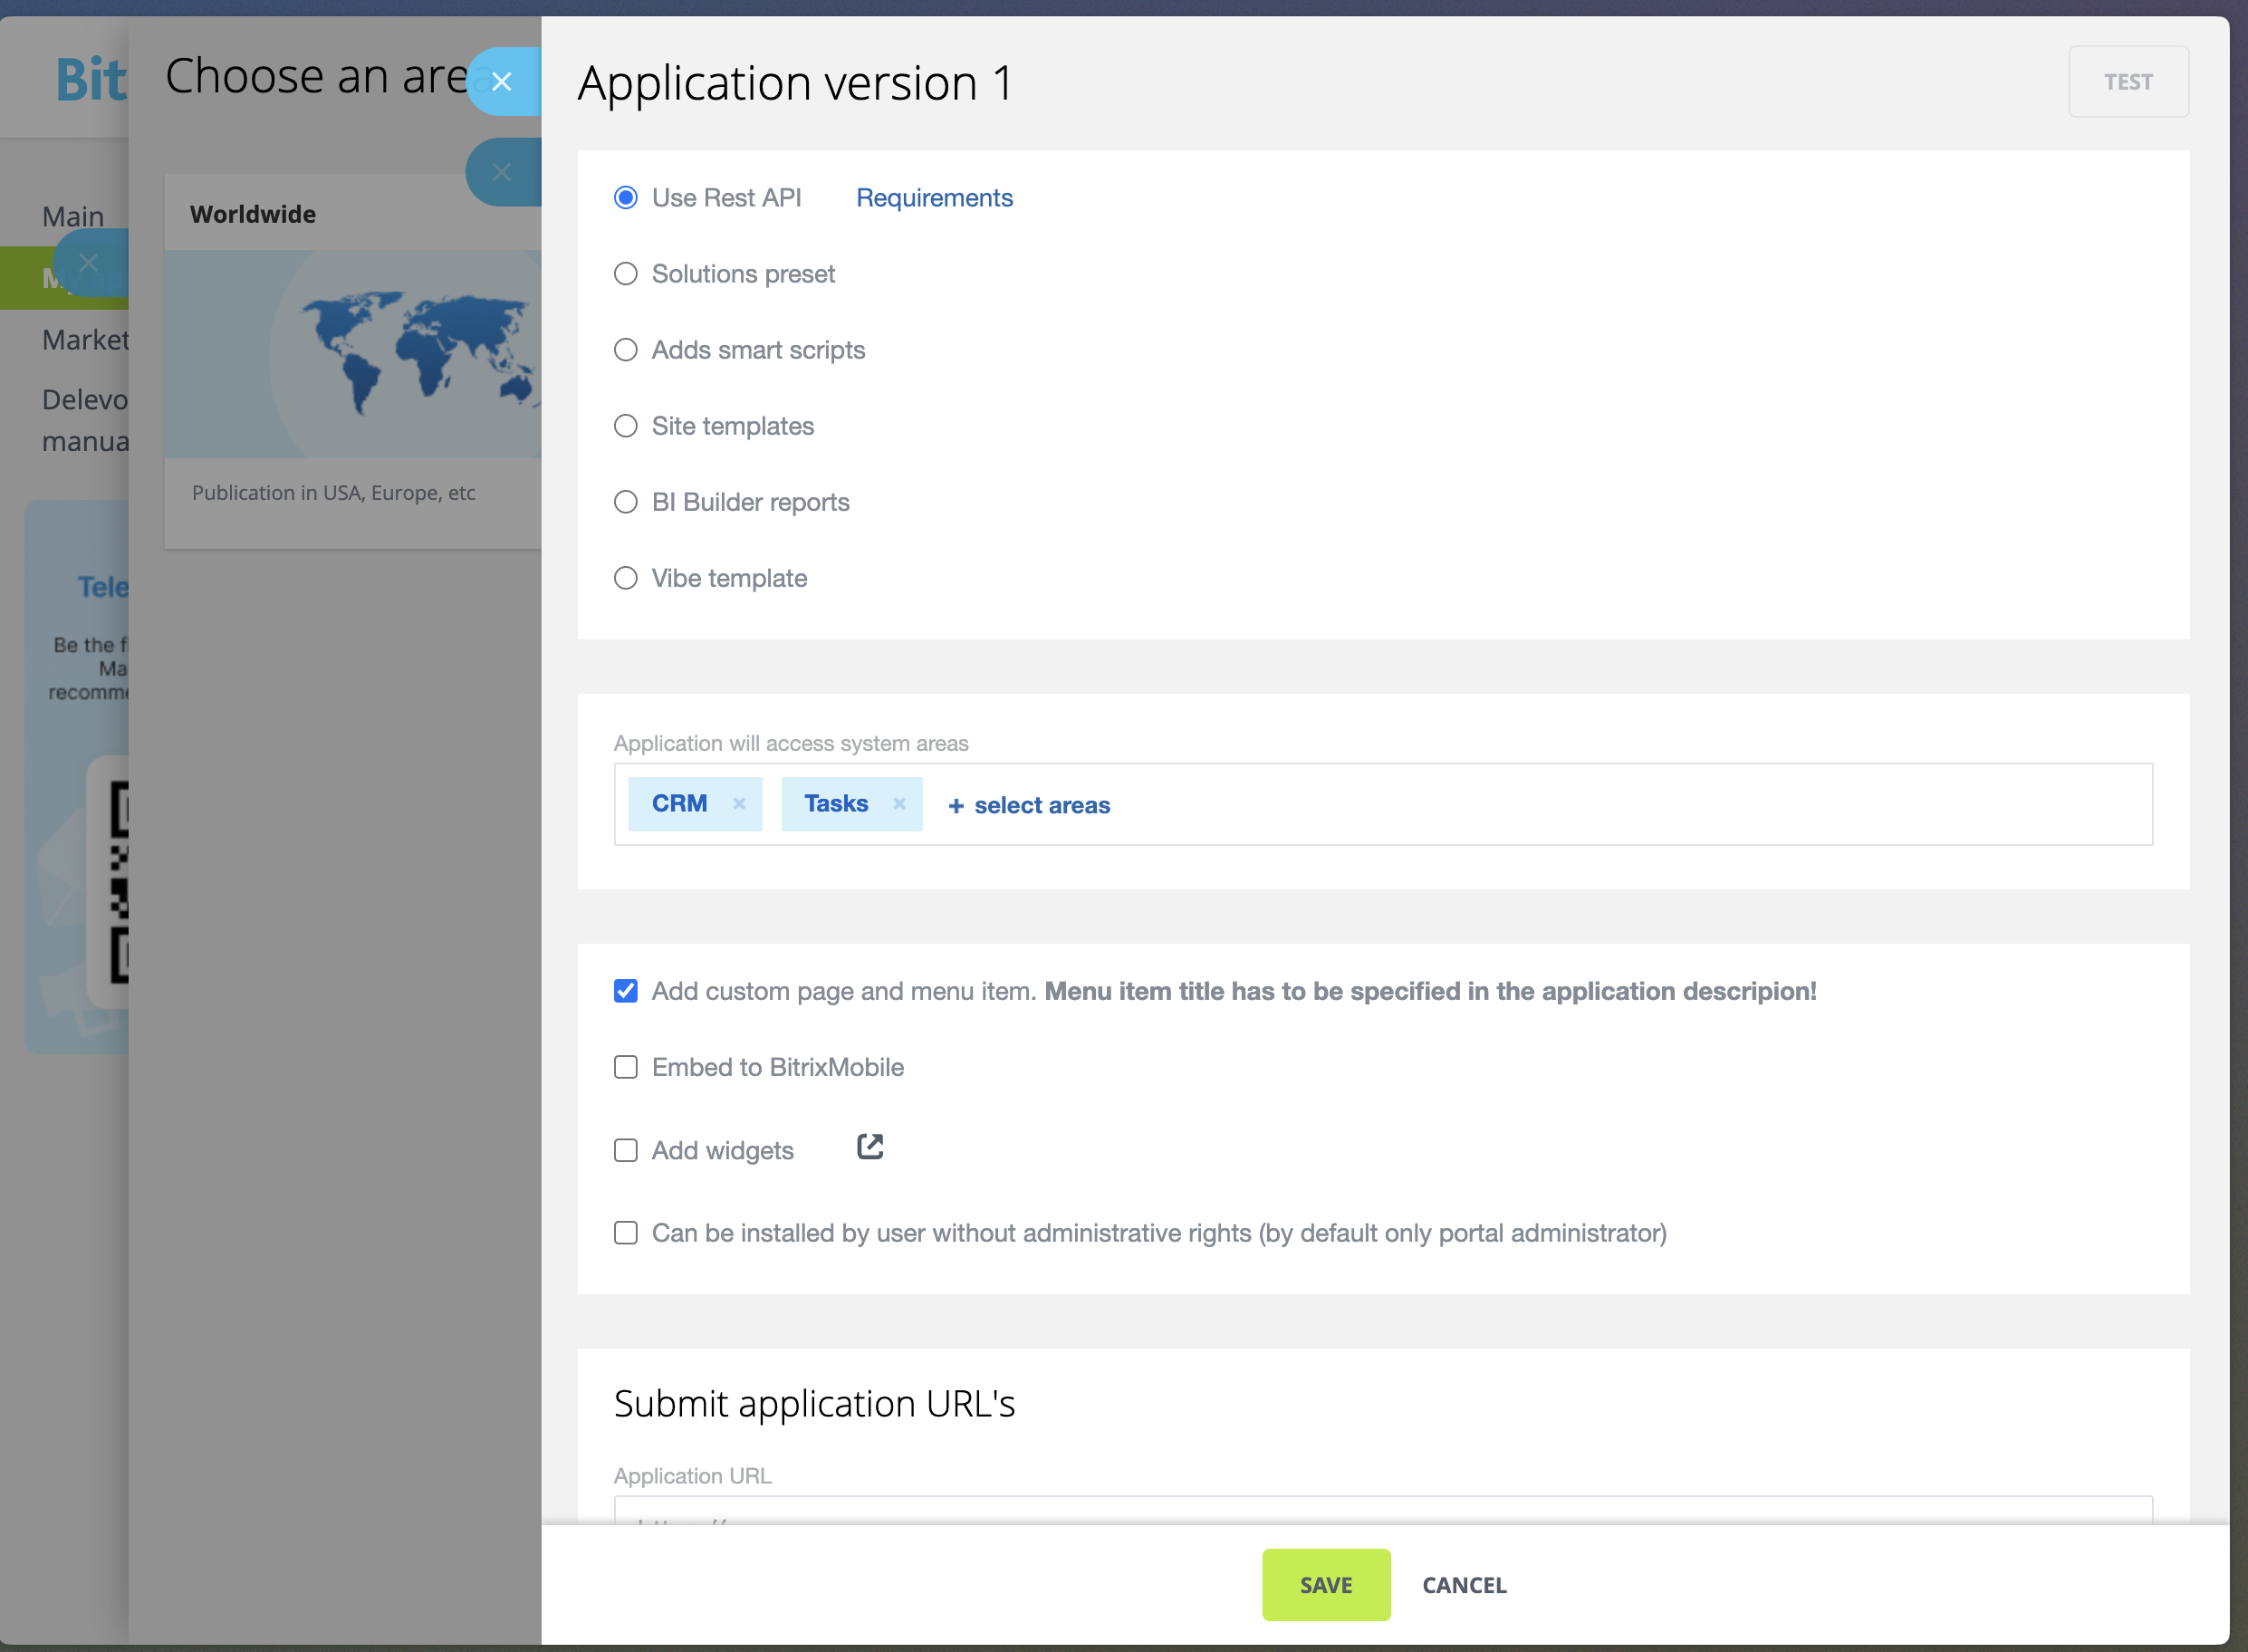
- Pick Use Rest API and fill in the required information:
- Application URL: https://app.mychatbot.app/integration?integration=Bitrix
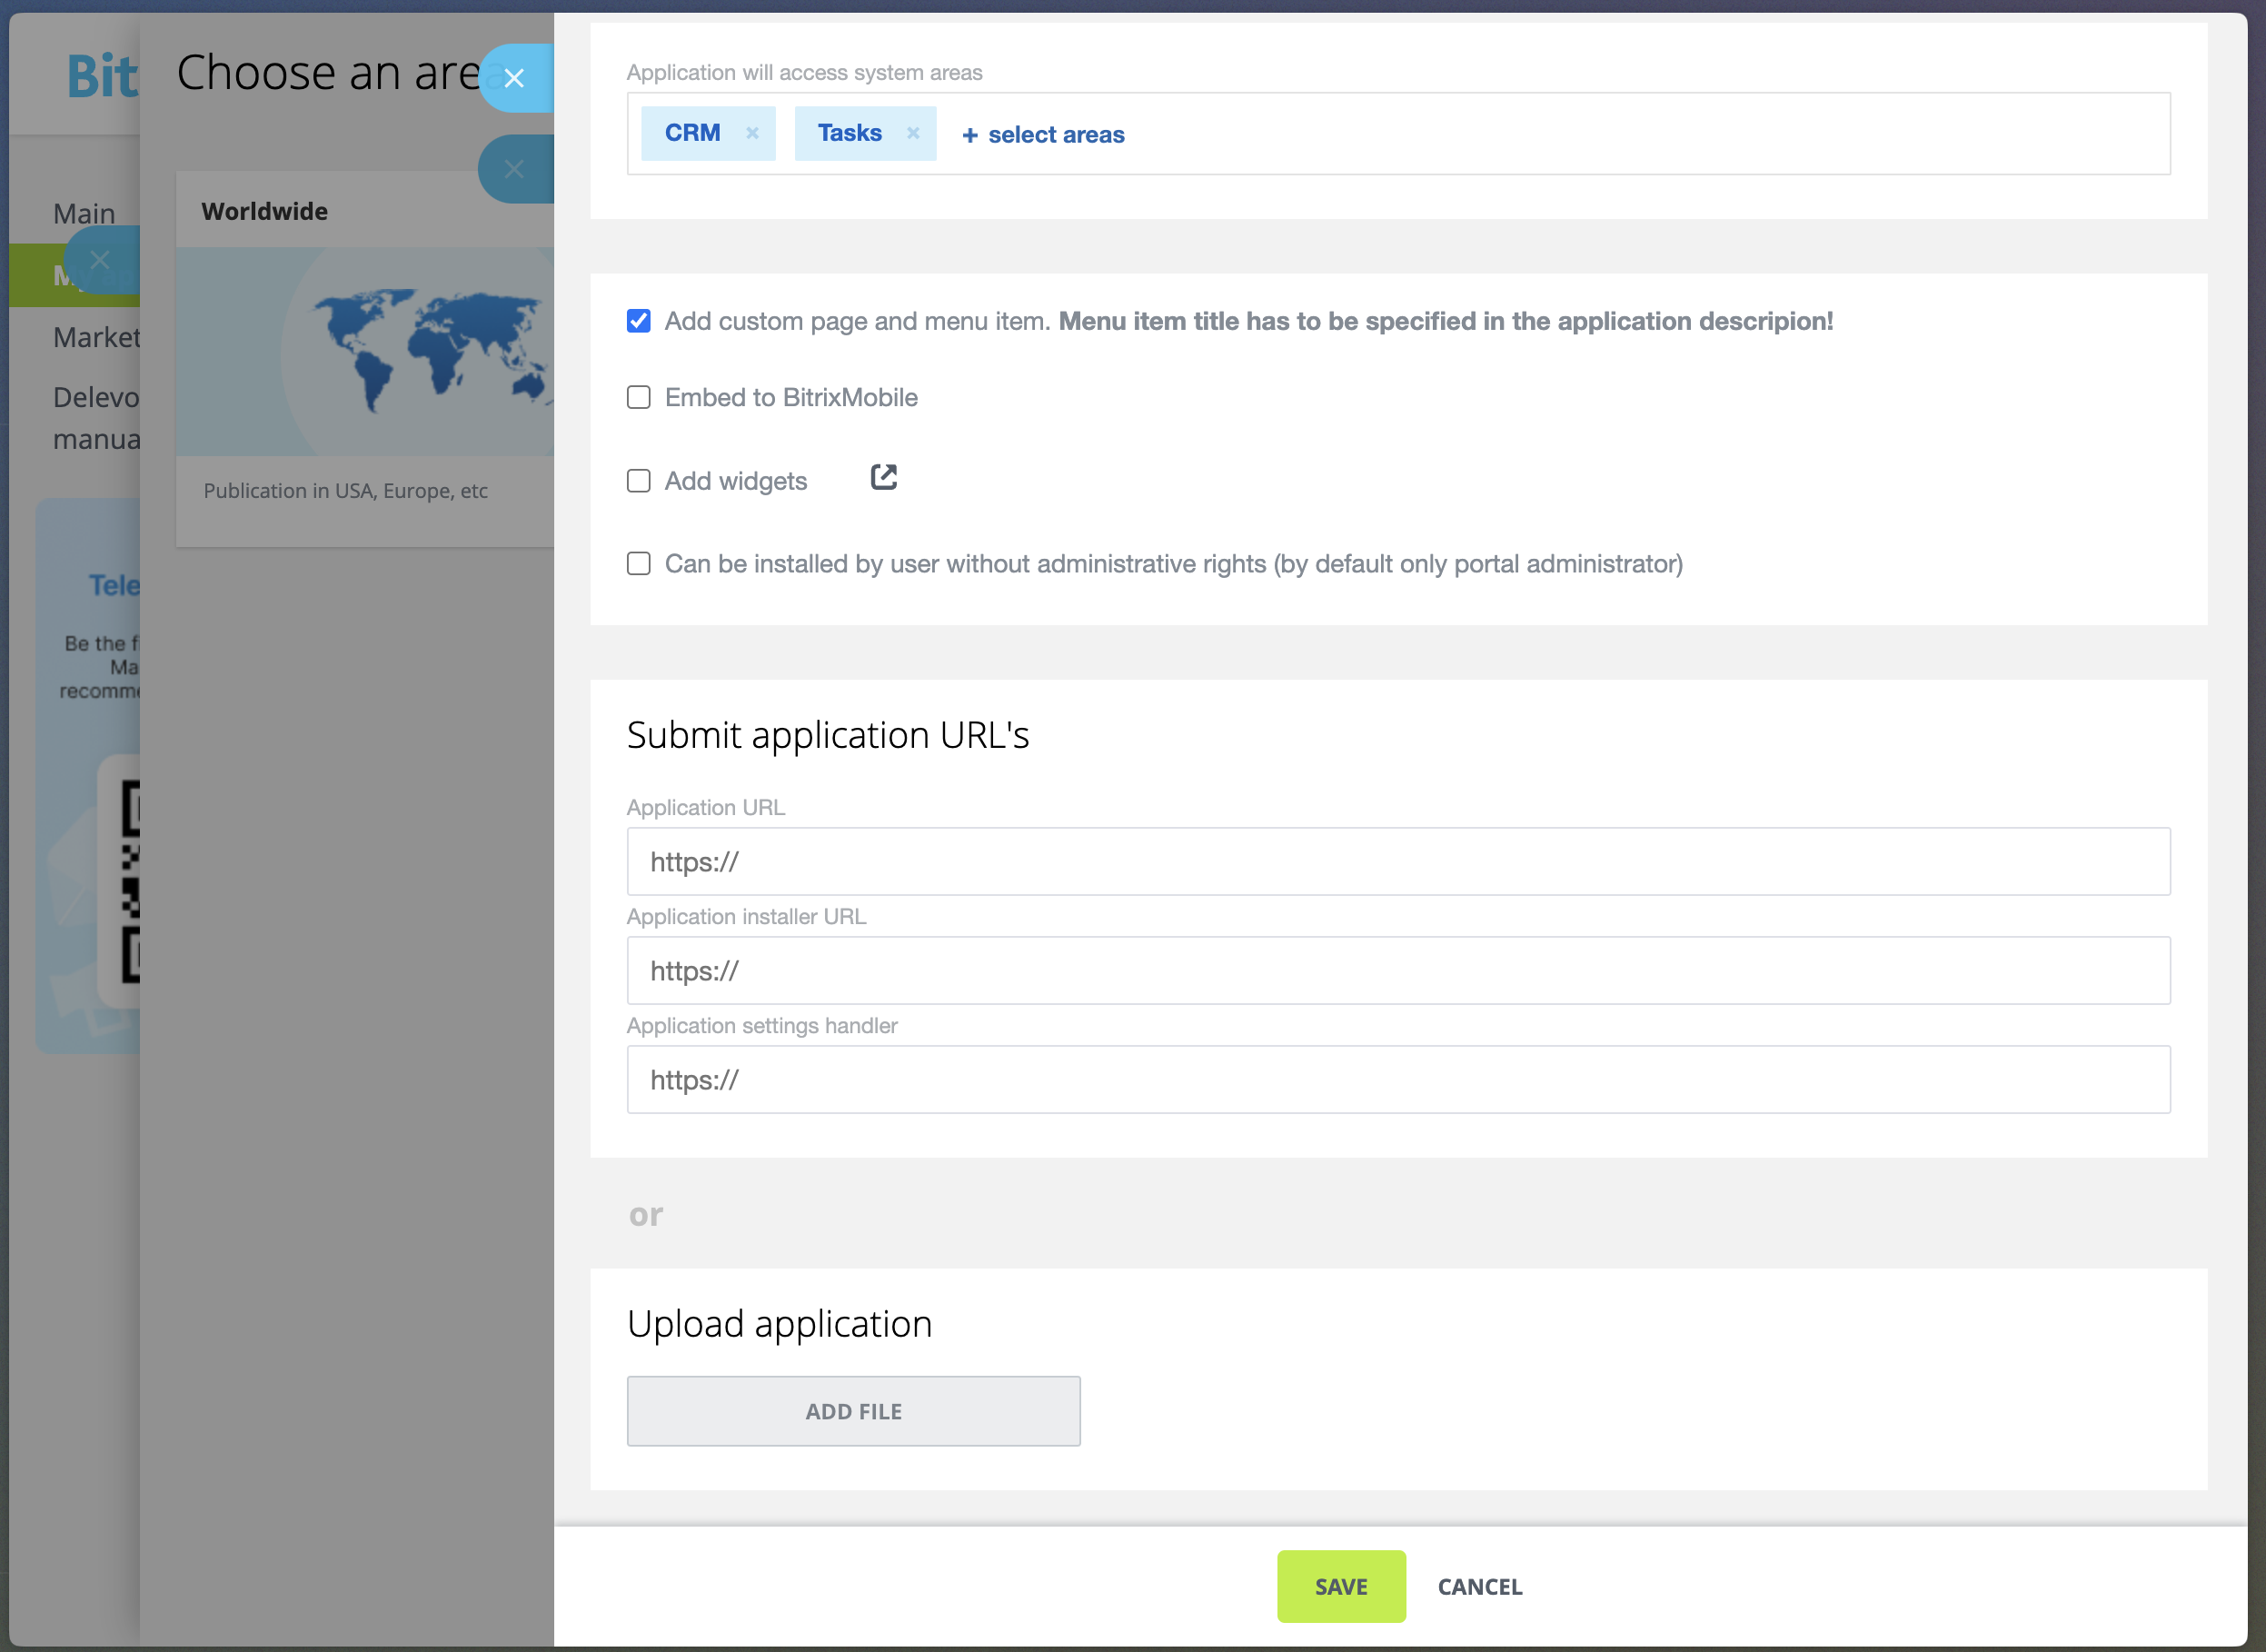
- Application URL: https://app.mychatbot.app/integration?integration=Bitrix
- Click Save to create your application
- Click Test in right top corner that in Application version 1 block to get Client ID and Client Secret
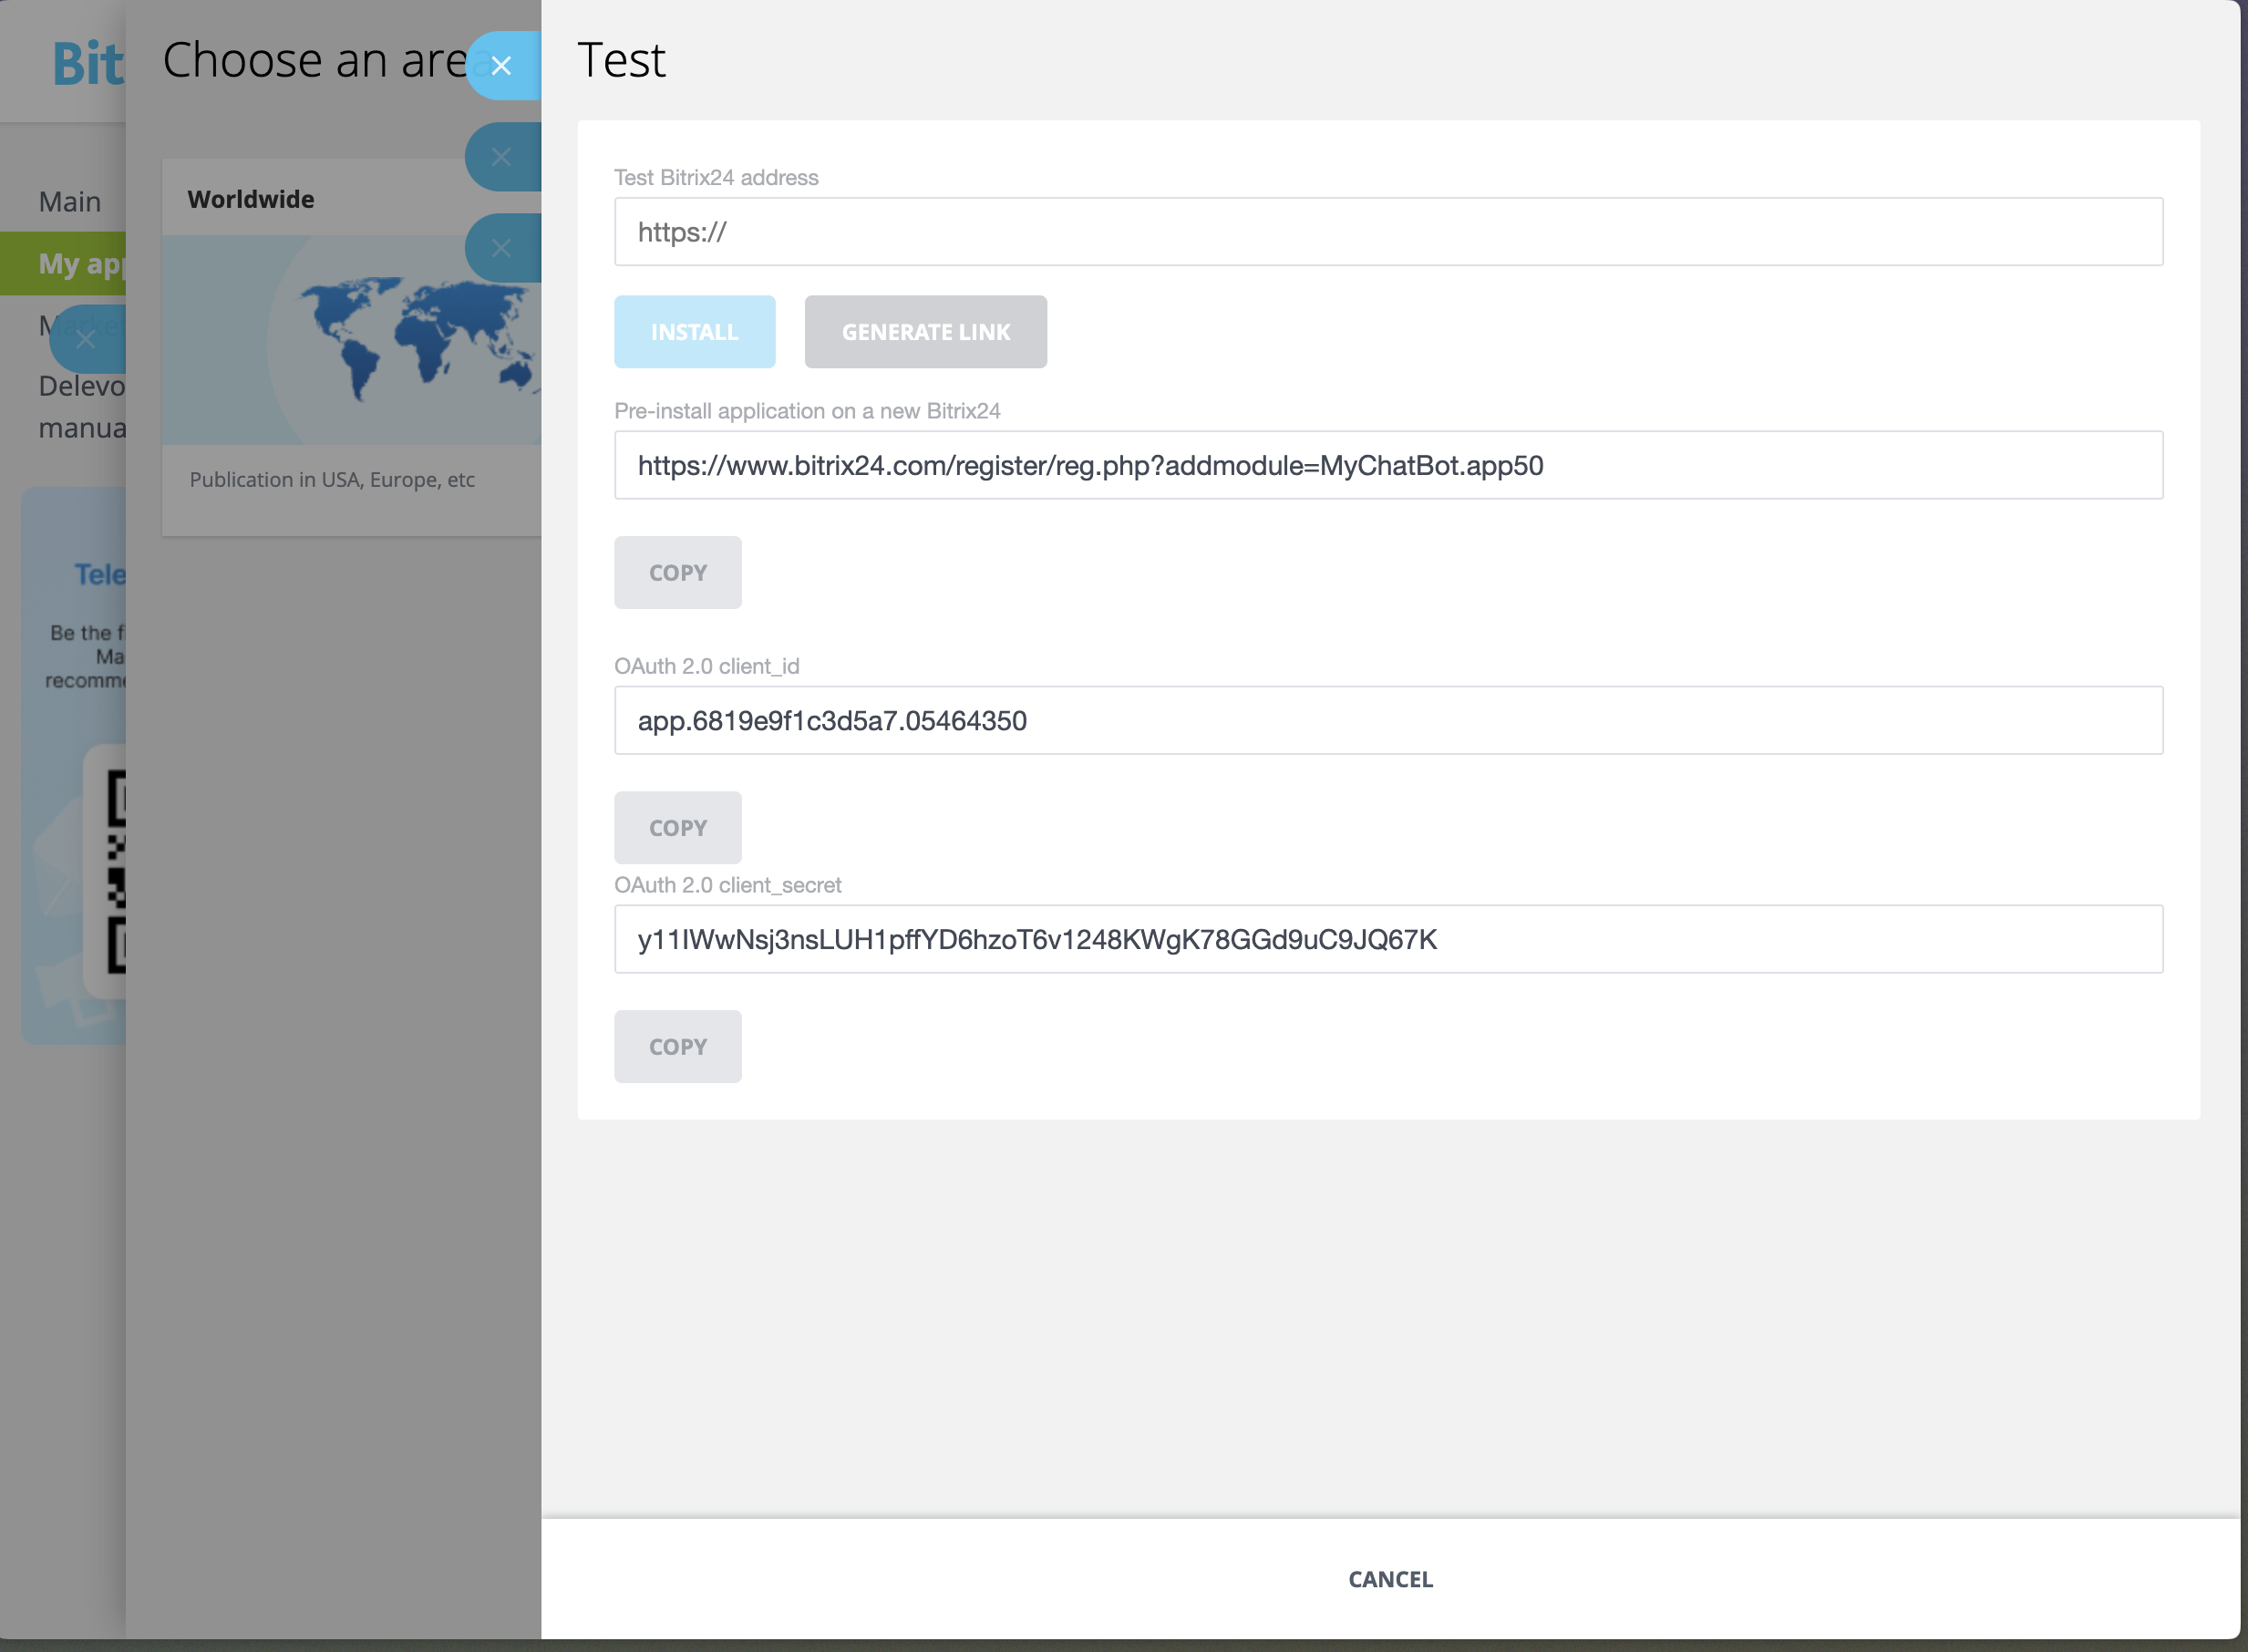
- Paste Domain in Test Bitrix24 address and click Install after this you will be redirected to install page in our CRM
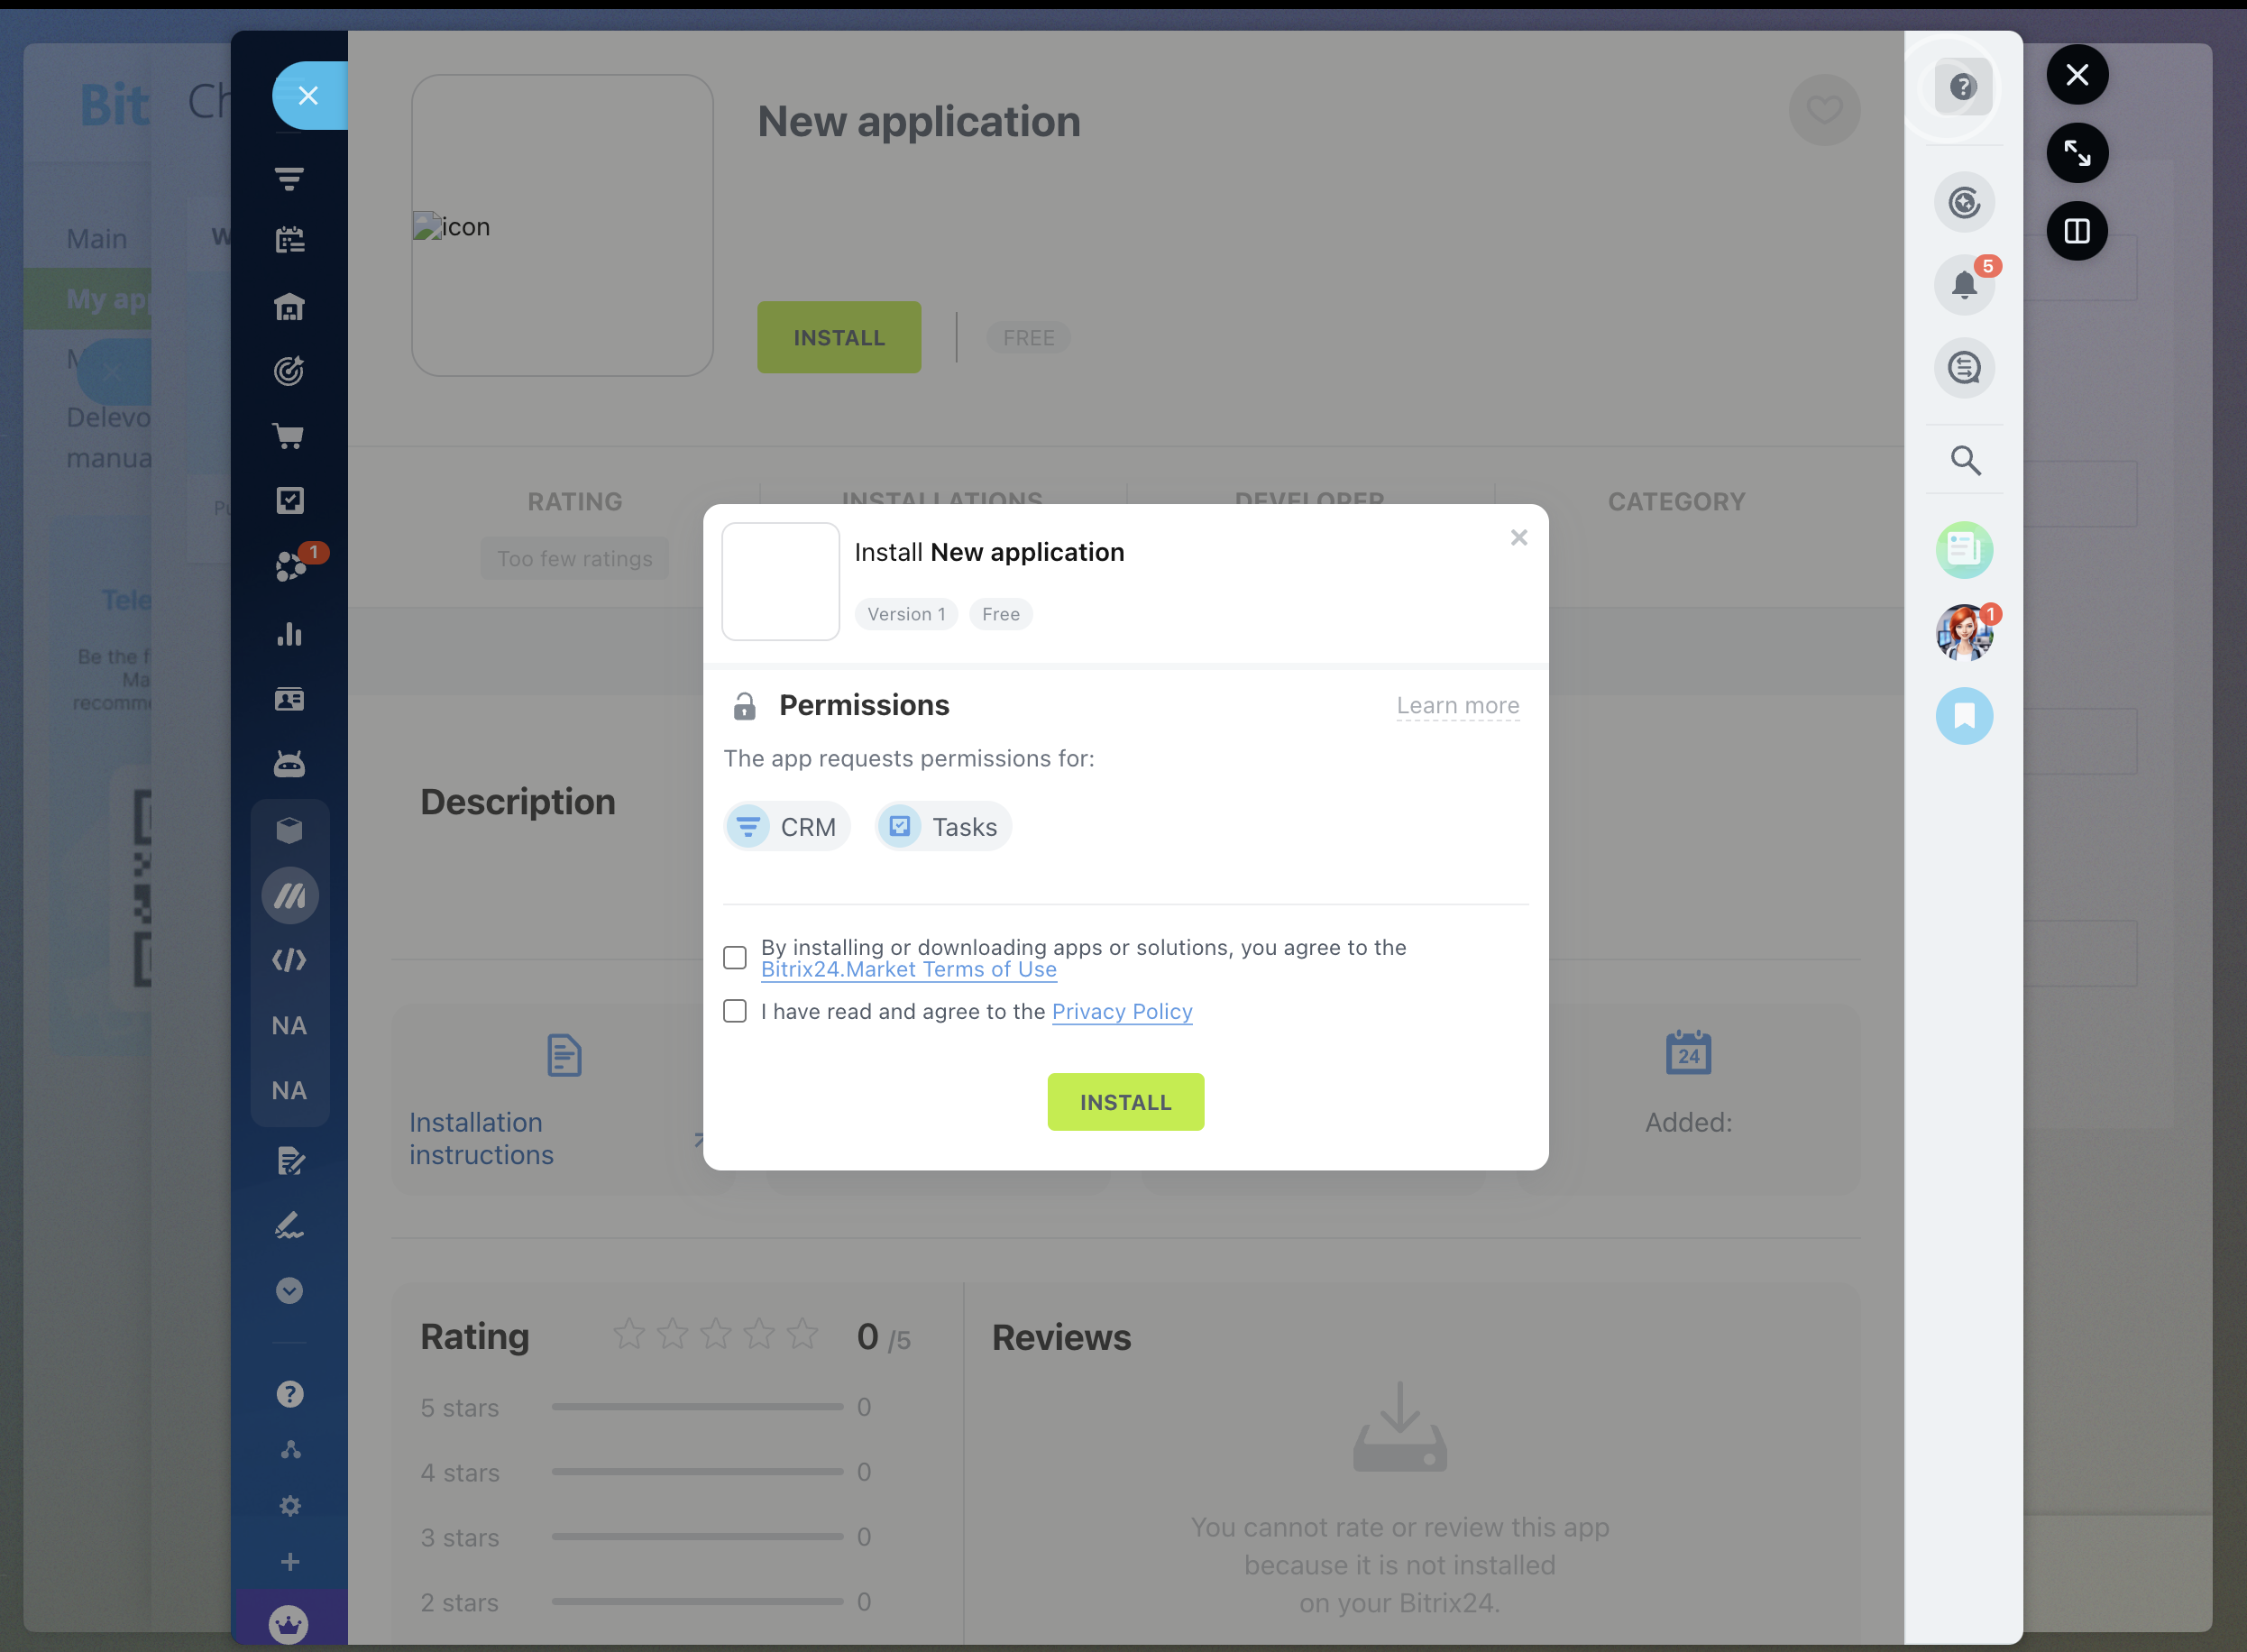
- Check all checkboxes and click Install then app will be installed
Creating Integration on MyChatBot
- Navigate to the Integrations tab in your MyChatBot dashboard - https://app.mychatbot.app/integration?integration=Bitrix
- Select the agent you want to connect to Bitrix24
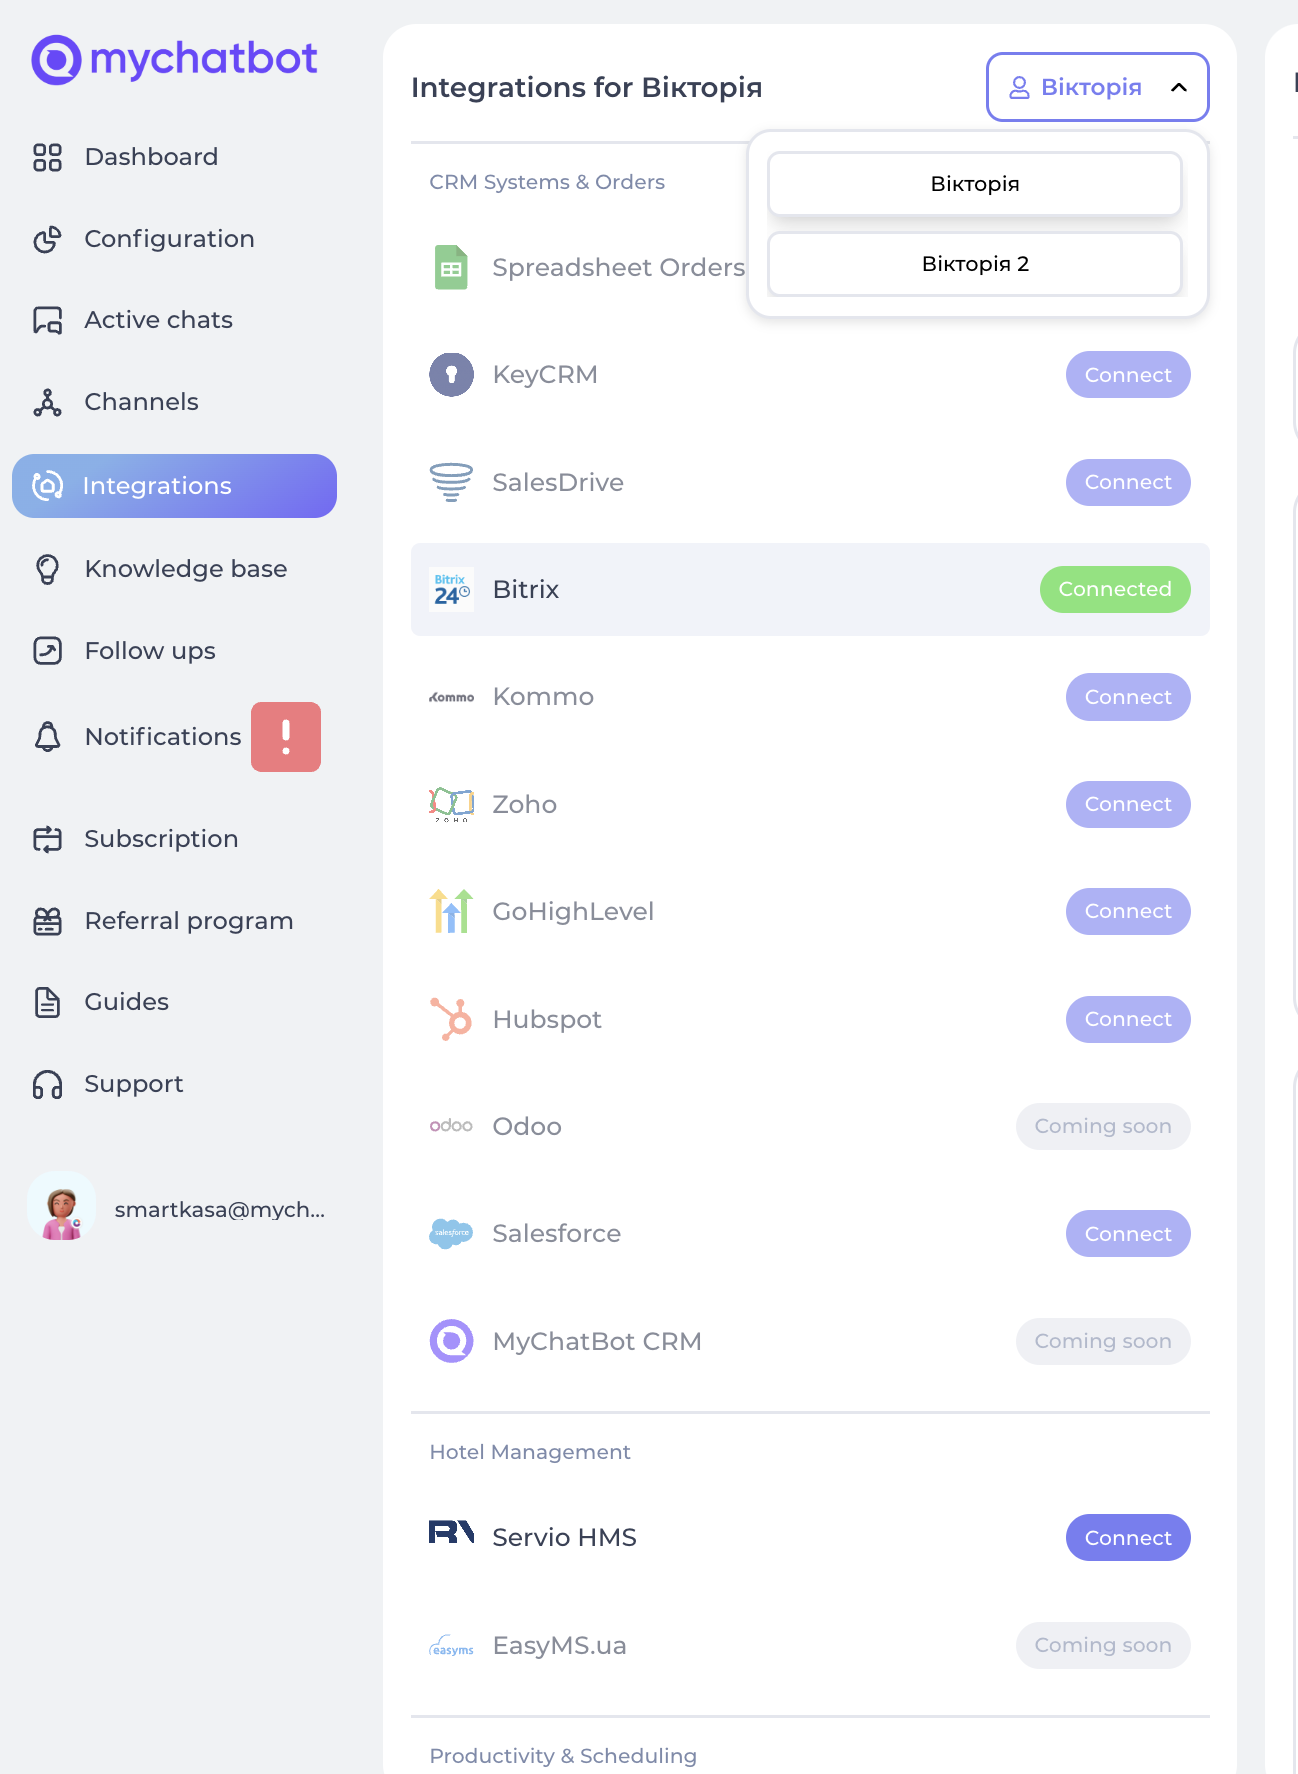
- Scroll down to find Bitrix24 CRM in the integrations list
- Click the Connect button
- You'll need to provide the following credentials:
- Domain: Your Bitrix24 domain (e.g., your-company.bitrix24.eu)
- Client ID: The Client ID from your Bitrix24 app
- Client Secret: The Client Secret from your Bitrix24 app
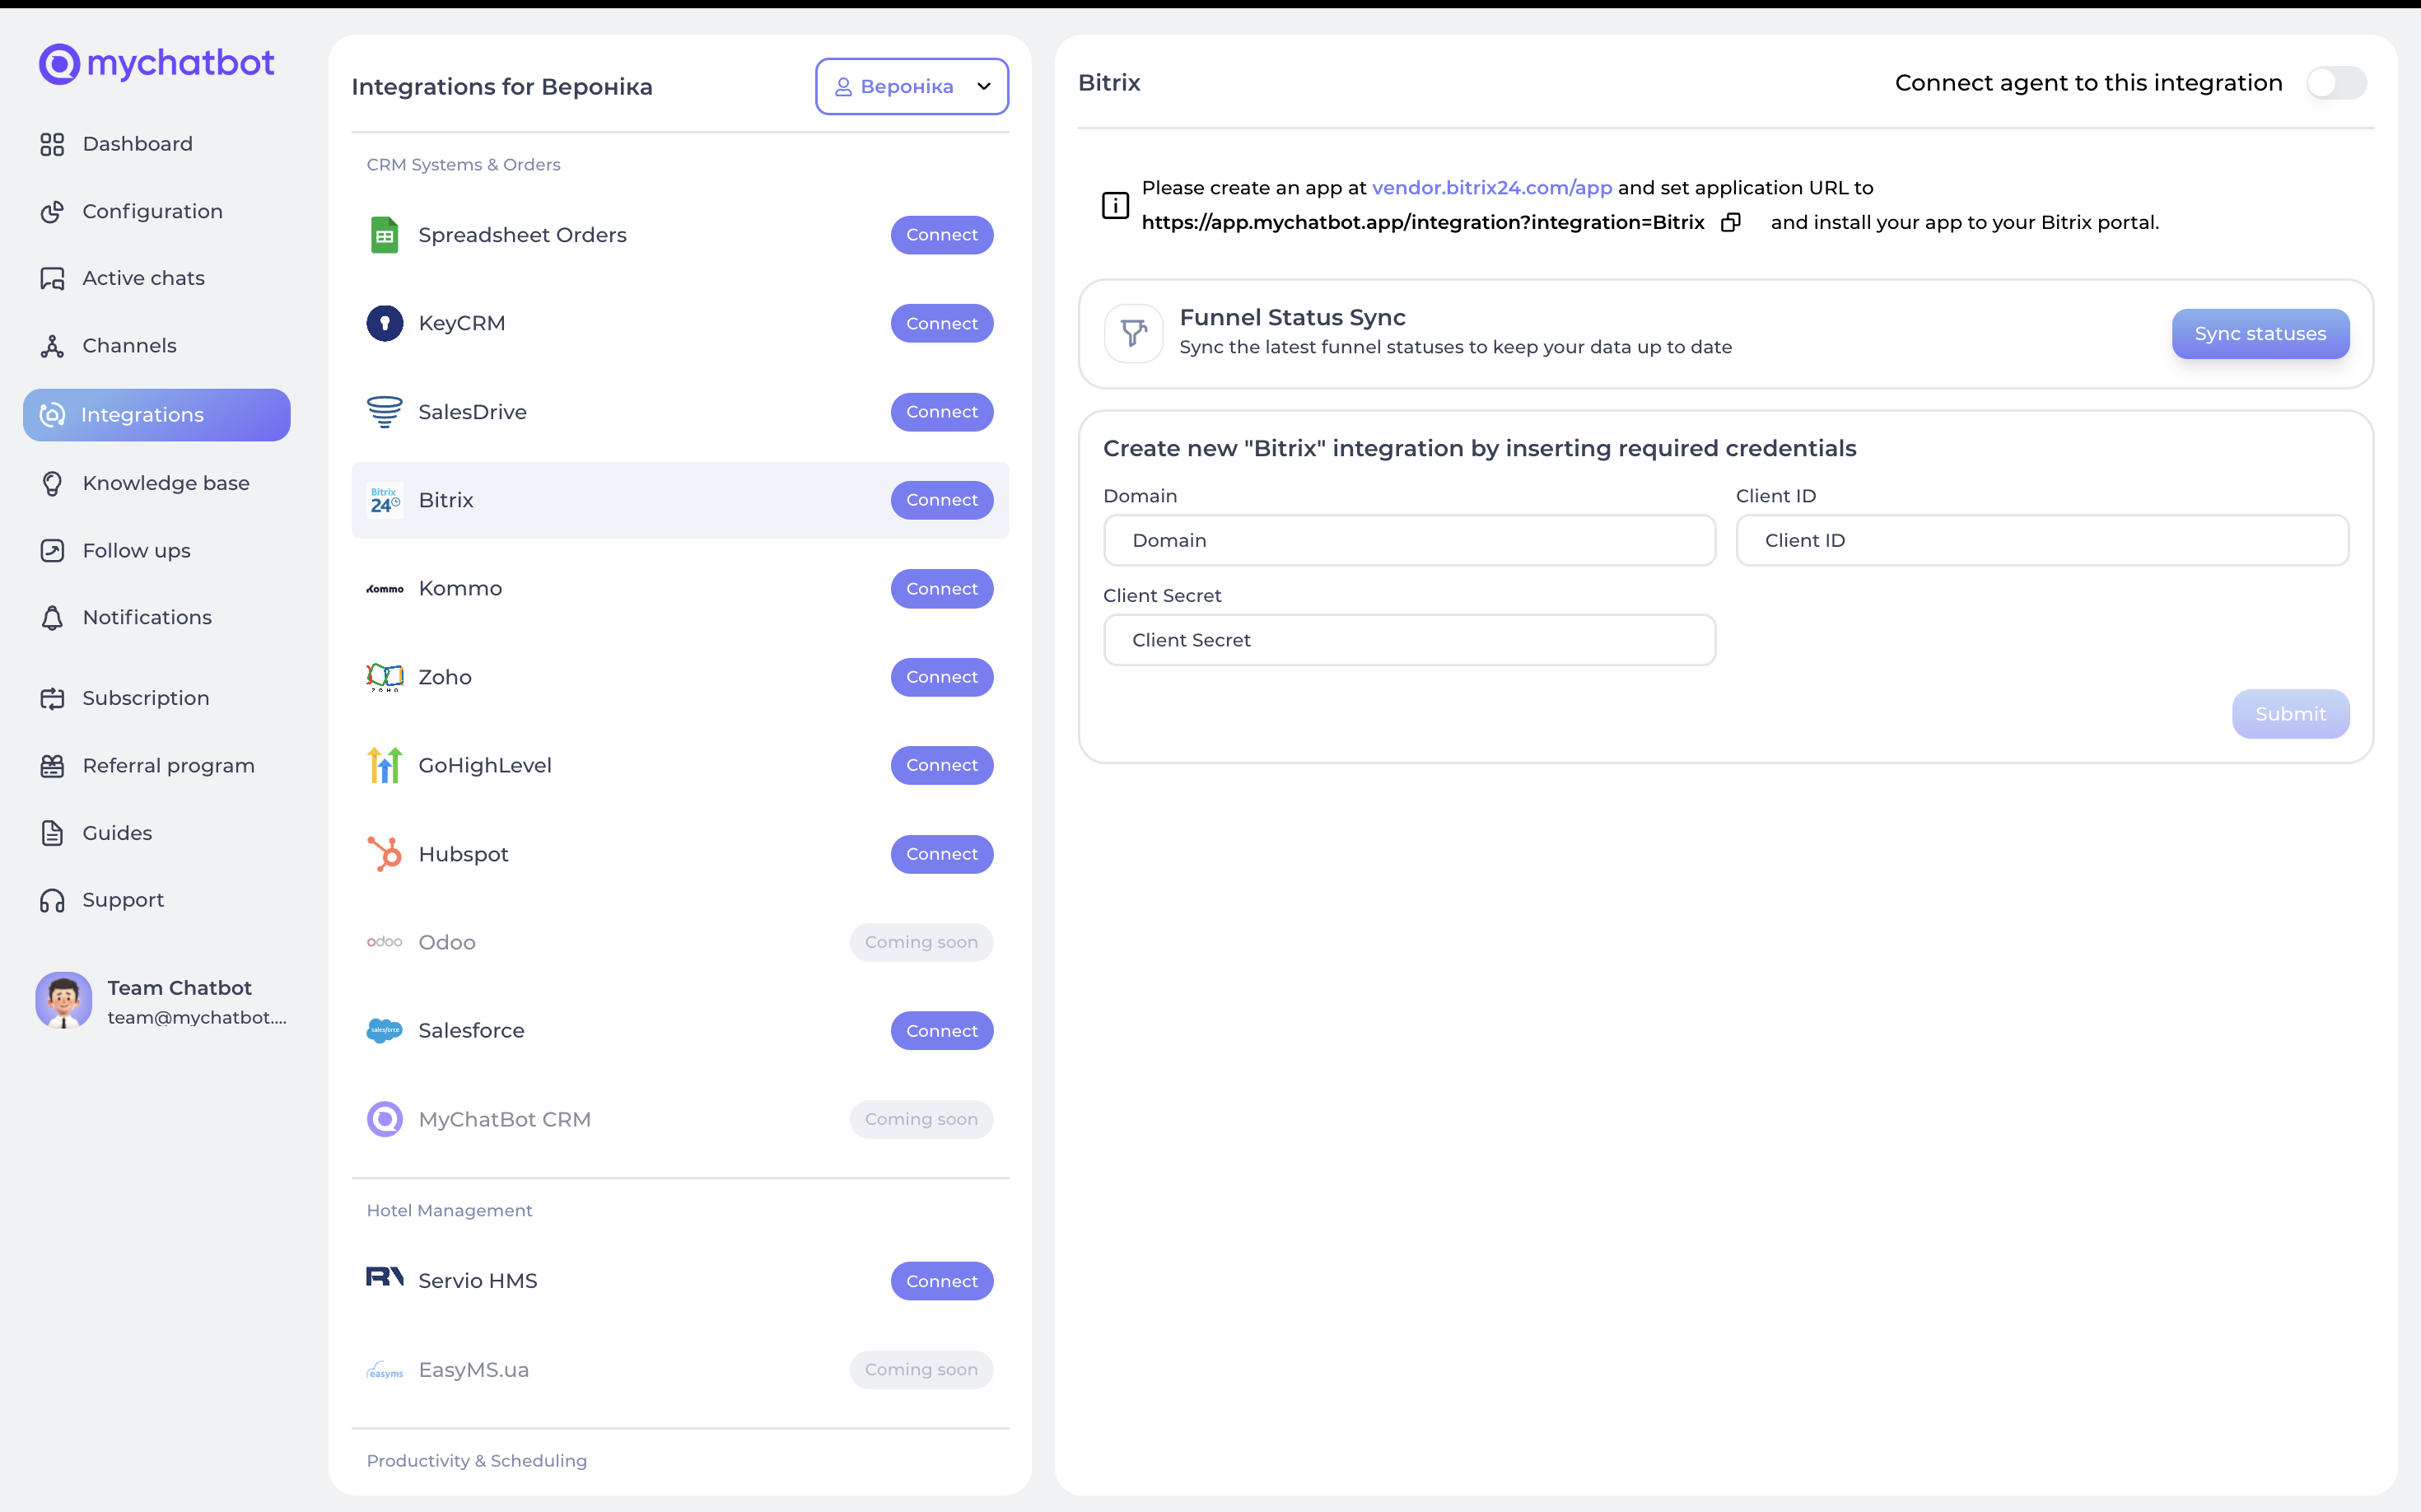
- Click Submit to save your integration
Entities & Data Fields Configuration
After connecting your Bitrix24 account, you'll need to configure which entities and fields your agent can access: 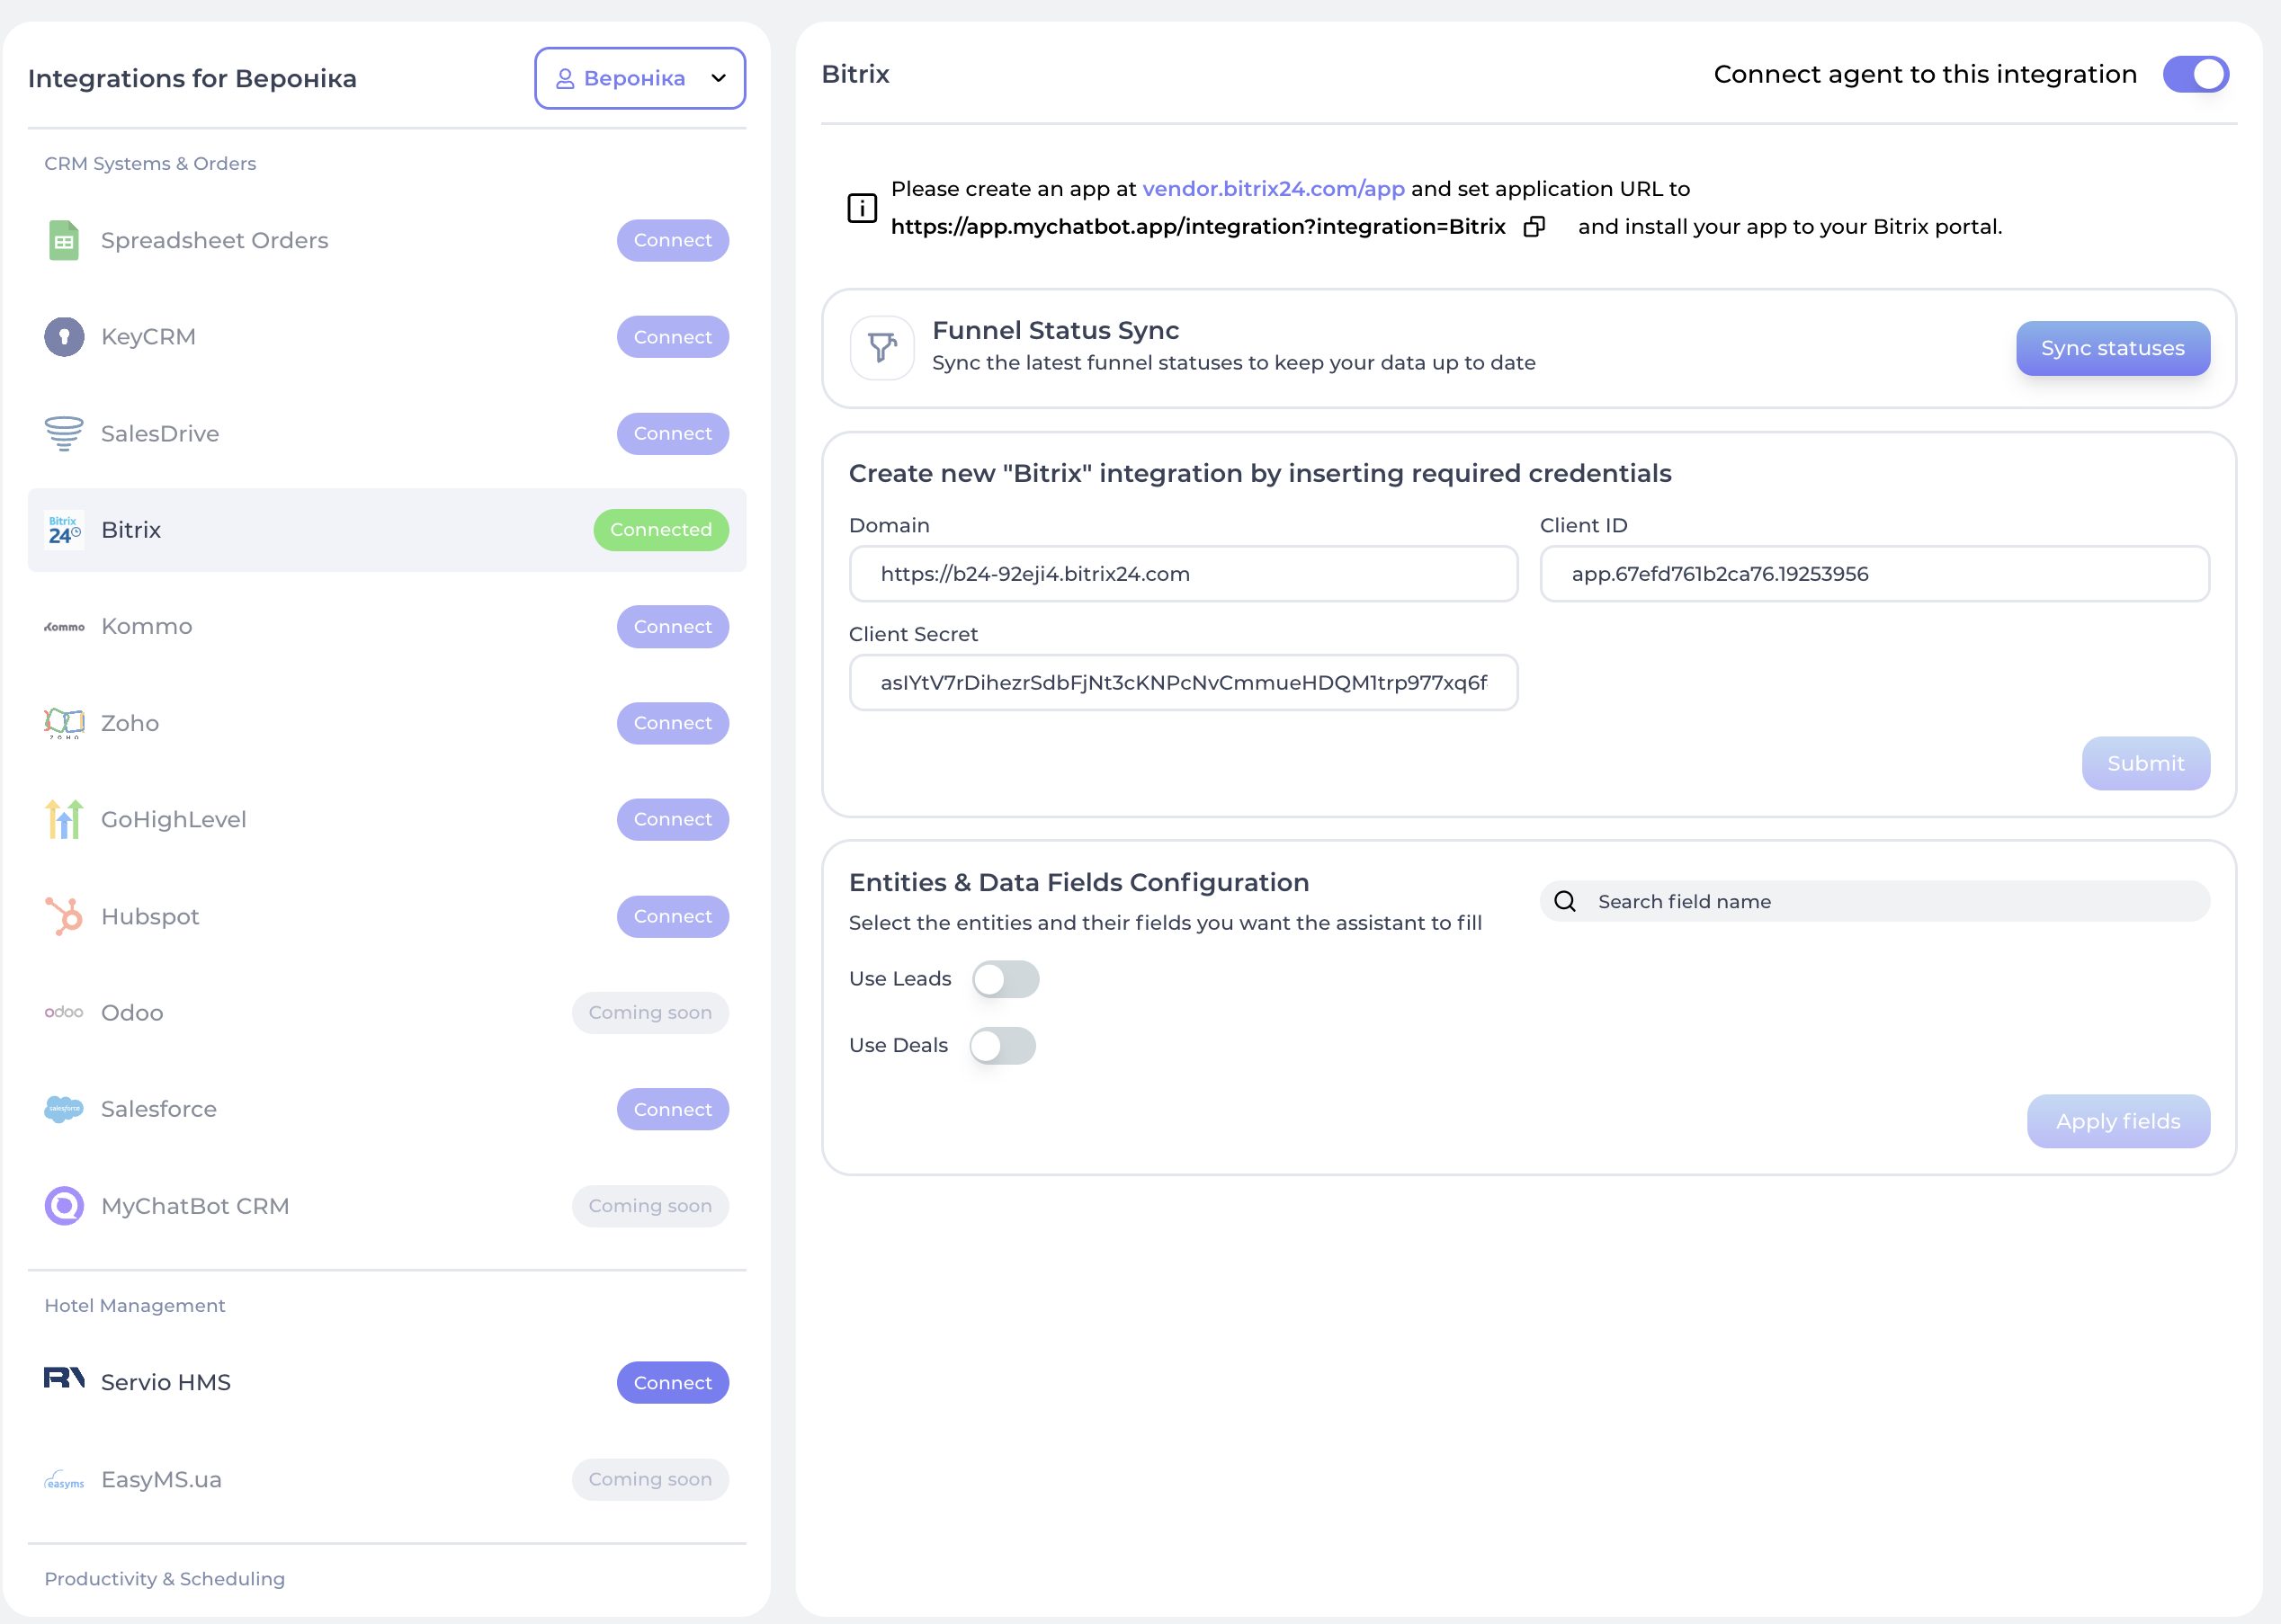
- In the "Entities & Data Fields Configuration" section, you can:
- Toggle Use Leads to enable lead management
- Toggle Use Deals to enable deal management
- For each entity type, you can select:
- Standard fields from Bitrix24
- Custom fields that exist in your CRM
- Click Apply fields to save your configuration
- If you need to sync the latest funnel statuses, use the Sync statuses button at the top
Understanding Entity Types
Bitrix24 integration supports three main entity types:
- Leads: Potential sales opportunities
- Deals: Sales transactions in progress
- Contacts: Individual client information
Field Types
Each entity has two types of fields:
- Standard Fields: Default fields provided by Bitrix24 (appear under "Standard fields for Leads/Deals")
- Custom Fields: User-defined fields specific to your CRM setup (appear under "Other custom fields" or "Most used custom fields")
Special Fields
Several special fields require specific attention:
Status
- For leads: Represents the current stage in the lead pipeline
- Common values include "New", "In Progress", "Qualified", "Disqualified"
- Must match exactly with statuses defined in your Bitrix24 account
- Can be updated using the Sync statuses button
Source
- Identifies where the lead originated
- Automatically set to "AI-" + name of your assistant
- This helps track which leads came from your AI assistant
Chat Link
- Automatically added to each lead or deal
- Contains a link back to the conversation that generated the lead
- Stored in both the Comments field and a dedicated Chat Link field
Working with Pipelines
Deals in Bitrix24 are organized into pipelines with multiple stages:
- Select the appropriate pipeline from the dropdown in the MyChatBot dashboard
- Your agent will use this pipeline when creating new deals
- The stages within the pipeline can be used to move deals through your sales process
Available Tools
After connecting Bitrix24 CRM, your agent will have access to four powerful tools:
1. create_crm_lead
This tool allows your agent to create new leads with the following parameters:
- full_name: Contact's full name (required)
- phone: Contact's phone number
- Status: Current stage in the sales pipeline
- Custom Fields: Any additional fields you've configured
All fields you select in the "Entities & Data Fields Configuration" section will be available as parameters for this function.
When a lead is created:
- A contact is automatically created or found based on the phone number
- The lead is linked to this contact
- A chat link is automatically added to trace back to the conversation
- The source is set to identify your AI assistant
2. edit_crm_lead
This tool enables your agent to update existing leads:
- Lead ID: Automatically uses the lead associated with the client
- Status: Update the lead's status/stage
- Custom Fields: Update any field values as needed
All fields you select in the "Entities & Data Fields Configuration" section will be available as parameters for this function.
3. create_crm_deal
This tool allows your agent to create new deals:
- full_name: Contact's full name (required)
- phone: Contact's phone number (required)
- products: Optional list of products to add to the deal
- Custom Fields: Any additional fields you've configured
All fields you select in the "Entities & Data Fields Configuration" section will be available as parameters for this function.
When a deal is created:
- A contact is automatically created or found based on the phone number
- The deal is linked to this contact
- Products are added to the deal (creating new products if needed)
- A chat link is automatically added
- The deal is added to the pipeline you selected in the dashboard
- The order information is tracked by MyChatBot internal system
4. add_crm_client_contact
This tool enables your agent to create or update contacts:
- full_name: Contact's complete name (required)
- phone: Primary phone number (required)
All fields you select in the "Entities & Data Fields Configuration" section will be available as parameters for this function.
When a contact is created:
- If a lead already exists for the client, it's updated with this contact
- The client's information in MyChatBot is also updated
The client status is tracked by the internal MyChatBot system
Configuration in Agent Instructions
Creating Leads or Deals
Include these examples in your agent's instructions to enable lead/deal creation:
When a customer expresses interest in our services, use create_crm_lead in Bitrix24 with the following information:
- Use their name as the lead title
- Set status to "New"
- Include their phone number
- Add any product details to the comments field
For deals:
When a customer confirms a purchase intention, use create_crm_deal in Bitrix24:
- Use their full name
- Include their phone number
- Add the products they're interested in
- Add any relevant notes to the comments field
Updating Lead or Deal Status
Include these examples to enable status updates:
When a customer requests a call back:
1. Use create_crm_lead if they're new
2. Use edit_crm_lead to update the lead status to "Callback Requested"
3. Add the preferred callback time to the comments

When a customer confirms an appointment:
1. Use edit_crm_lead to update the lead status to "Appointment Scheduled"
2. Add appointment details to the comments field
For deals:
When a customer completes a payment:
1. Use edit_crm_lead to update the deal stage to "Closed Won"
2. Update the deal amount to match the final purchase value
3. Add payment details to the comments field

When a customer declines to proceed:
1. Use edit_crm_lead to update the deal stage to "Closed Lost"
2. Add the reason for declining in the comments field