
Appearance
Kommo CRM Integration
The Kommo CRM integration lets your MyChatBot agent create and manage deals and contacts directly in your Kommo account. Your AI assistant handles CRM work as it chats with customers, streamlining your sales process and customer management — no manual data entry.
At a glance
| You need | Where | Result |
|---|---|---|
| Admin access + a Kommo integration | Kommo → Settings → Create Integration | Long-lived API token |
widget.zip uploaded to the integration | Kommo integration form | Widget registered |
| Domain + API Key | MyChatBot → Integrations → Kommo → Connect | Integration linked to an agent |
| Entities & fields selected | MyChatBot → Entities & Data Fields Configuration → Apply fields | Agent can create/update deals & contacts |
Connect in 4 steps:
- Create an integration in Kommo and generate a long-lived token (5-year expiry).
- In MyChatBot, open Integrations → Kommo, pick your agent, and submit your Domain + API Key.
- Configure which entities and fields the agent can access, then Apply fields.
- Add deal/contact examples to your agent instructions.
Status names must match exactly
Deal Status values must match the statuses defined in your Kommo account exactly. Use the Sync statuses button whenever your funnel changes so the agent references valid stages.
Step 1 — Create the app in Kommo
- Log in to your Kommo account as an administrator.
- Navigate to Settings.
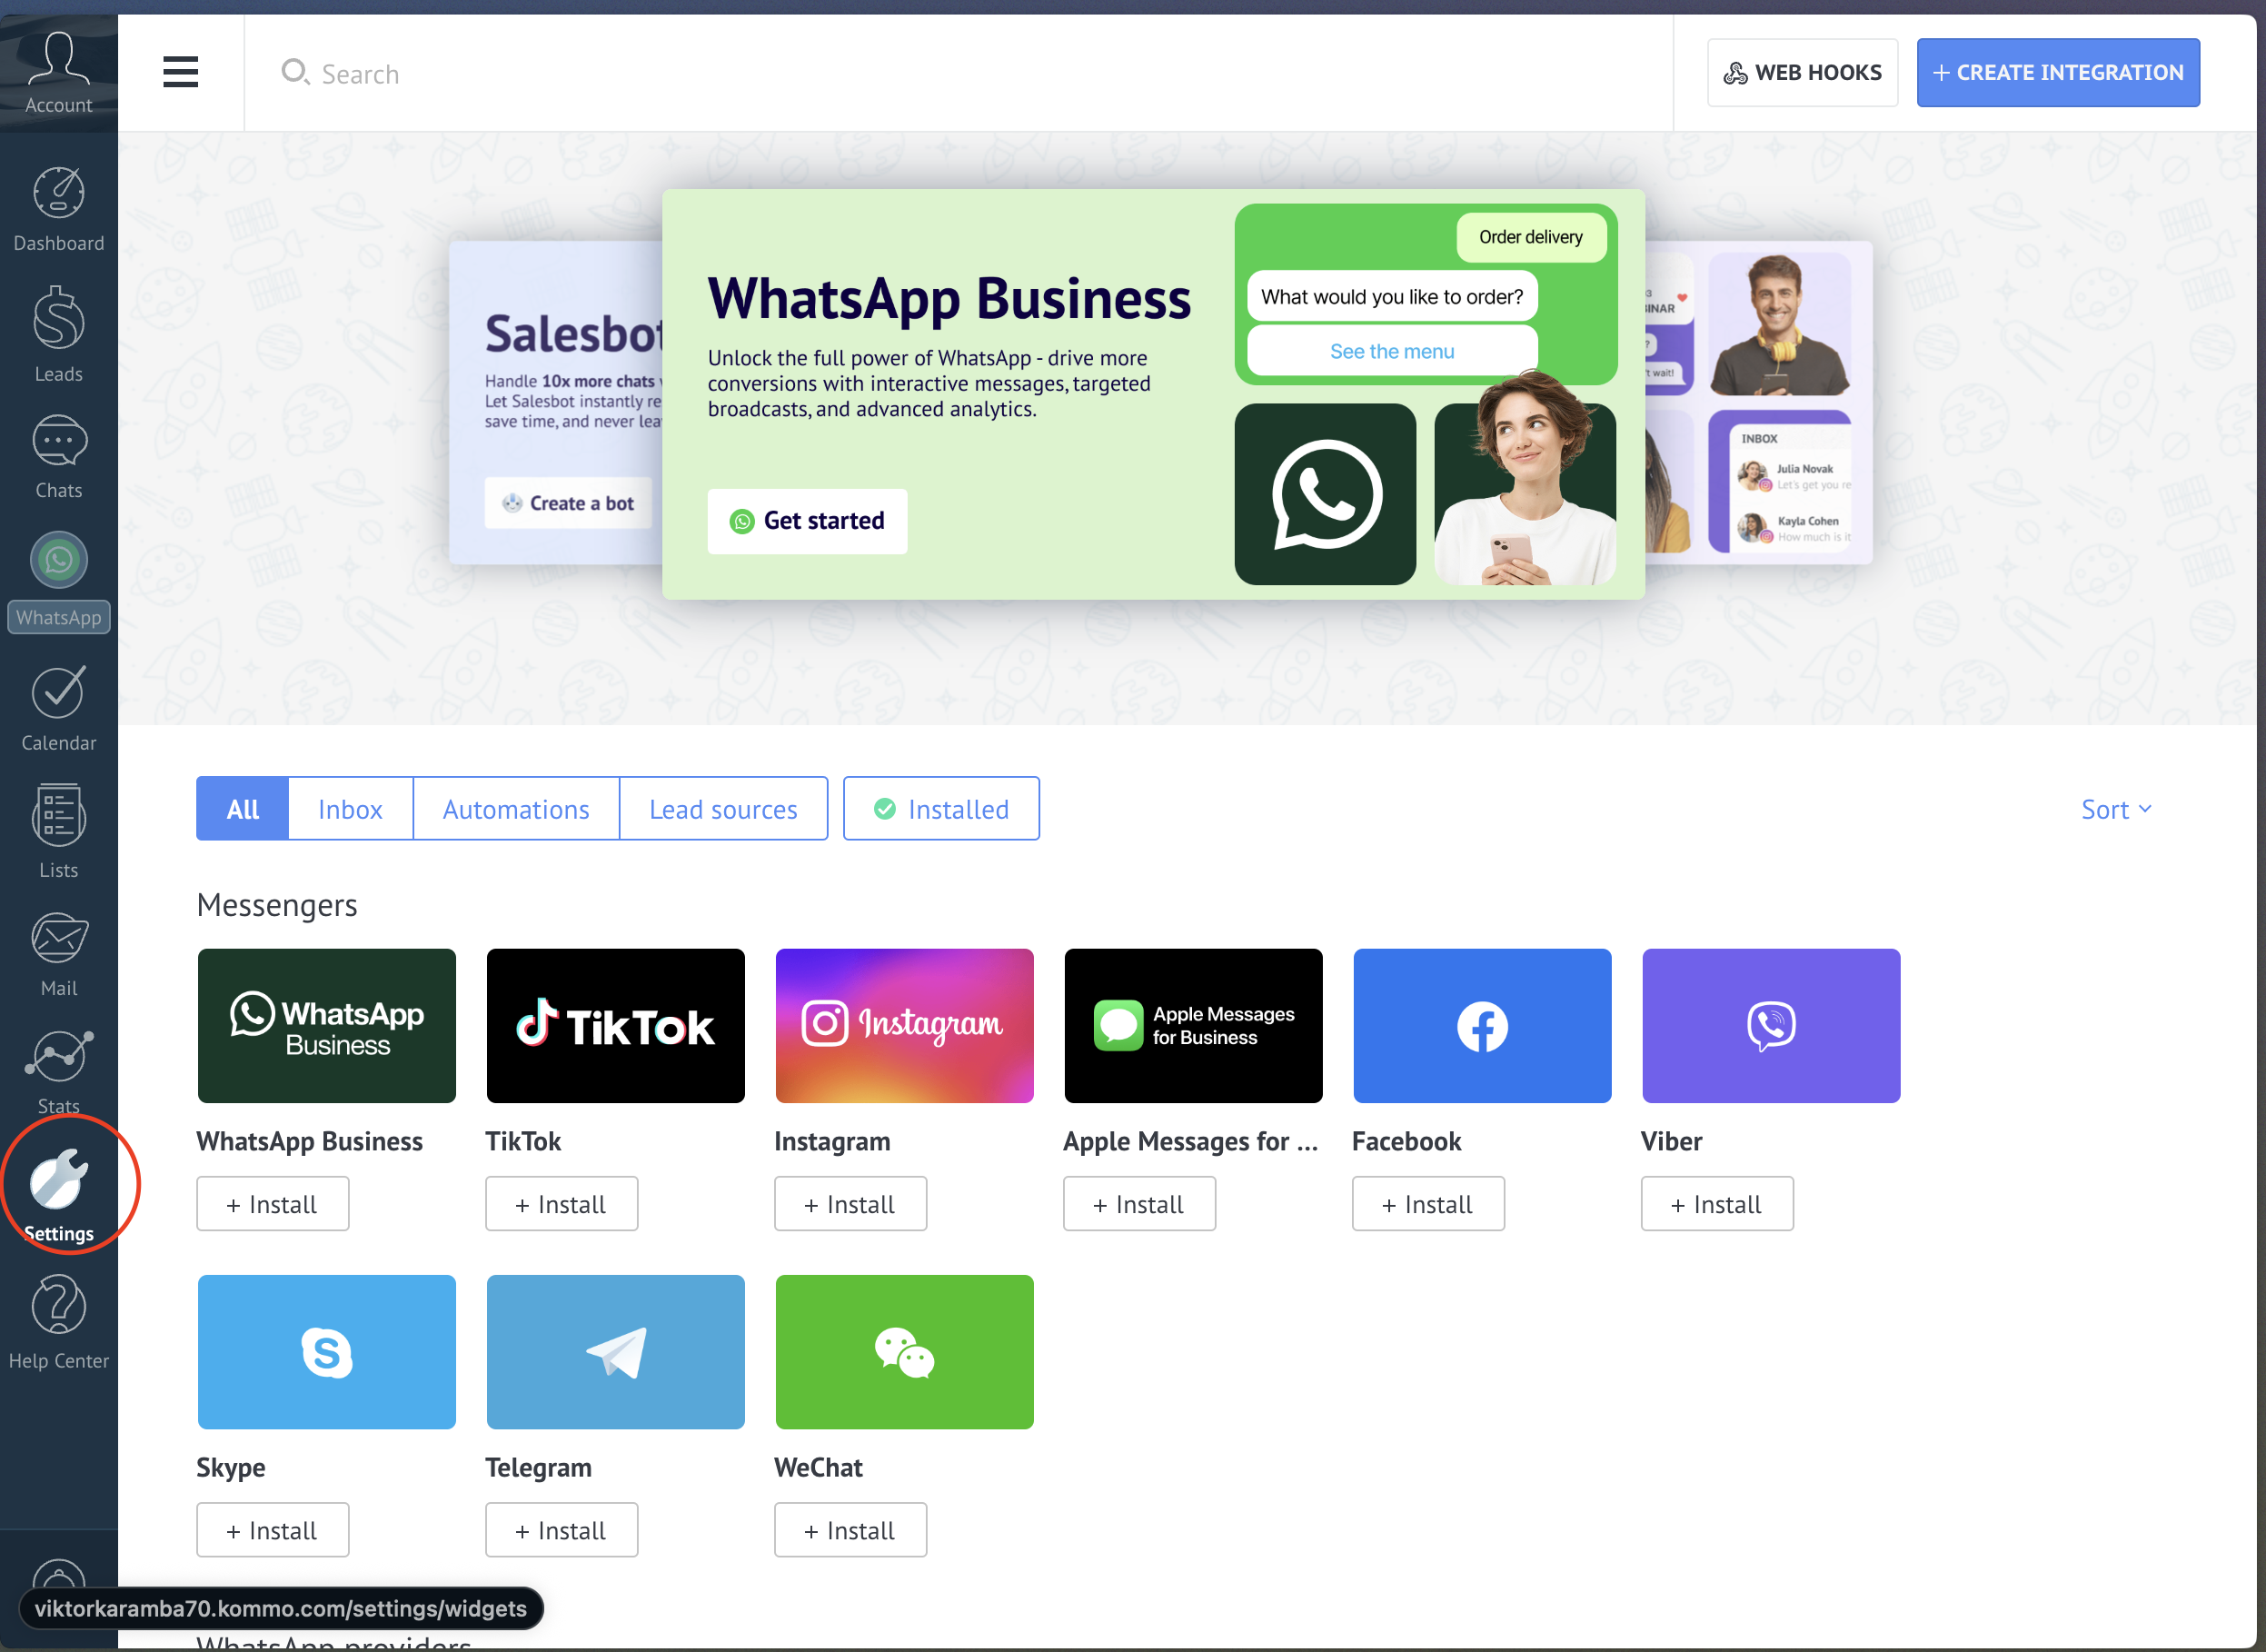
- Click Create Integration.
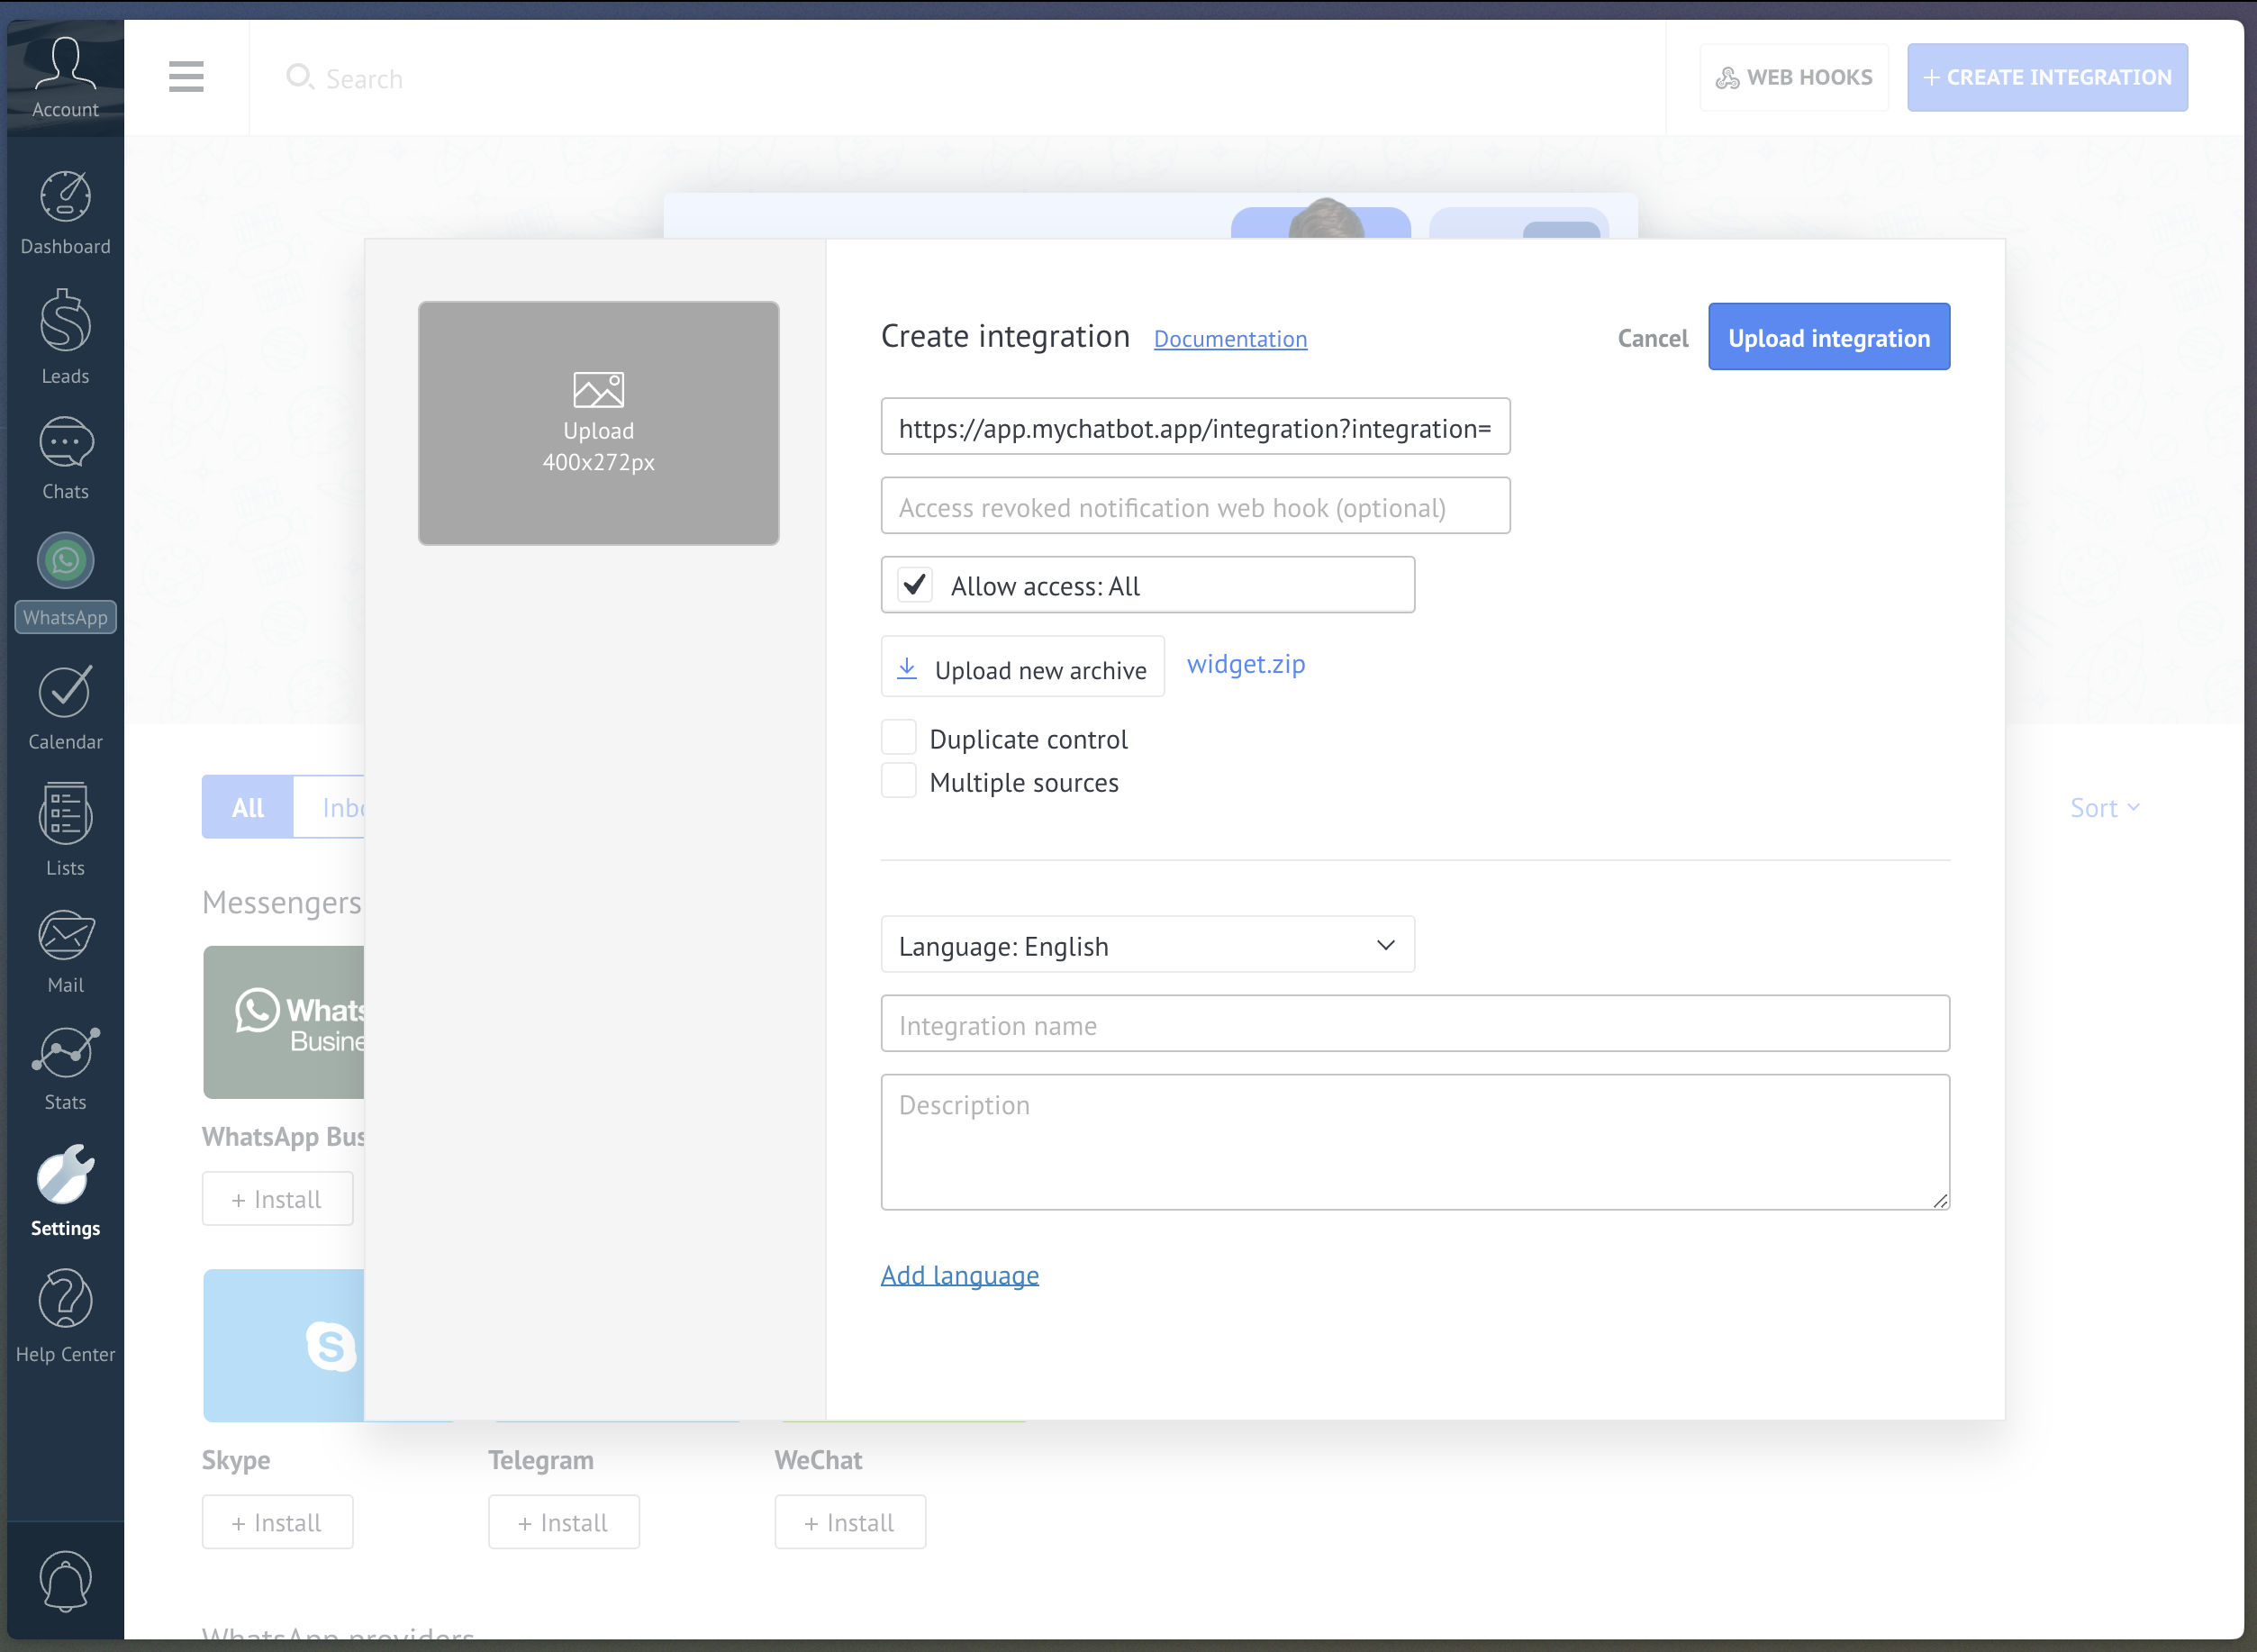
- Fill in the required information:
- Redirect URI:
https://app.mychatbot.app/integration?integration=Kommo - Integration name: MyChatBot Integration
- Upload this file: Download widget.zip
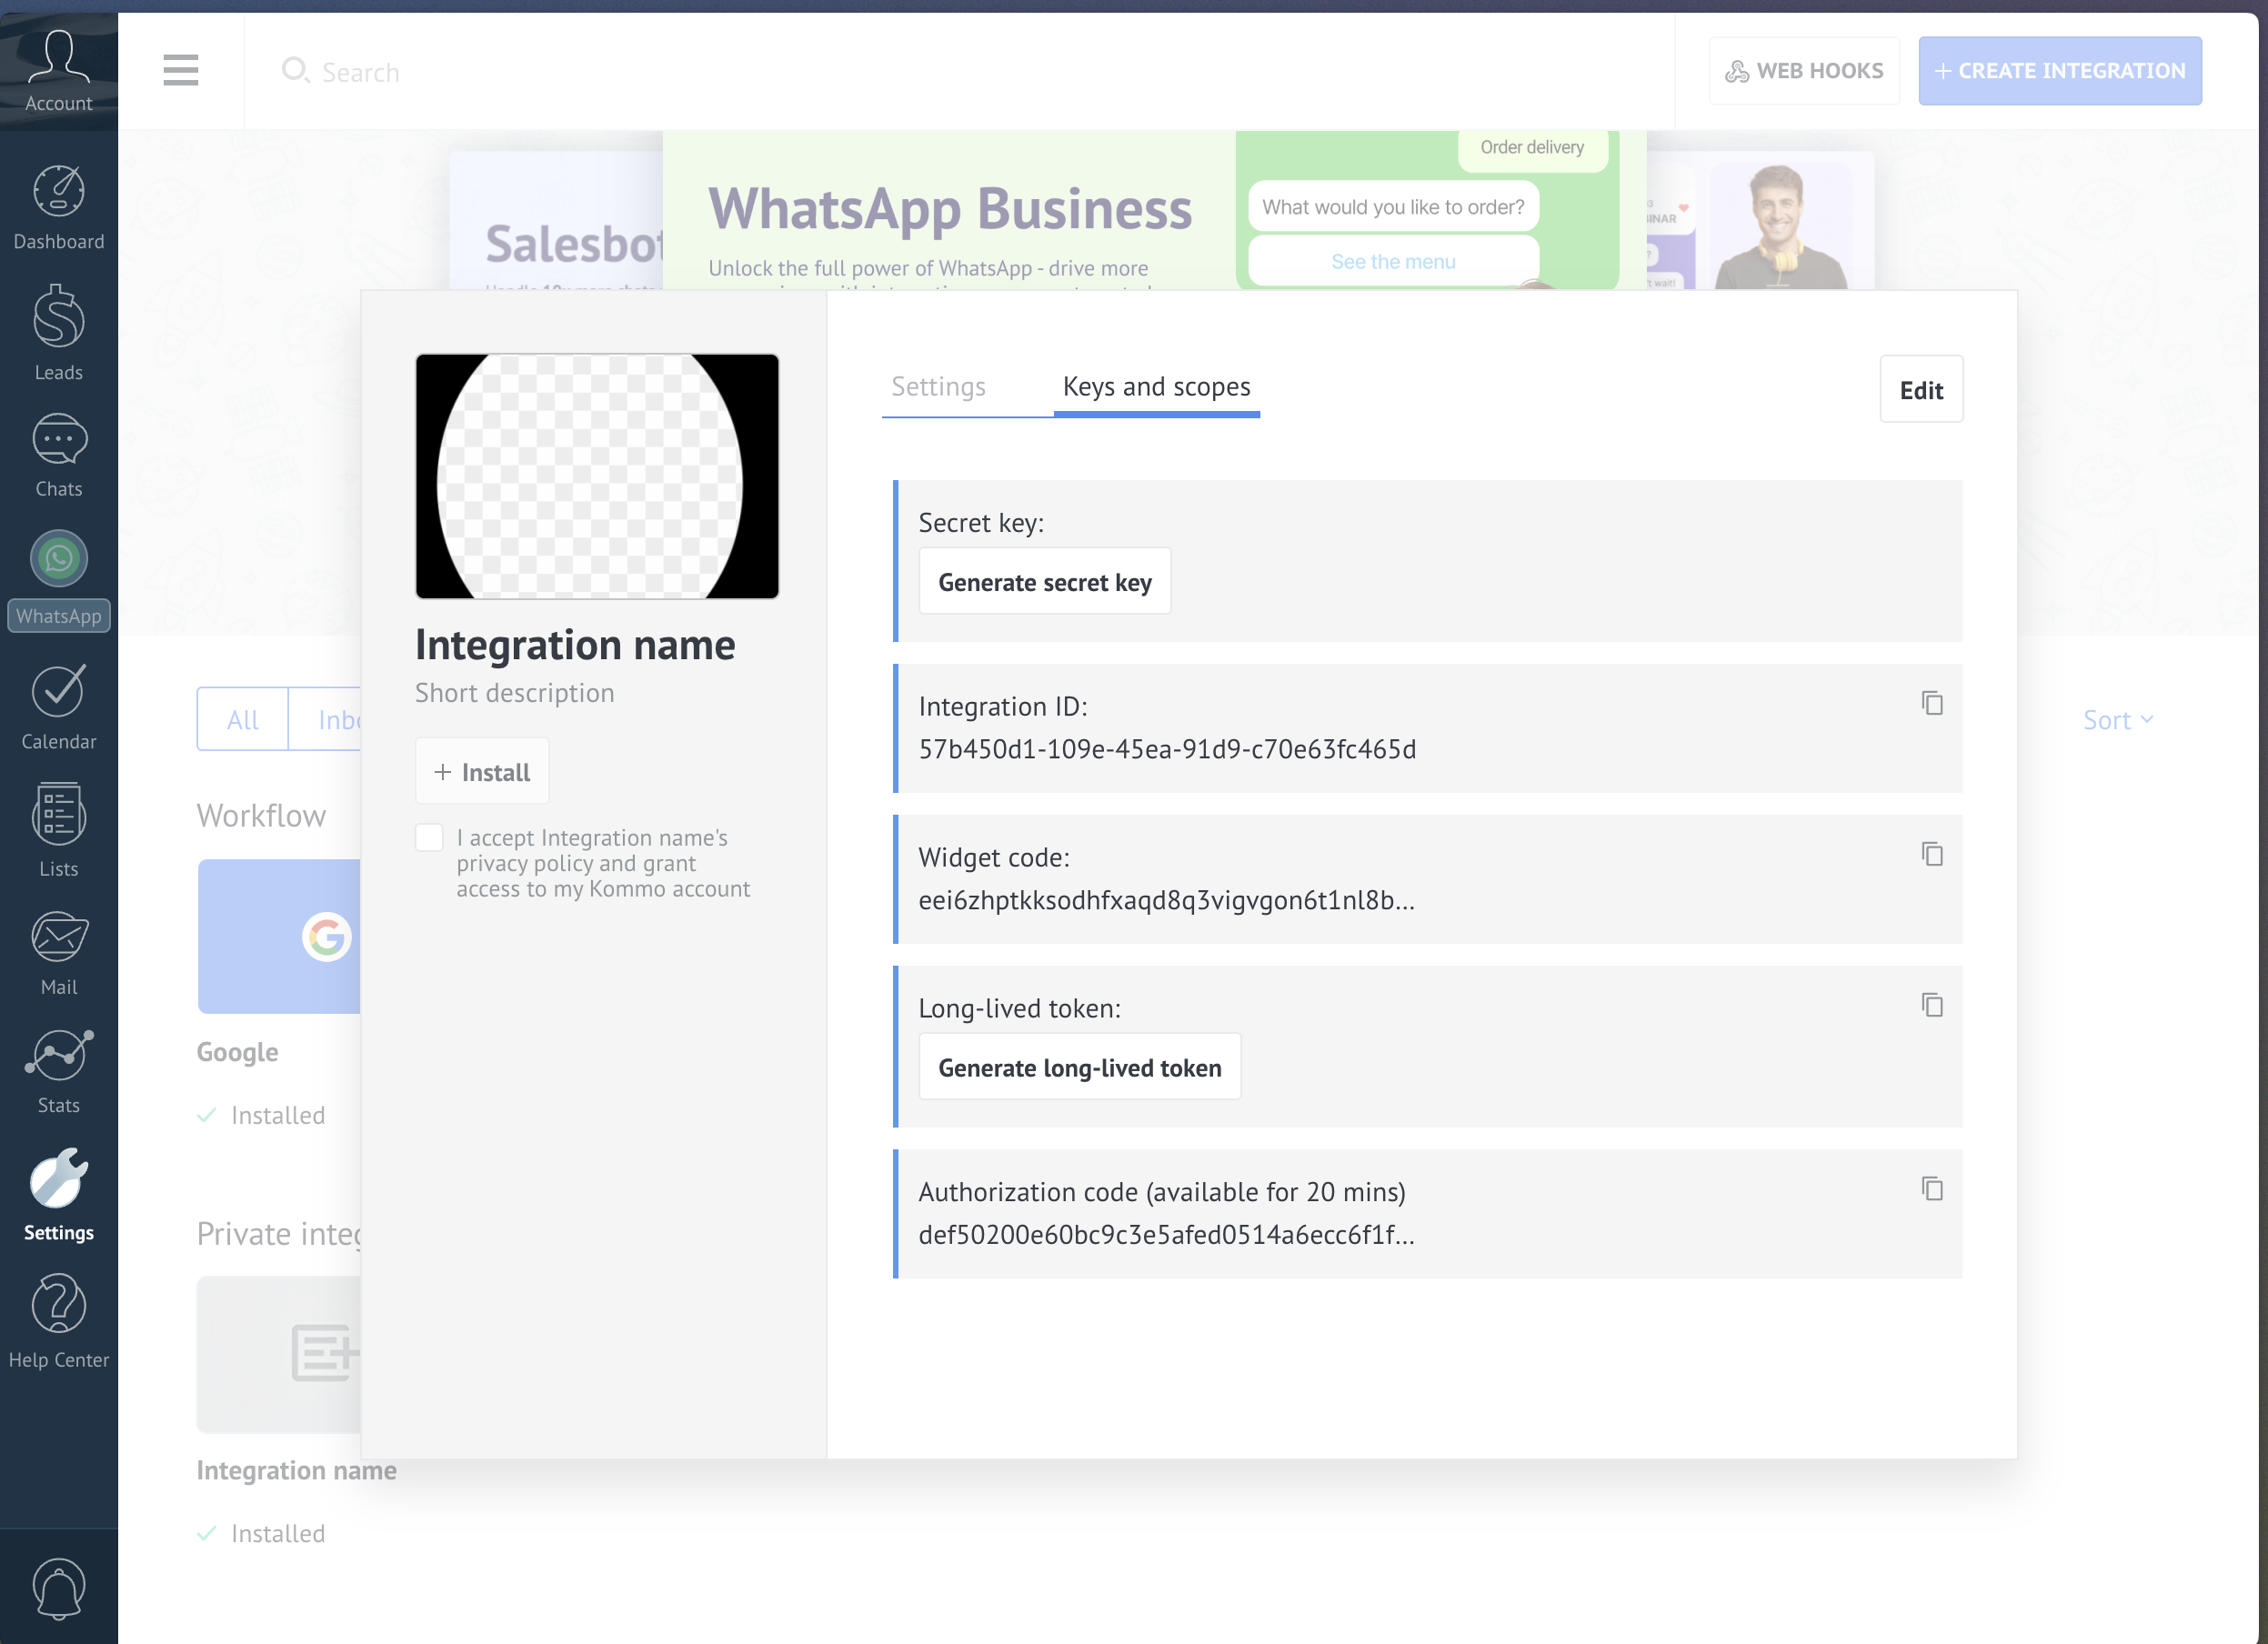
- Click Generate long-lived token to create your API token.
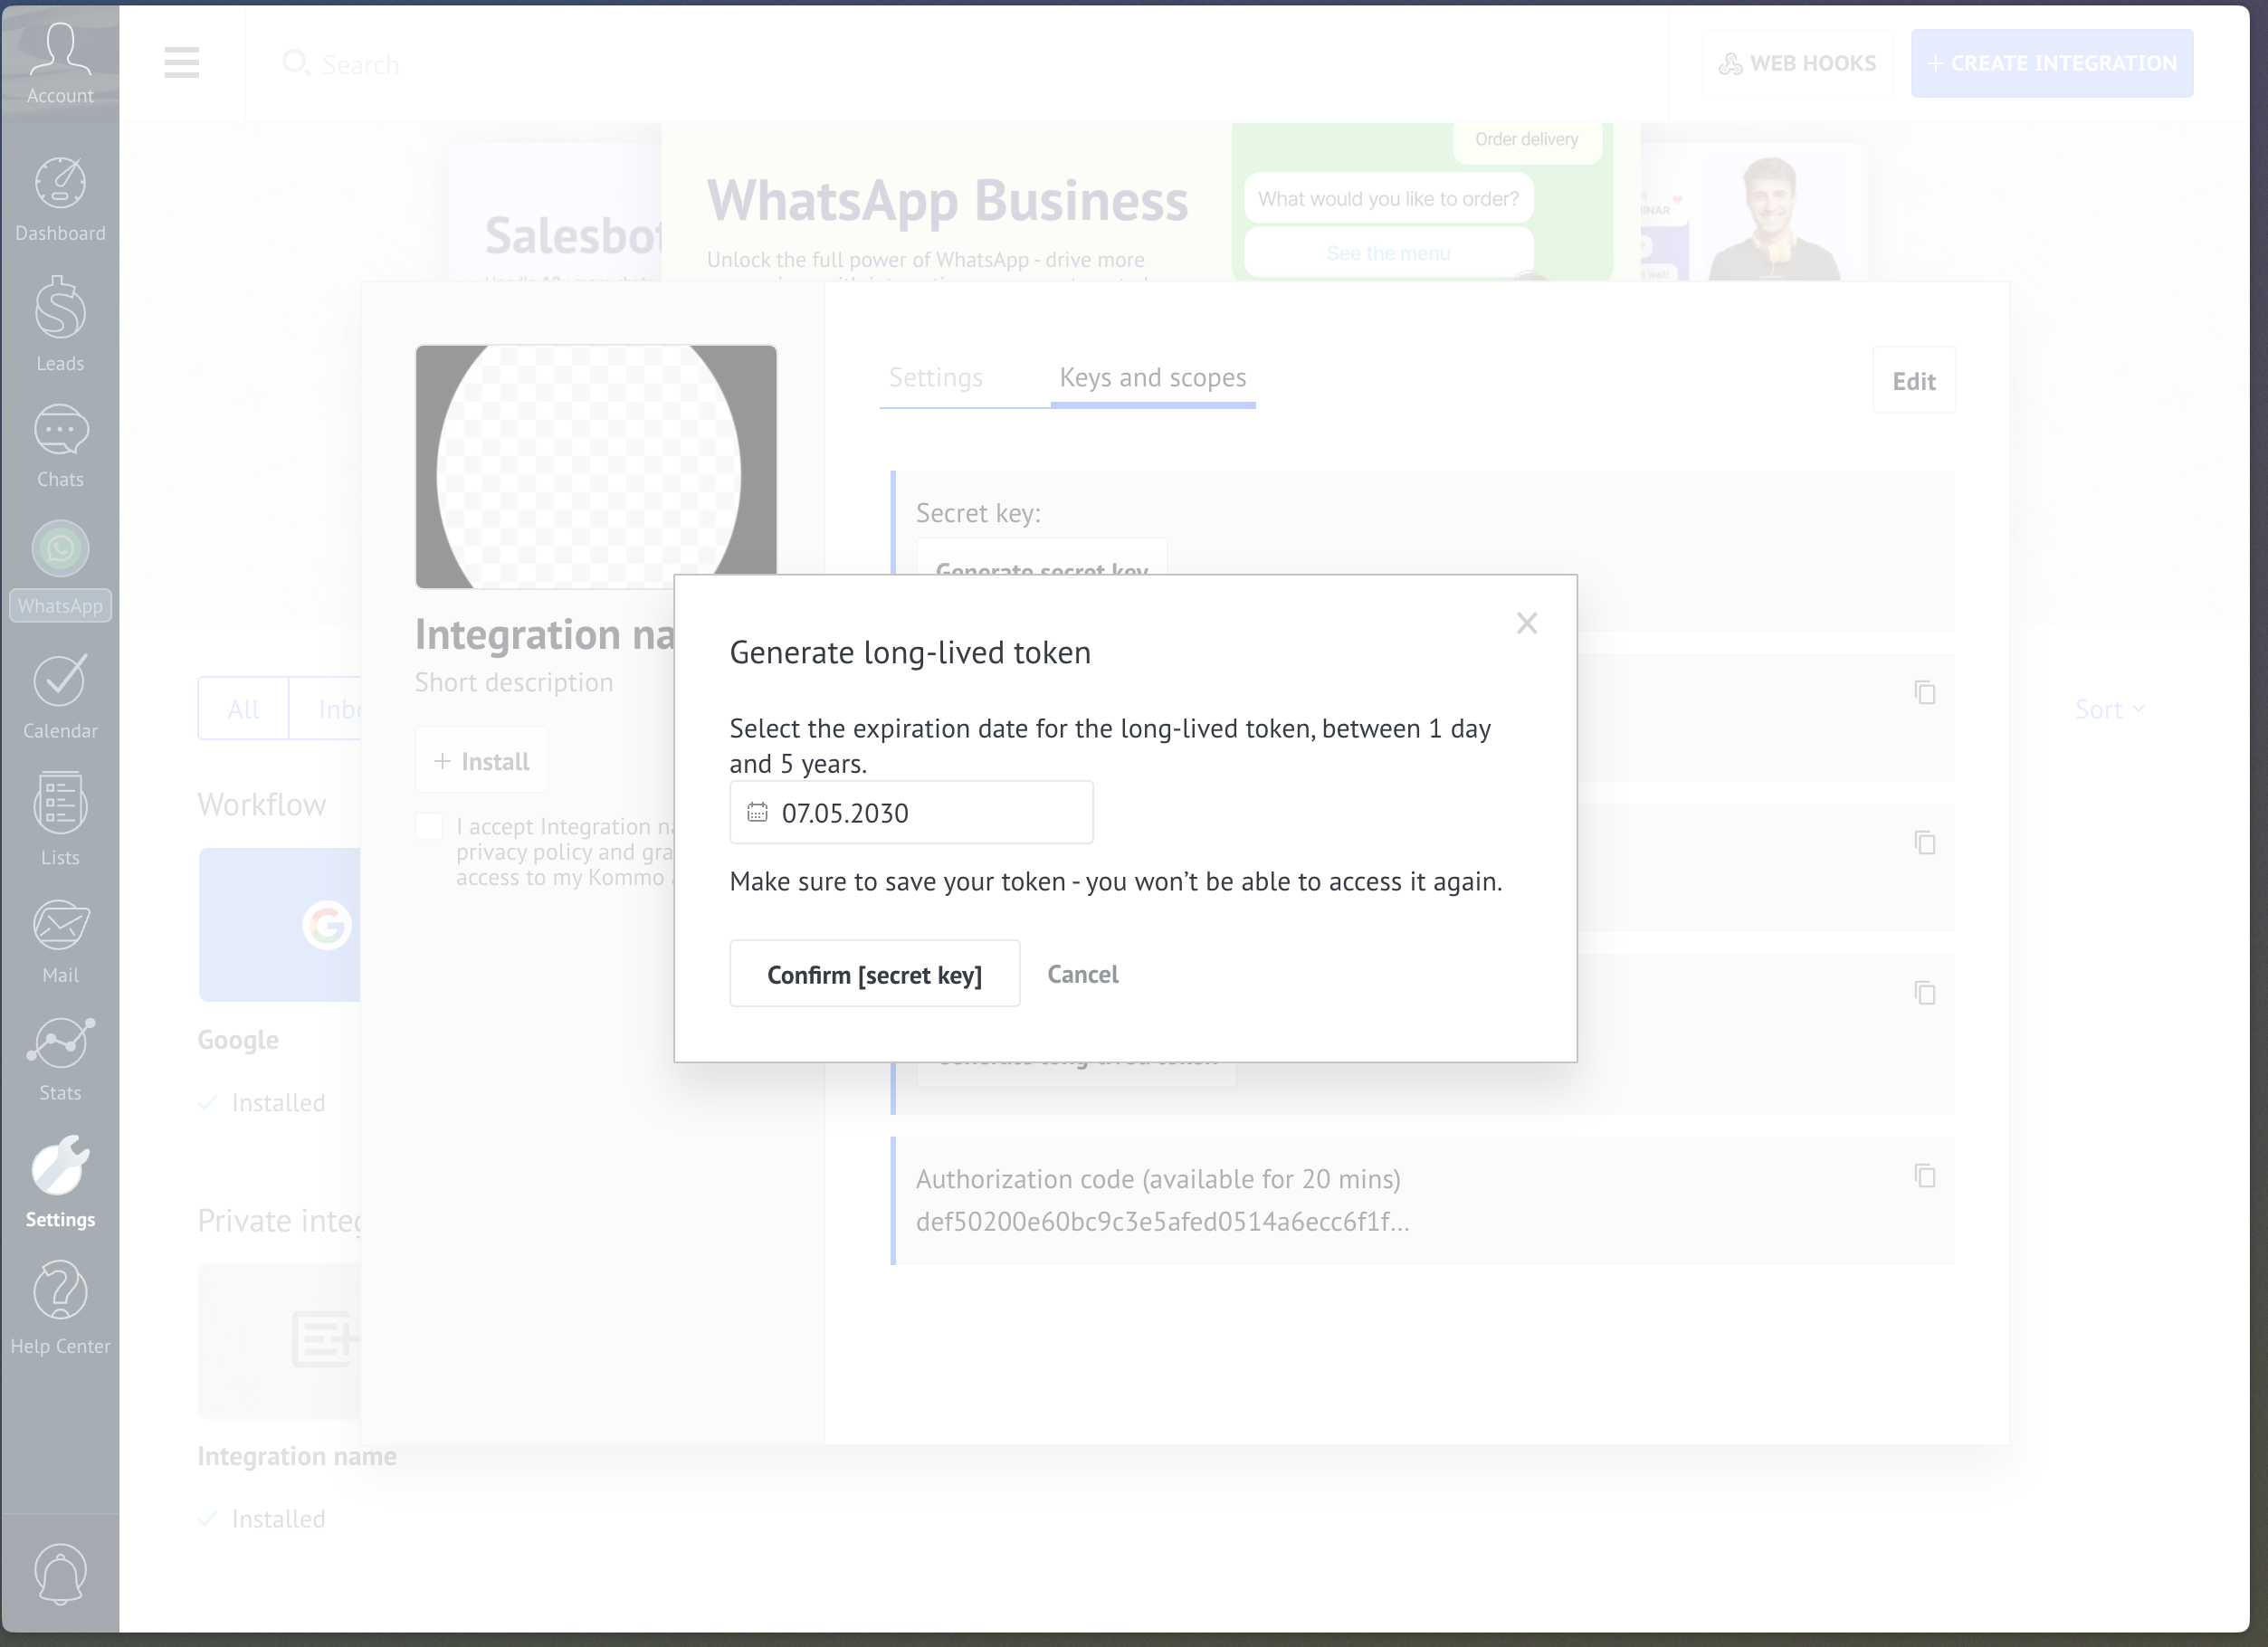
- Select the expiration date — 5 years:
- Copy the long-lived token.
Step 2 — Connect Kommo in MyChatBot
In the app
Go to Integrations → Kommo — https://app.mychatbot.app/integration?integration=Kommo. Pick the agent you want to connect, find Kommo CRM in the list, and click Connect.
- Open the Integrations tab in your MyChatBot dashboard.
- Select the agent you want to connect to Kommo.
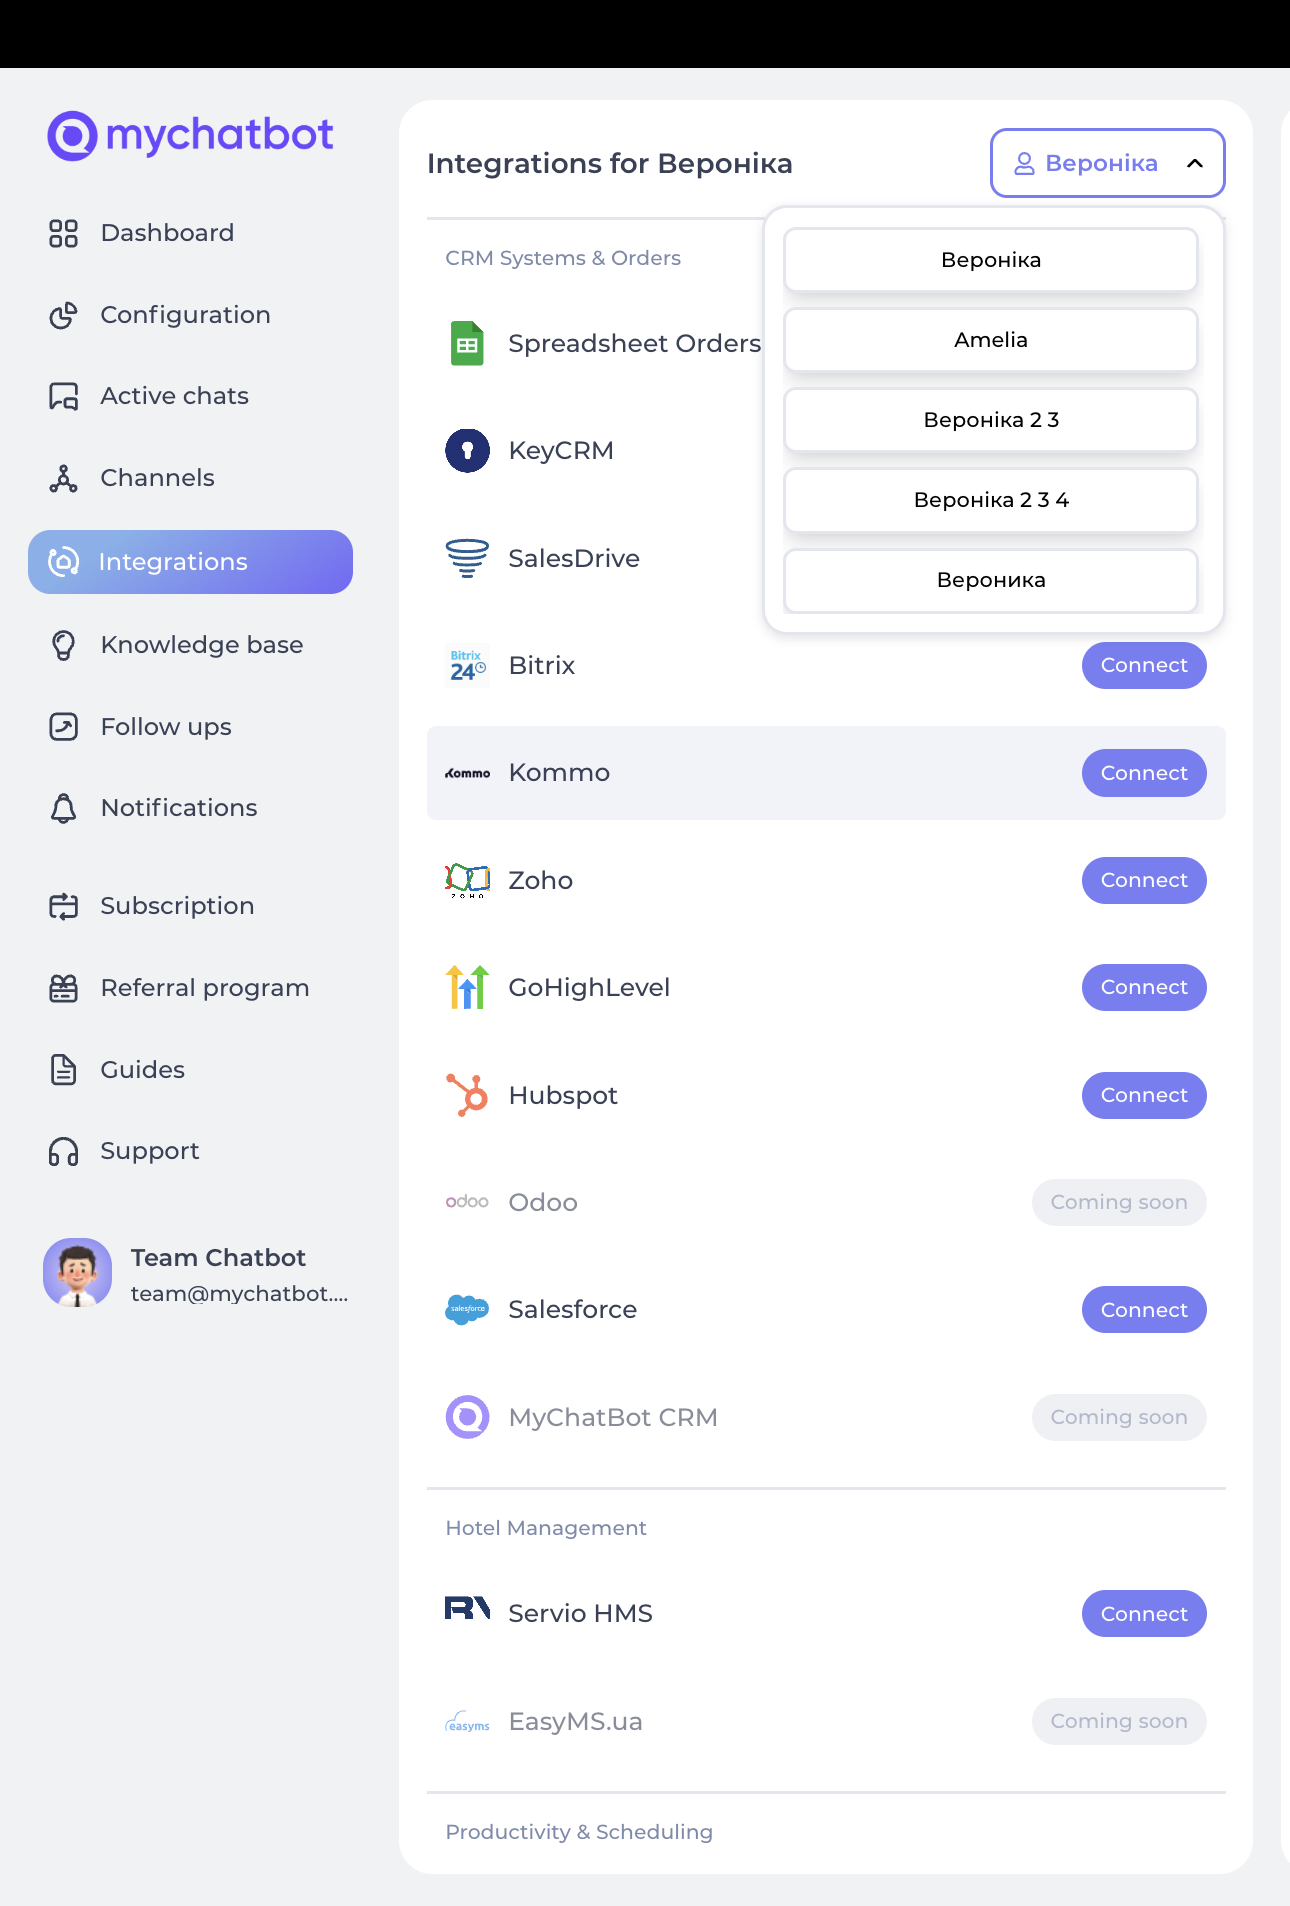
- Scroll to Kommo CRM in the integrations list.
- Click Connect.
- Provide the following credentials:
- Domain: Your Kommo domain (e.g.,
your-company.kommo.com) - API Key: The long-lived token from your Kommo integration
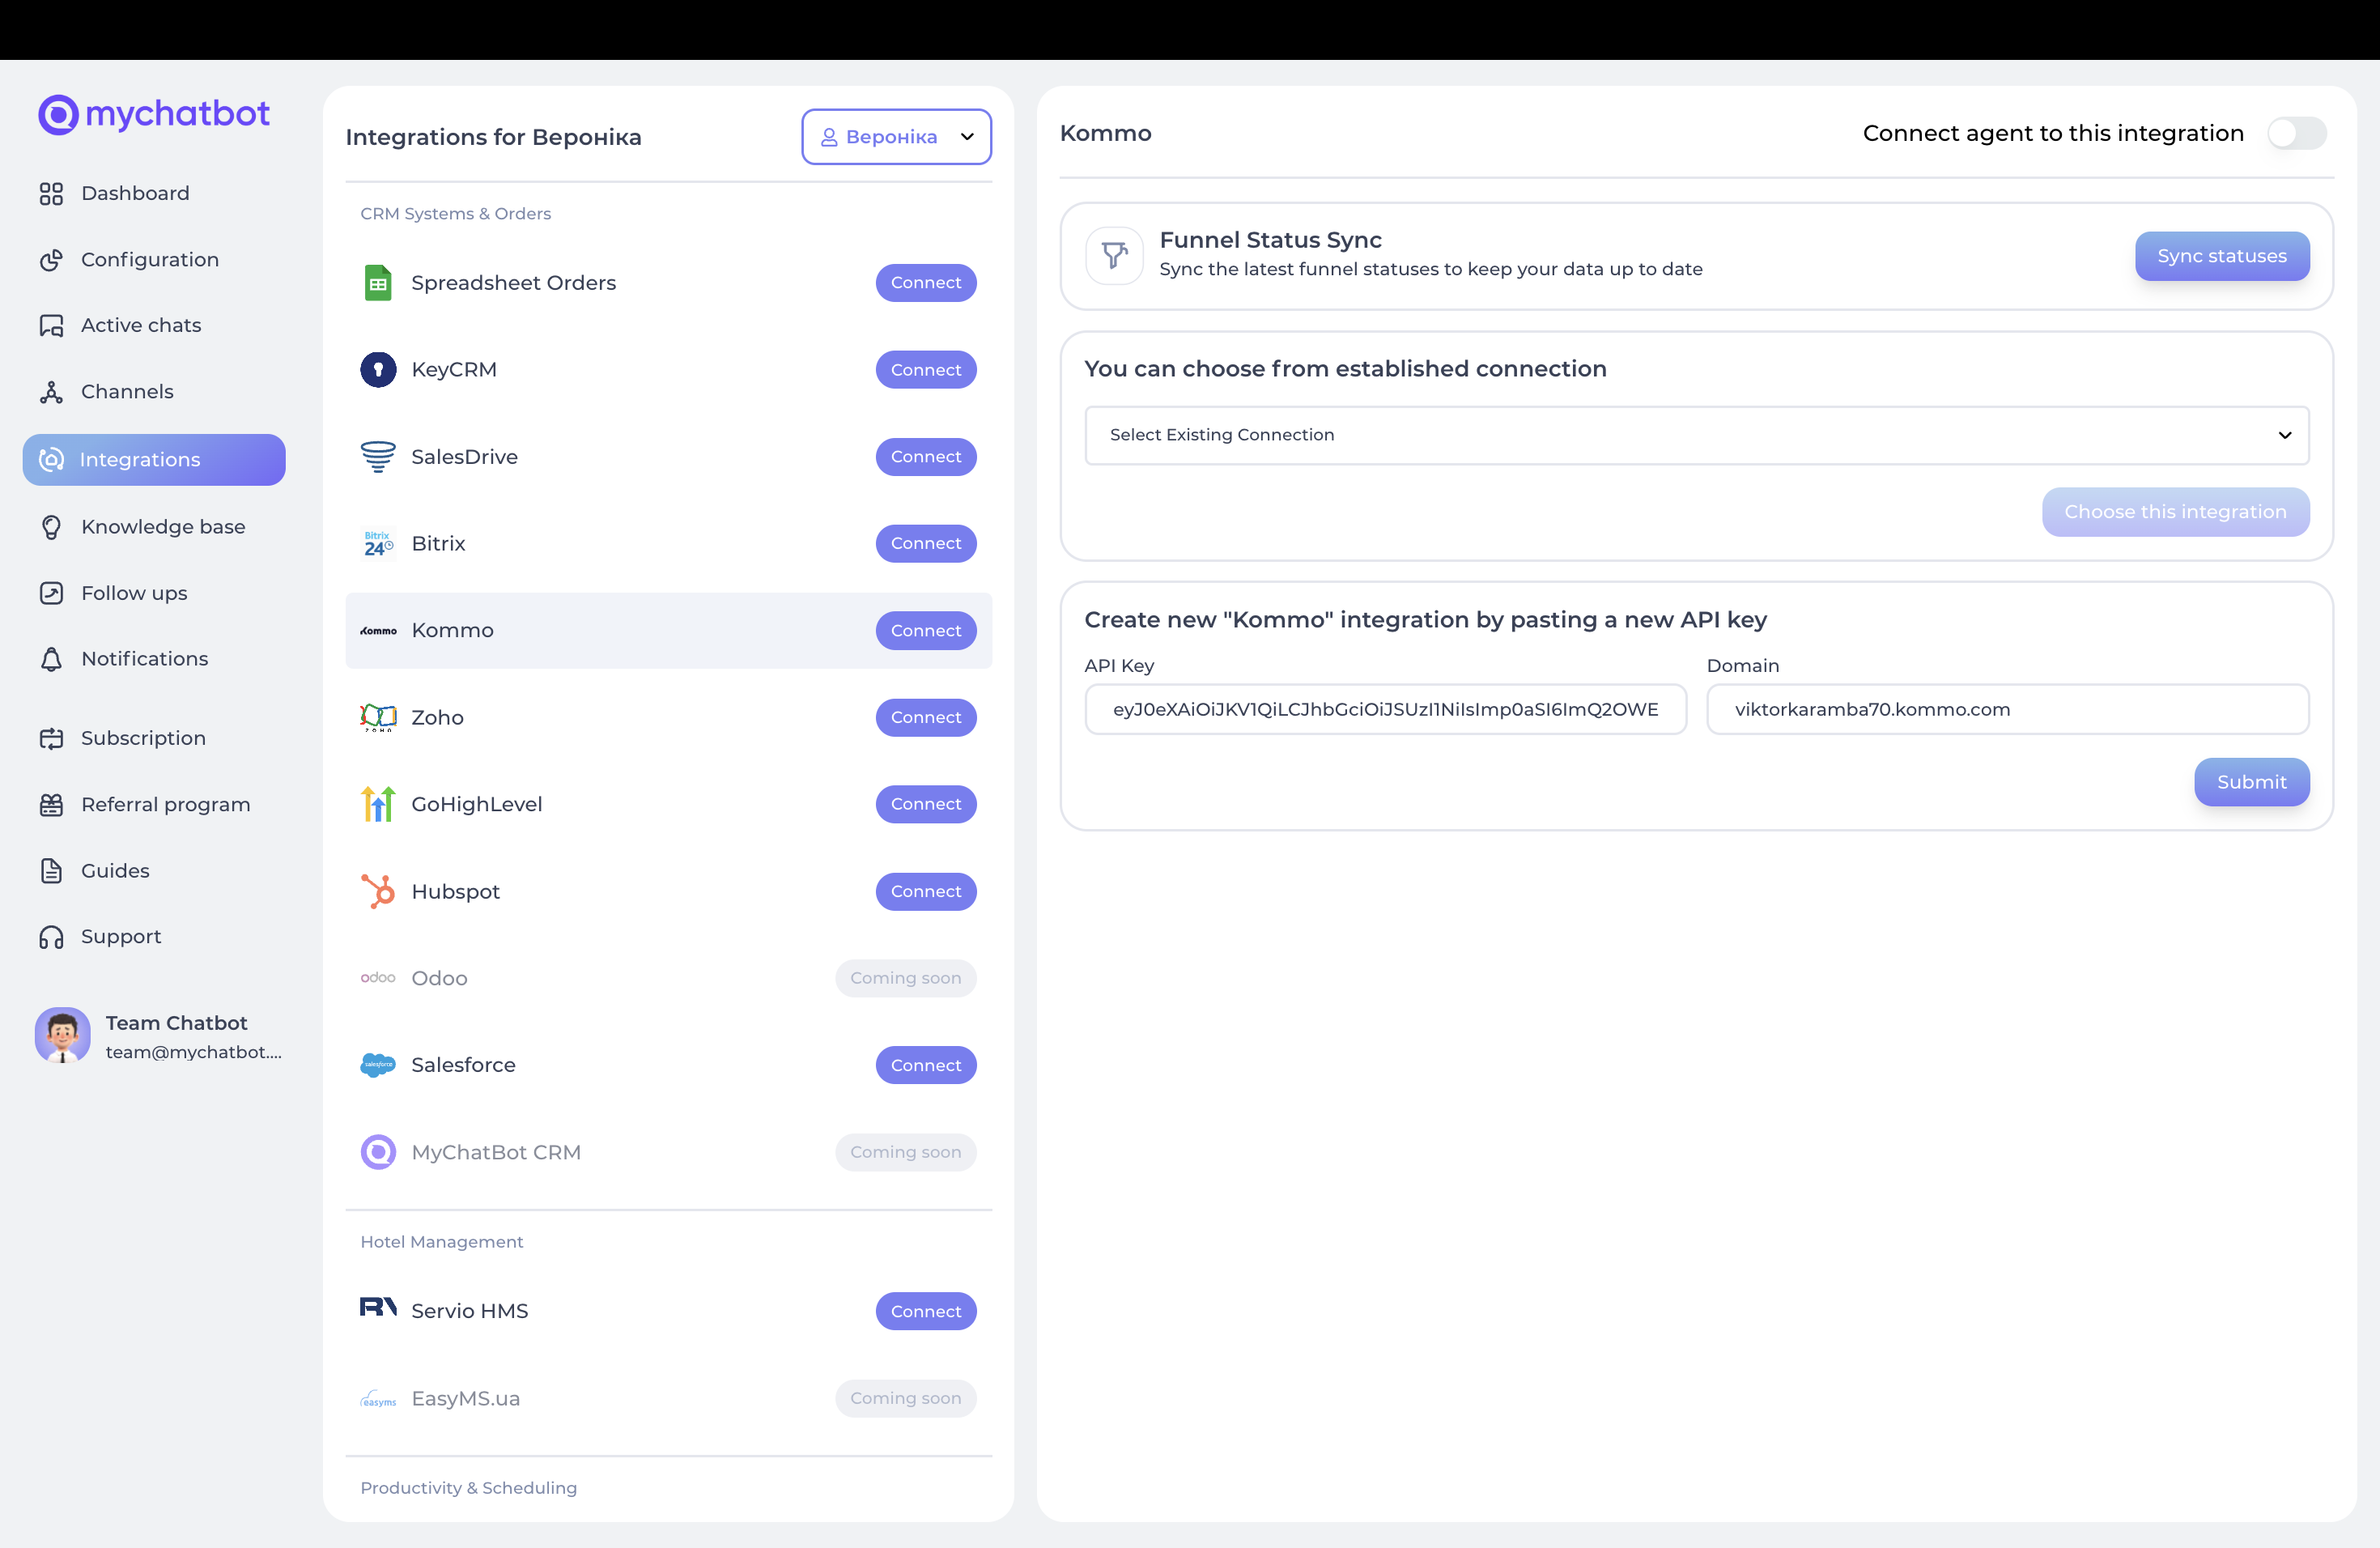
- Domain: Your Kommo domain (e.g.,
- Click Submit to save your integration.
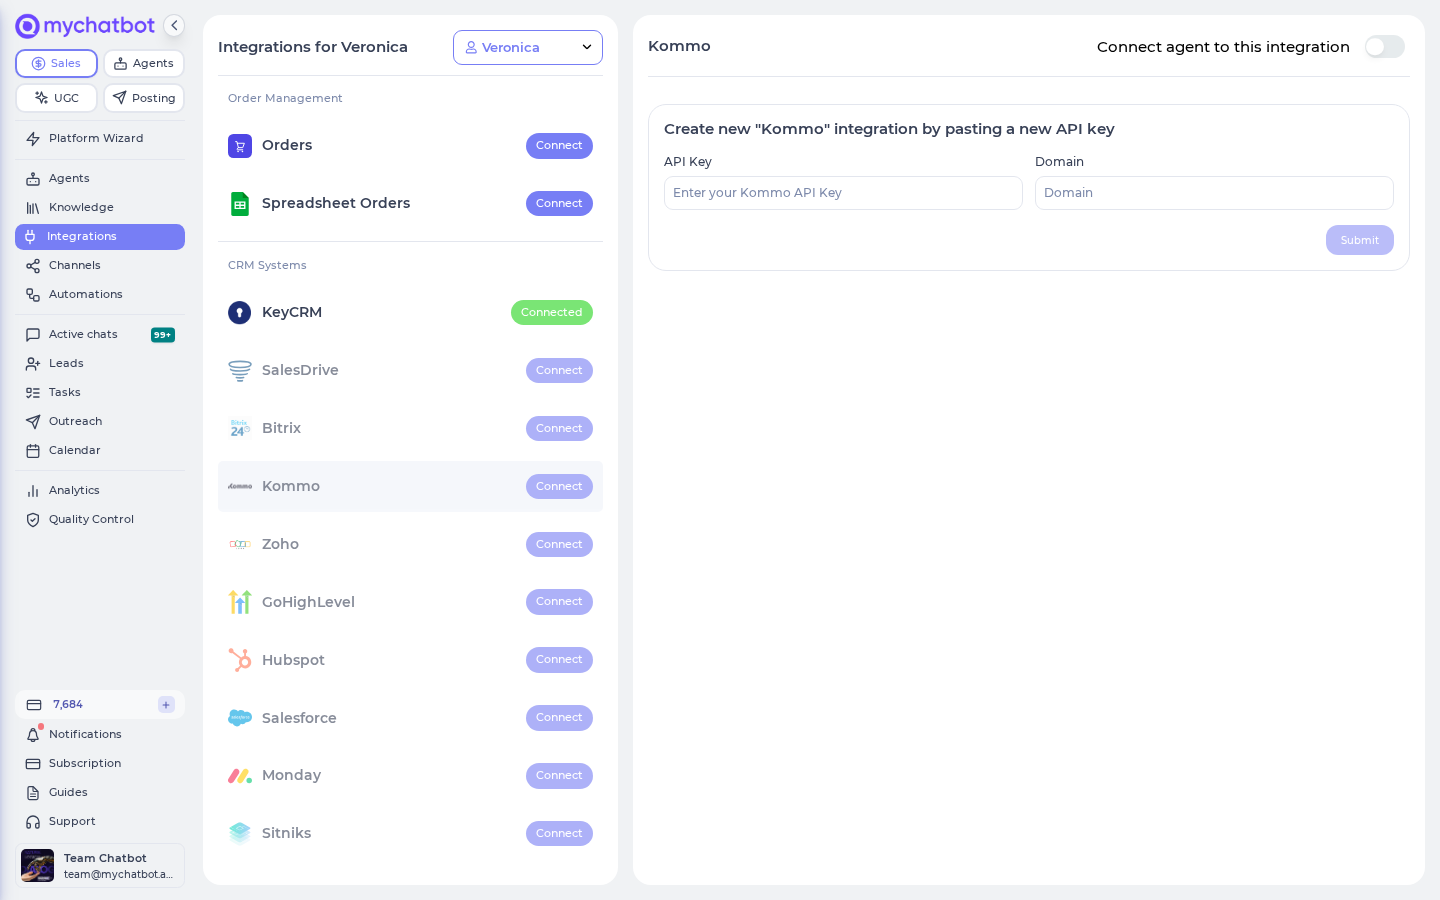
Step 3 — Entities & Data Fields Configuration
After connecting your Kommo account, choose which entities and fields your agent is allowed to fill.
In the app
Scroll to the Entities & Data Fields Configuration section on the Kommo integration page. Its subtitle reads "Select the entities and their fields you want the assistant to fill."
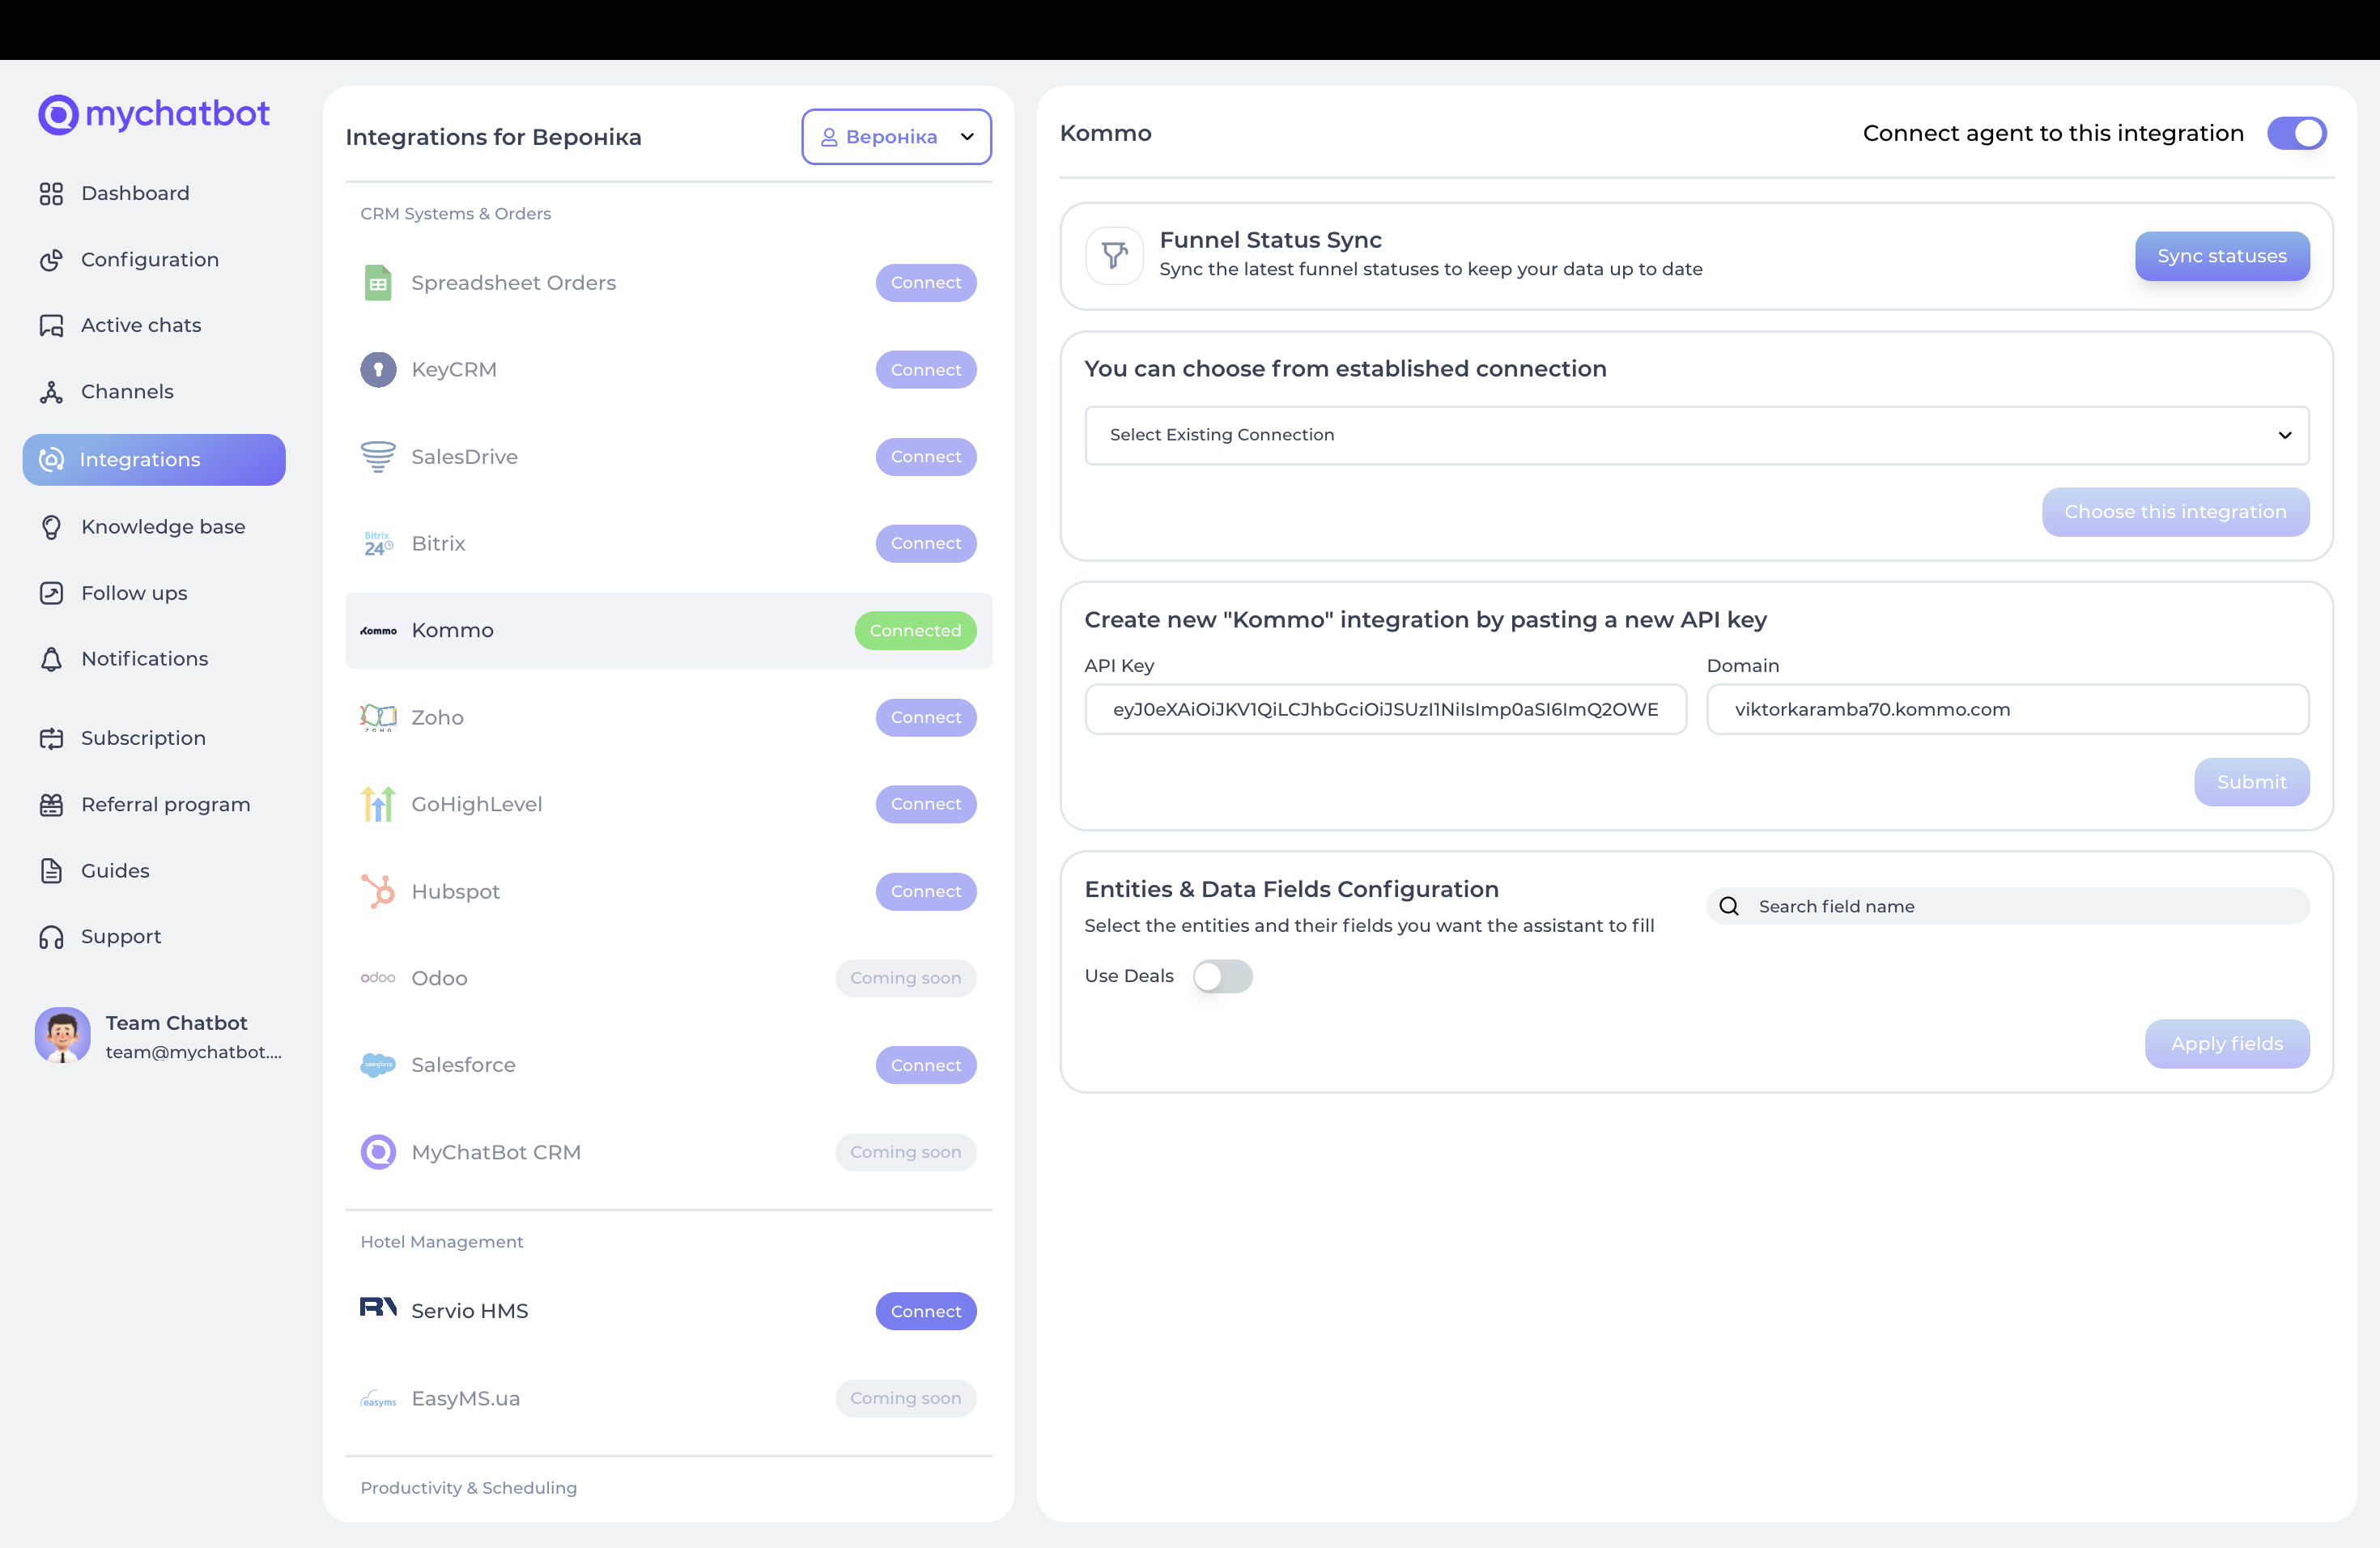
- Toggle Use Deals to let the agent create and update deals.
- For each entity, pick the fields the agent may write to:
- Standard fields — the default fields Kommo provides.
- Custom fields — fields you defined in your own CRM setup (shown as most used and other custom fields).
- Choose the Deals Pipeline the agent should use from the pipeline dropdown.
- Click Apply fields to save your configuration.
- If your funnel changed, use the Sync statuses button (under Funnel Status Sync) to pull the latest stages.
Only the fields you enable here become available for the agent to fill — so this section is where you decide exactly how much of a deal or contact the agent may touch.
Entity types
Kommo supports two main entity types:
- Deals — sales transactions in progress.
- Contacts — individual client information.
Field types
Each entity has two kinds of fields:
- Standard fields — Kommo's built-in defaults.
- Custom fields — the fields specific to your own CRM setup.
Special fields
A few fields behave in special ways:
| Field | Behavior |
|---|---|
| Status | The current stage of a deal in its pipeline. Must match your Kommo statuses exactly — keep it in sync with Sync statuses. |
| Source | Set automatically to AI- + your assistant's name, so you can tell which deals your AI created. |
| Chat Link | Added automatically as a comment on each deal, linking back to the conversation that produced it. |
Working with pipelines
Deals in Kommo are organized into pipelines with multiple stages:
- Select the pipeline from the Deals Pipeline dropdown in MyChatBot.
- Your agent uses this pipeline when creating new deals.
- The stages within the pipeline let the agent move deals through your sales process (by updating the deal's Status).
What your agent can do
Once Kommo is connected and fields are applied, your agent can perform two kinds of CRM actions as it chats:
| Action | What happens | Fields used |
|---|---|---|
| Create / update a deal | The agent opens a new deal or updates an existing one for the customer. A contact is automatically found or created from the phone number and linked to the deal; a chat link is attached as a comment; the source is tagged with your assistant's name; and MyChatBot keeps the deal tied to the conversation and order. | Contact name (required), phone, price, Status, plus any custom fields you enabled. |
| Add / update a contact | The agent creates or updates a client record. If a deal already exists for that client, it's linked to this contact, and the client's details in MyChatBot are updated too. | Full name (required), phone (required), plus any enabled fields. |
Every field you turn on in Entities & Data Fields Configuration becomes something the agent can fill for these actions — no field you leave off will be touched.
Guiding the agent with instructions
Your agent decides when to create or update a deal or contact based on your instructions. Describe the situations in plain language — the agent maps your intent to the right CRM action. Add examples like these to your agent's instructions.
Creating and updating deals
When a customer expresses interest in our services, create or update a deal in Kommo:
- Use their full name
- Include their phone number
- Set the price if provided
- Set the status to "New"
- Add any relevant notes to the comments field

When a customer provides additional information:
- Update their deal with the new details
- Include any new product information
- Set the price if it has changed
Updating deal status
When a customer requests a call back:
1. Create the deal if they're new
2. Update the deal status to "Callback Requested"
3. Add the preferred callback time to the comments

When a customer confirms an appointment:
1. Update the deal status to "Appointment Scheduled"
2. Add appointment details to the comments field

When a customer completes a payment:
1. Update the deal stage to "Closed Won"
2. Update the deal amount to match the final purchase value
3. Add payment details to the comments field

When a customer declines to proceed:
1. Update the deal stage to "Closed Lost"
2. Add the reason for declining in the comments field
Use your real status names
The status names in your instructions (New, Callback Requested, Closed Won, …) must exist in your Kommo funnel. Run Sync statuses after any funnel change so the agent always references valid stages.
Adding or updating contacts
When a customer provides their contact details:
1. Add their information to Kommo as a contact
2. Include their full name and phone number
3. Update any existing deal with this information